How to transform a $15 grocery store bouquet into a floral work of art
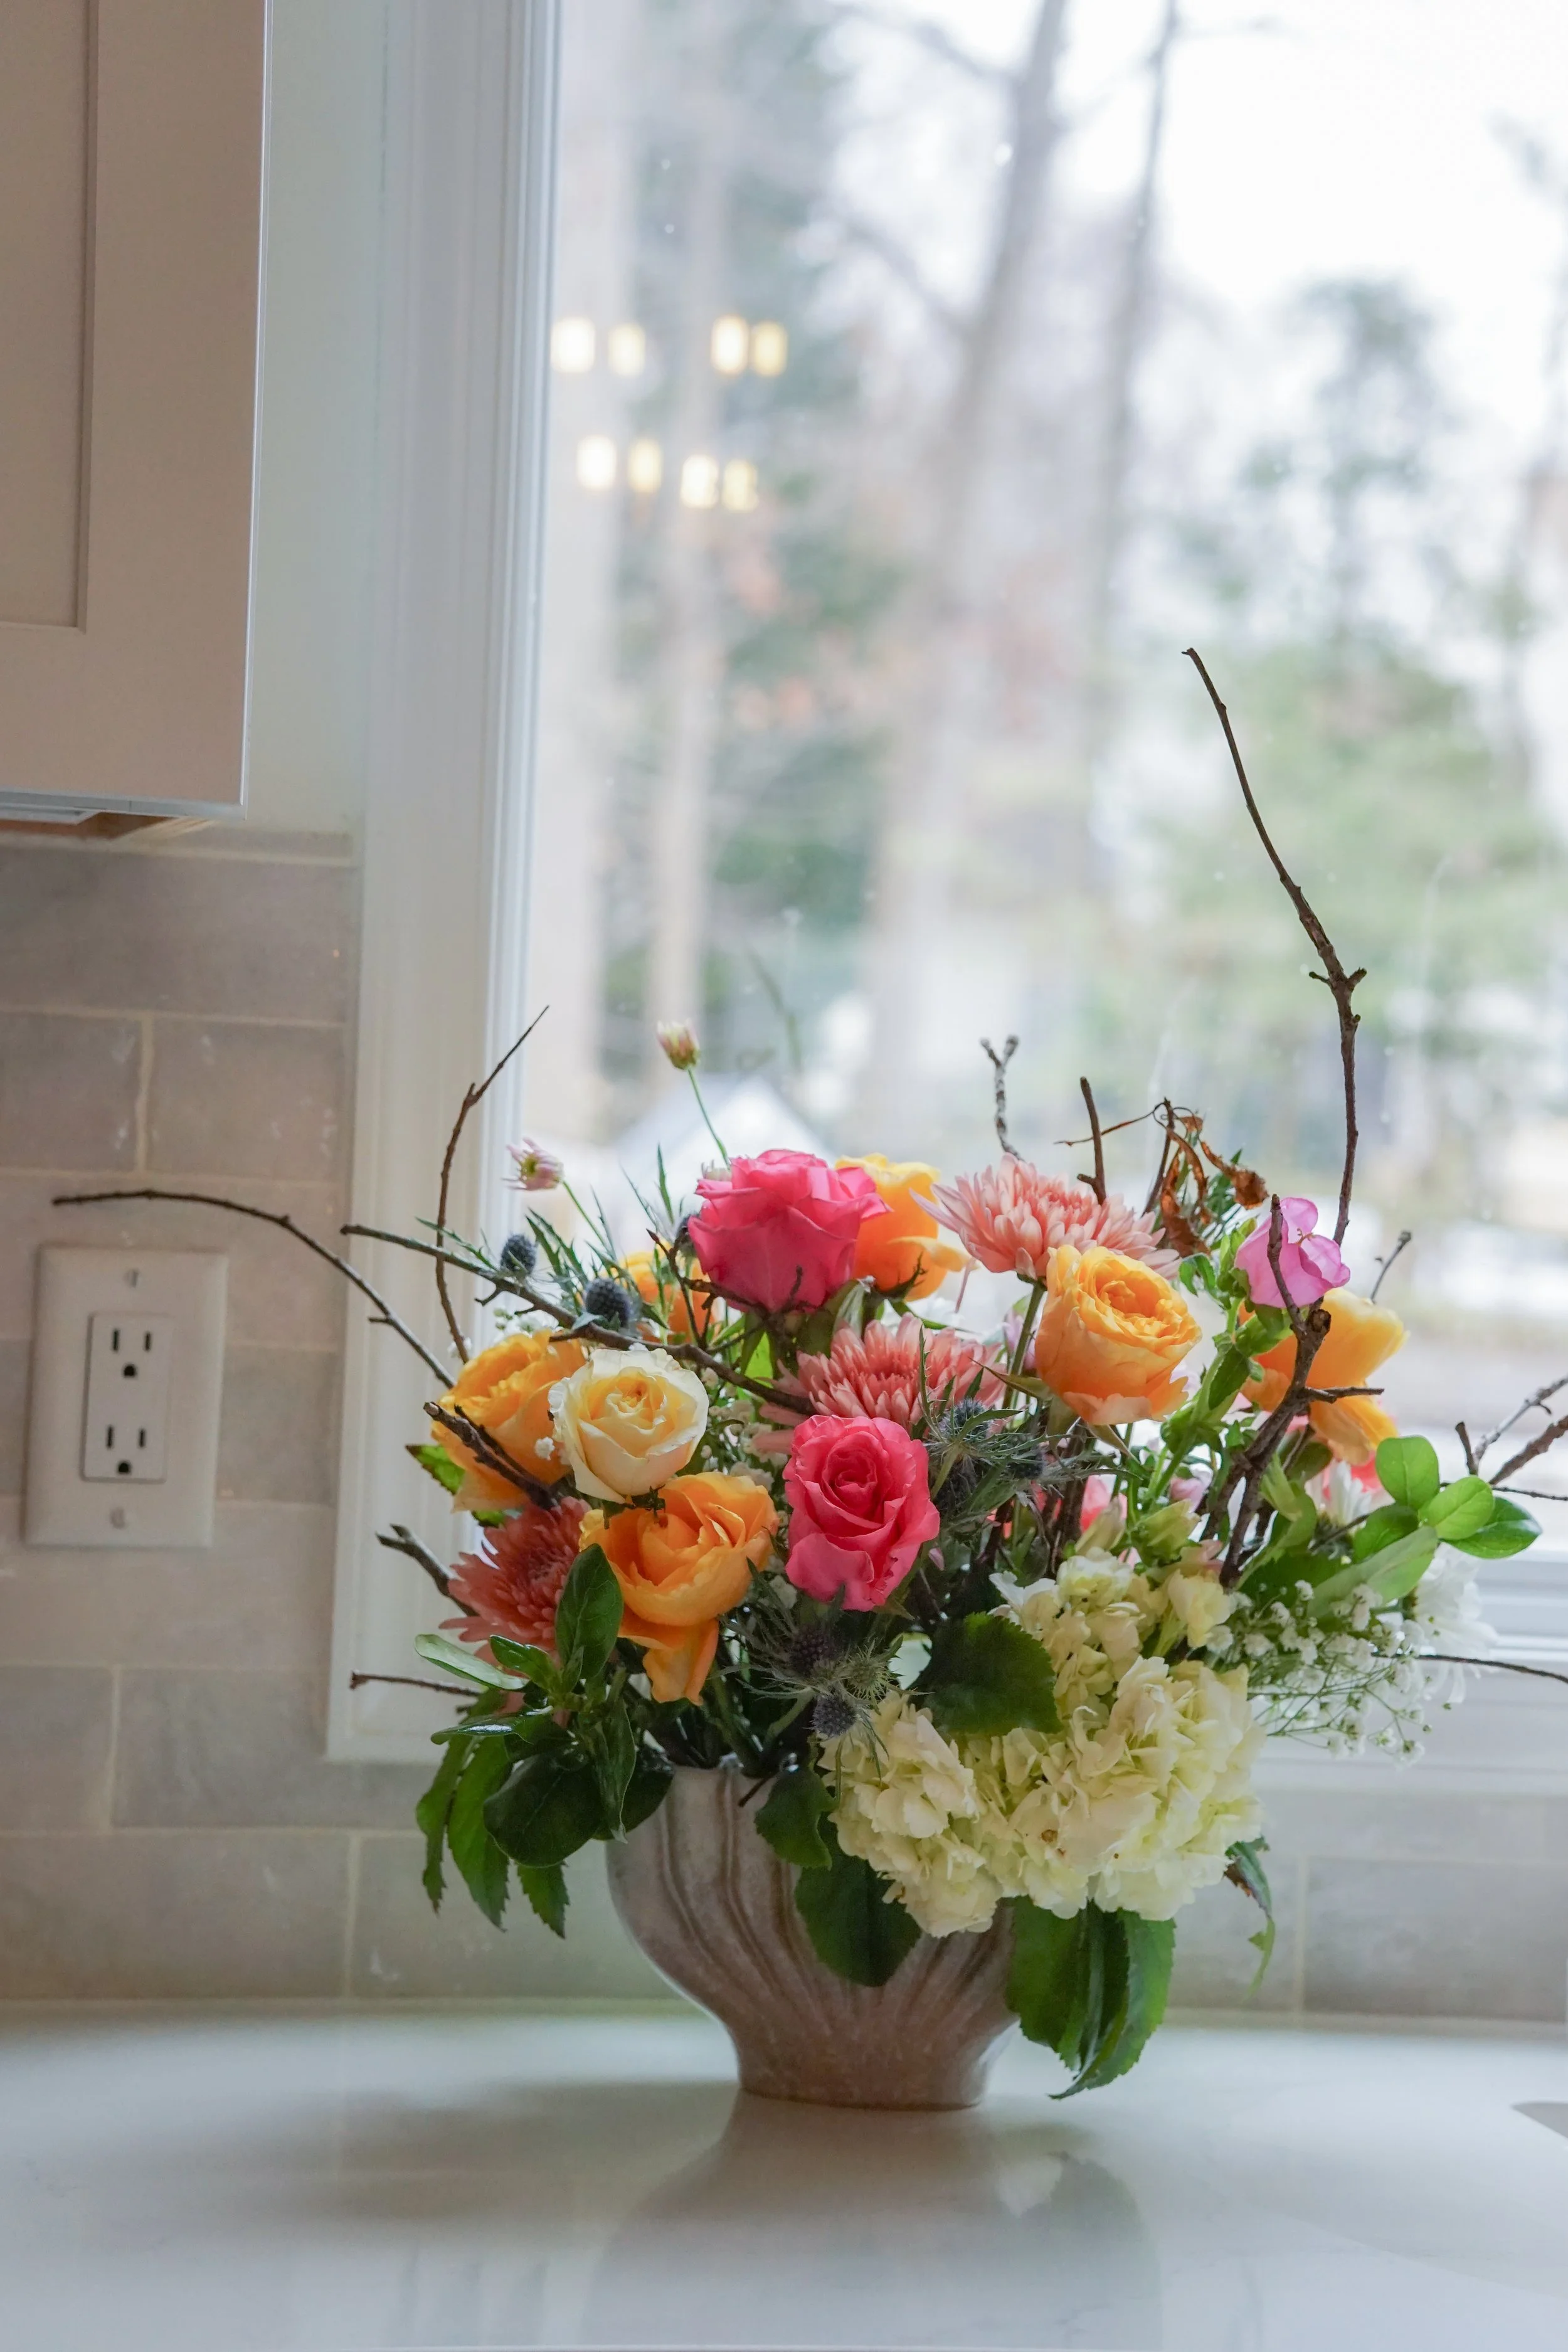
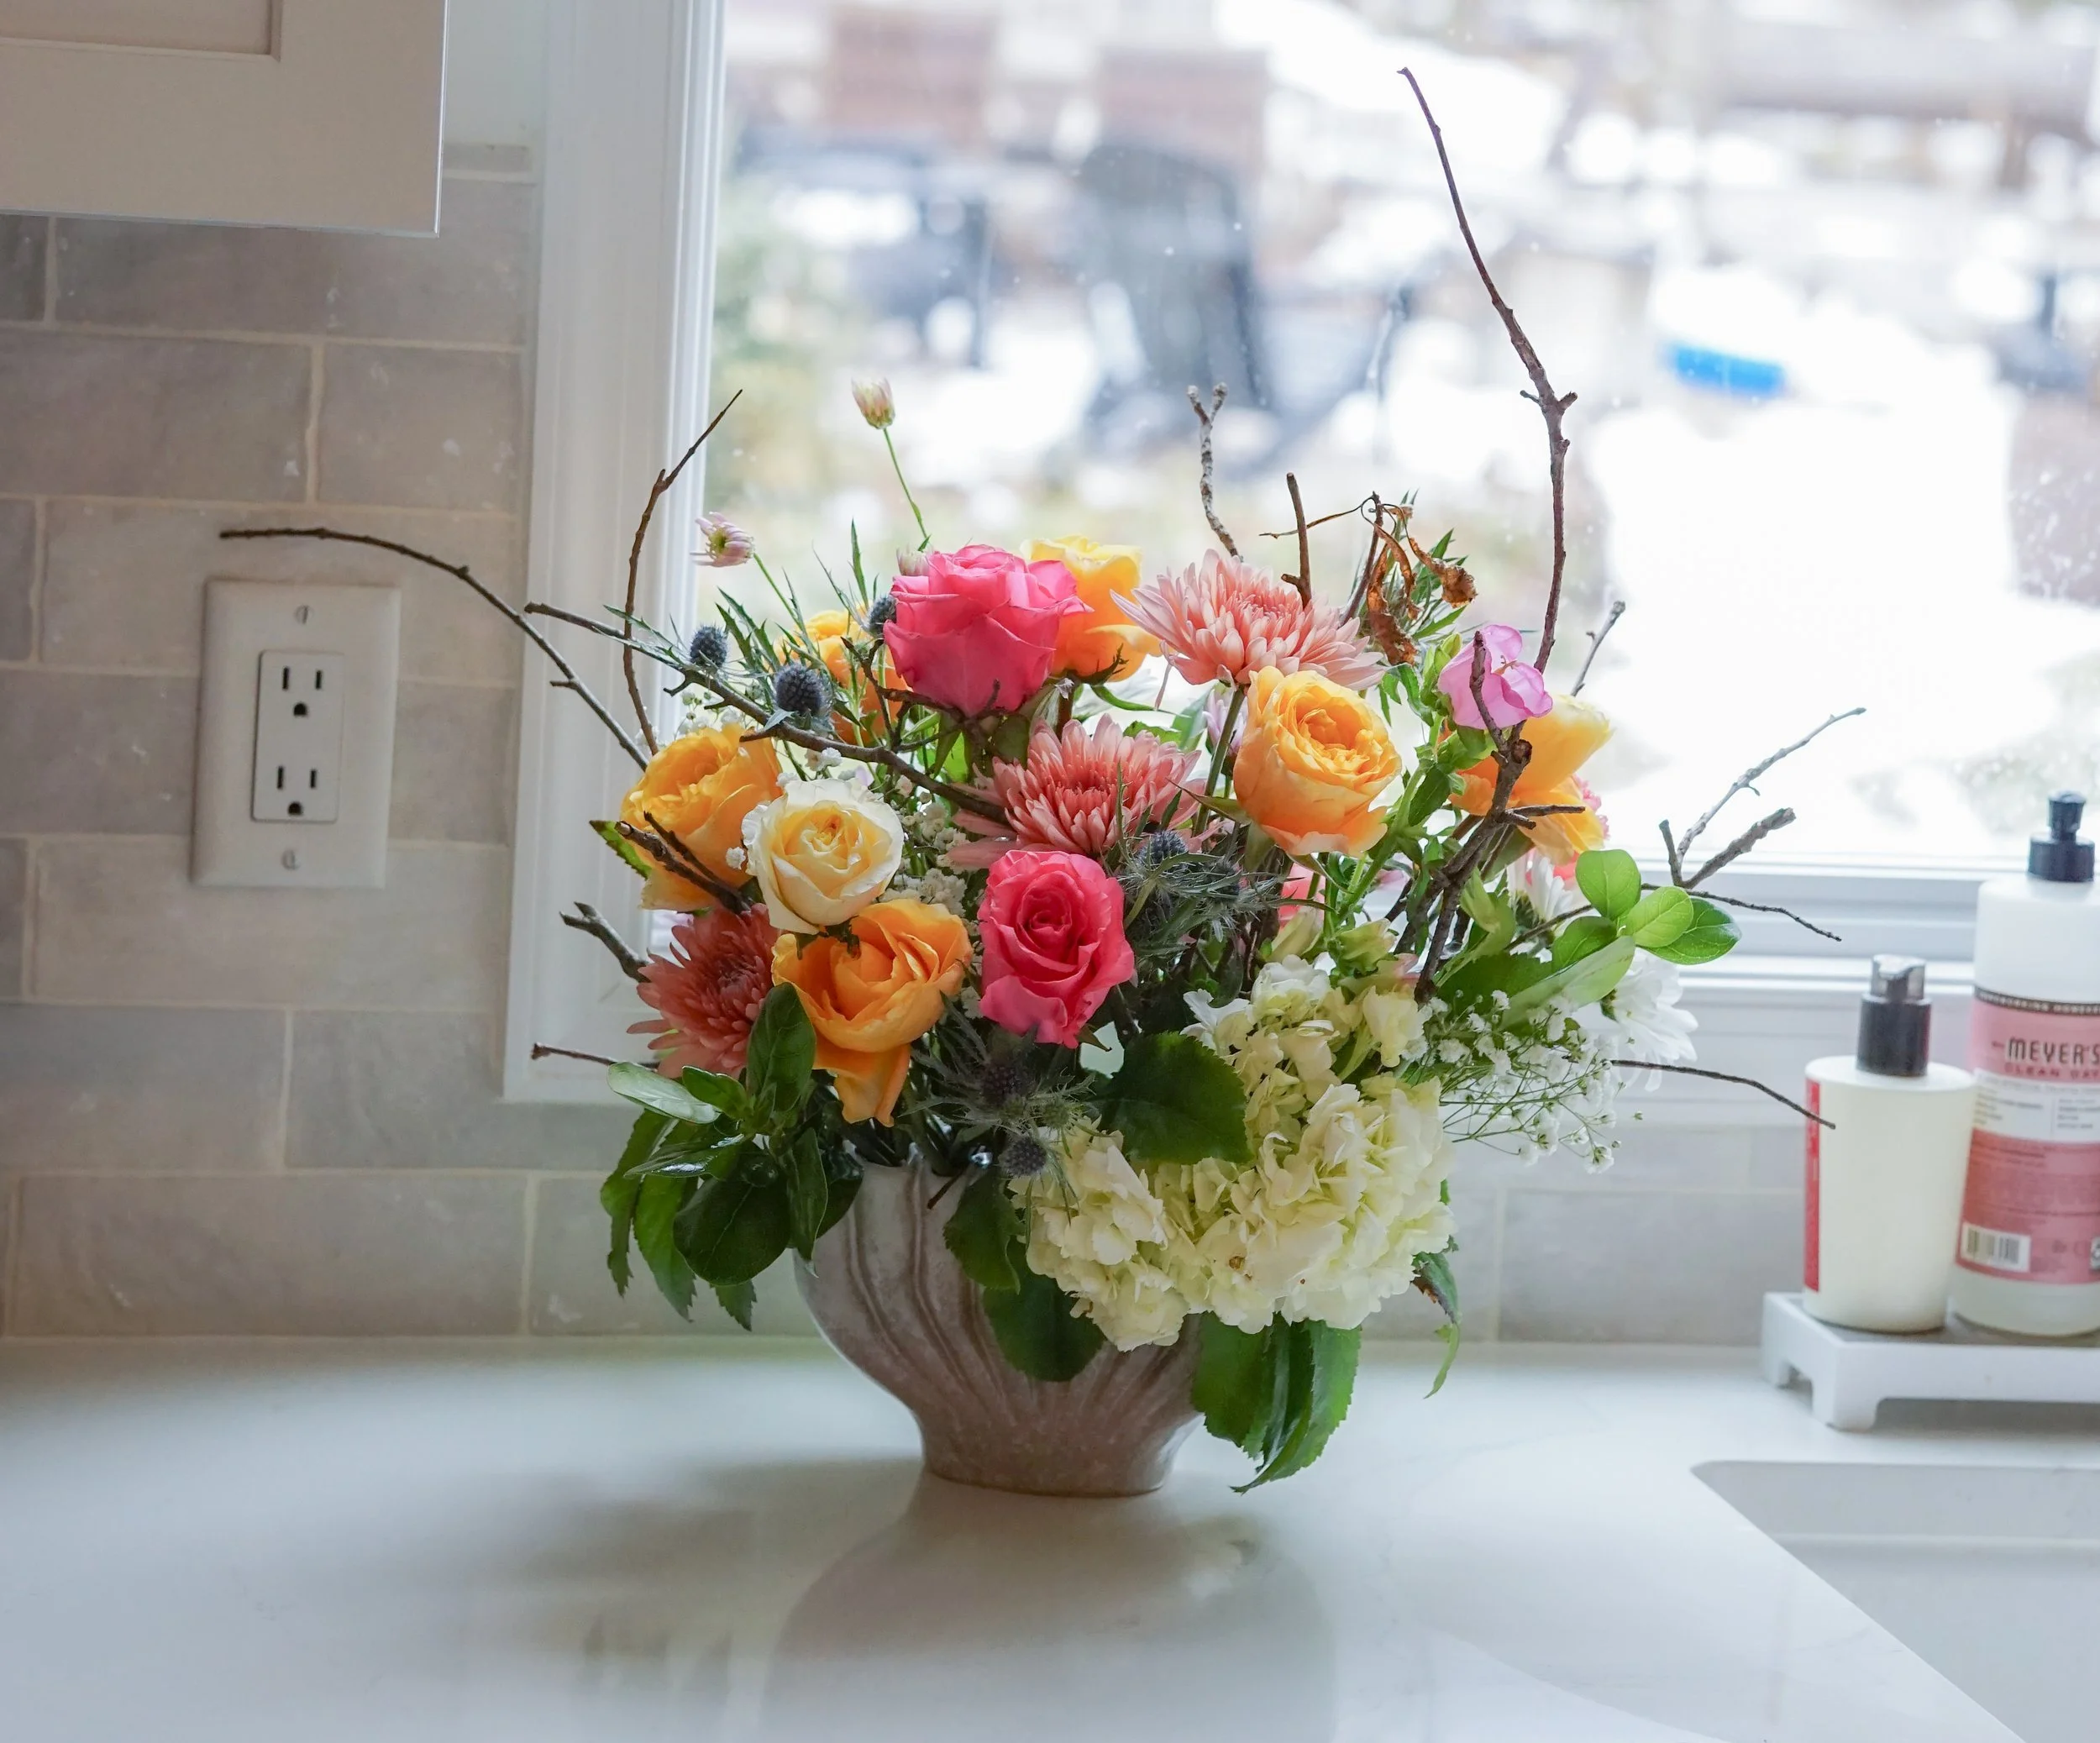
Transform a grocery store bouquet into a stunning floral arrangement.
Another installment in the Floral Notes + Rue Noelle collaboration
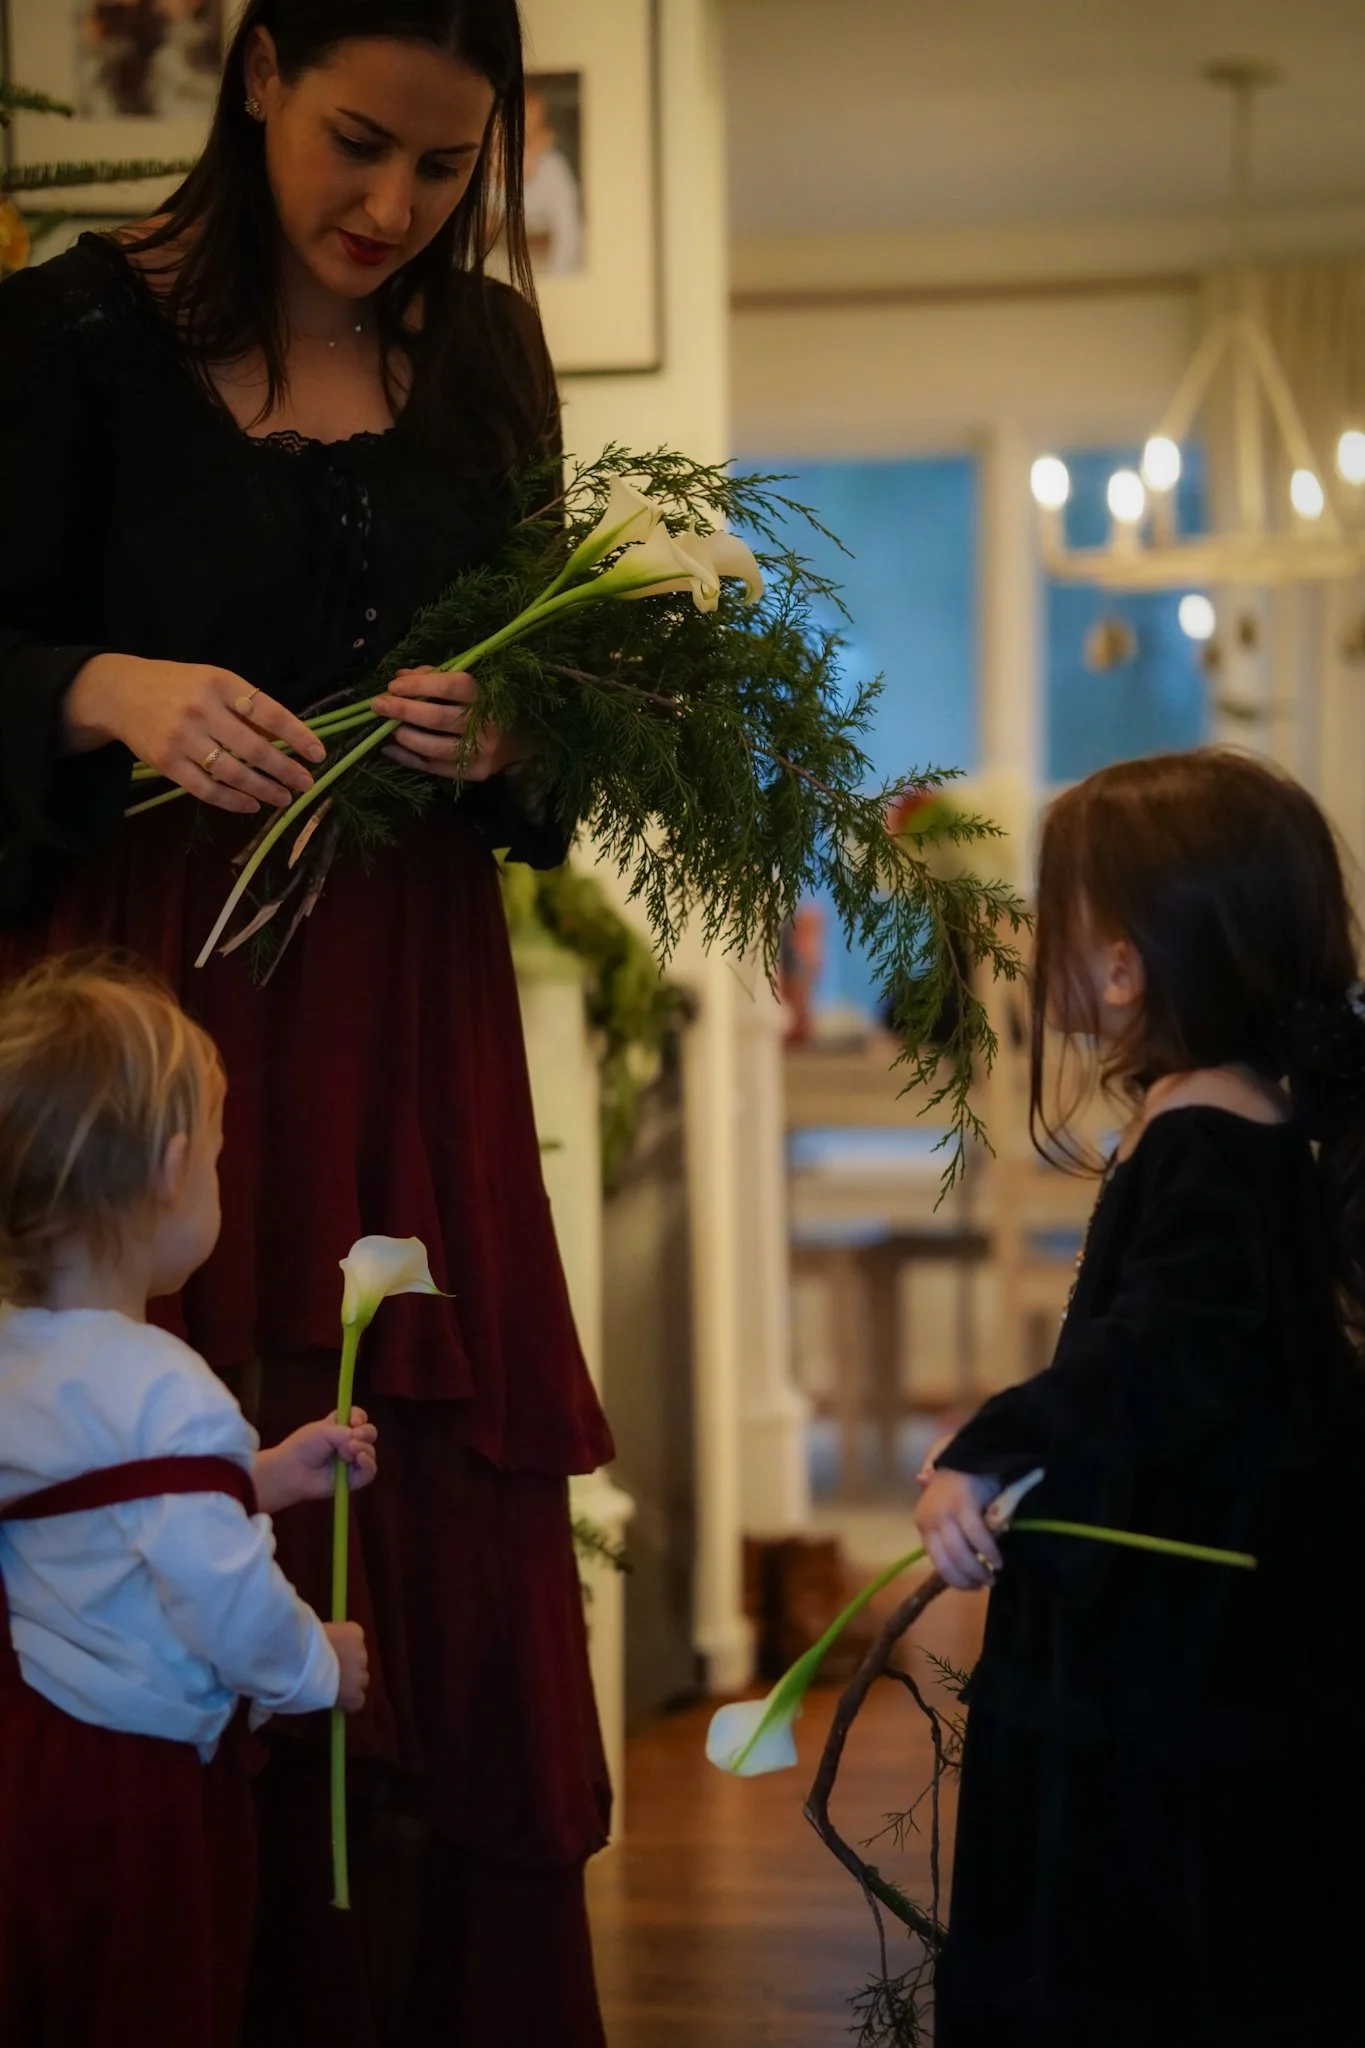
On the last day of my mother-in-law’s most recent visit, my family ramped up our last minute requests.
My mother-in-law, Maureen Christmas, is a professional floral designer based in Massachusetts with a long list of accolades and credentials. She owns a company called Floral Notes and travels the world to share her knowledge and expertise. When I first started Rue Noelle, I dreamed of partnering with her occasionally to bring her expertise to myself and you all, teaching us some basic tips & tricks to elevate our at-home flower arranging and creativity. We did our first collaboration over the holidays (a gorgeous chandelier greenery that you could adapt for any season!) and we’re back with another piece.
Back to Maureen’s most recent visit. You’d think I’d have the foresight to plan out an in-person floral collaboration. Of course, I did not, and we found ourselves on the last day of her visit, cramming in things we’d been thinking about. Maureen found herself doing crafts, baking desserts with Nellie, sewing repairs on a new princess dress… and then from me, a final and big ask.
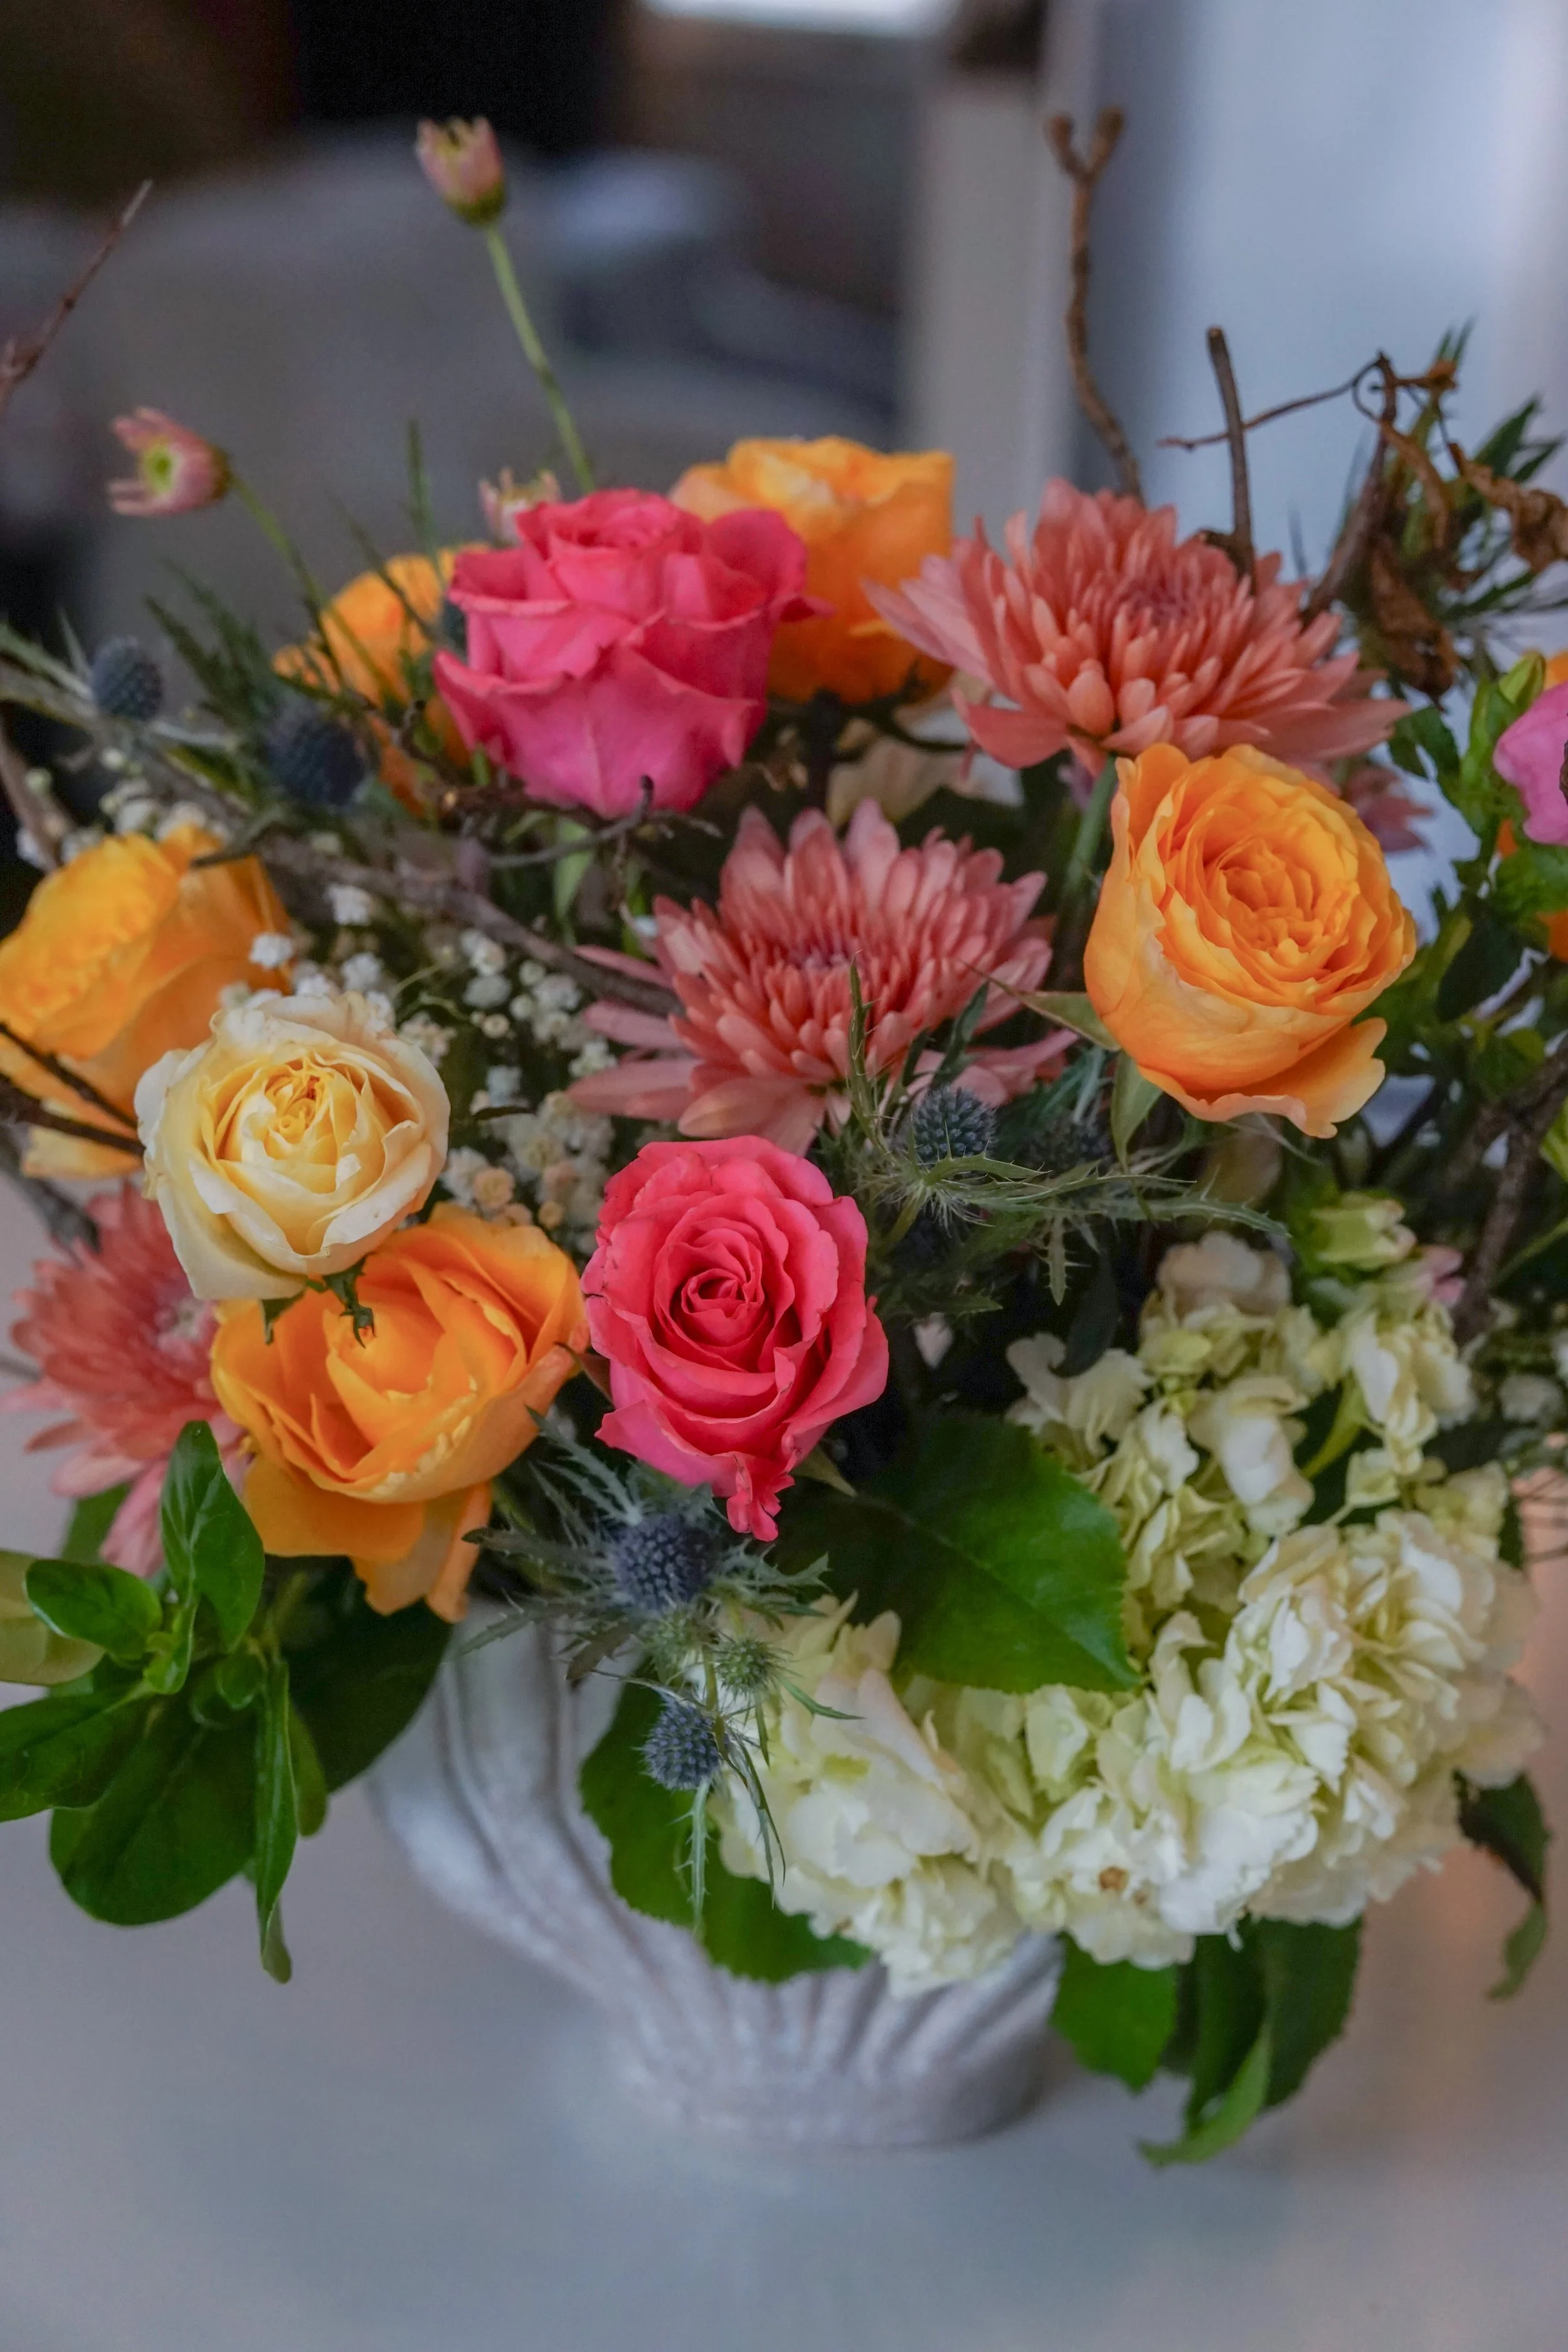
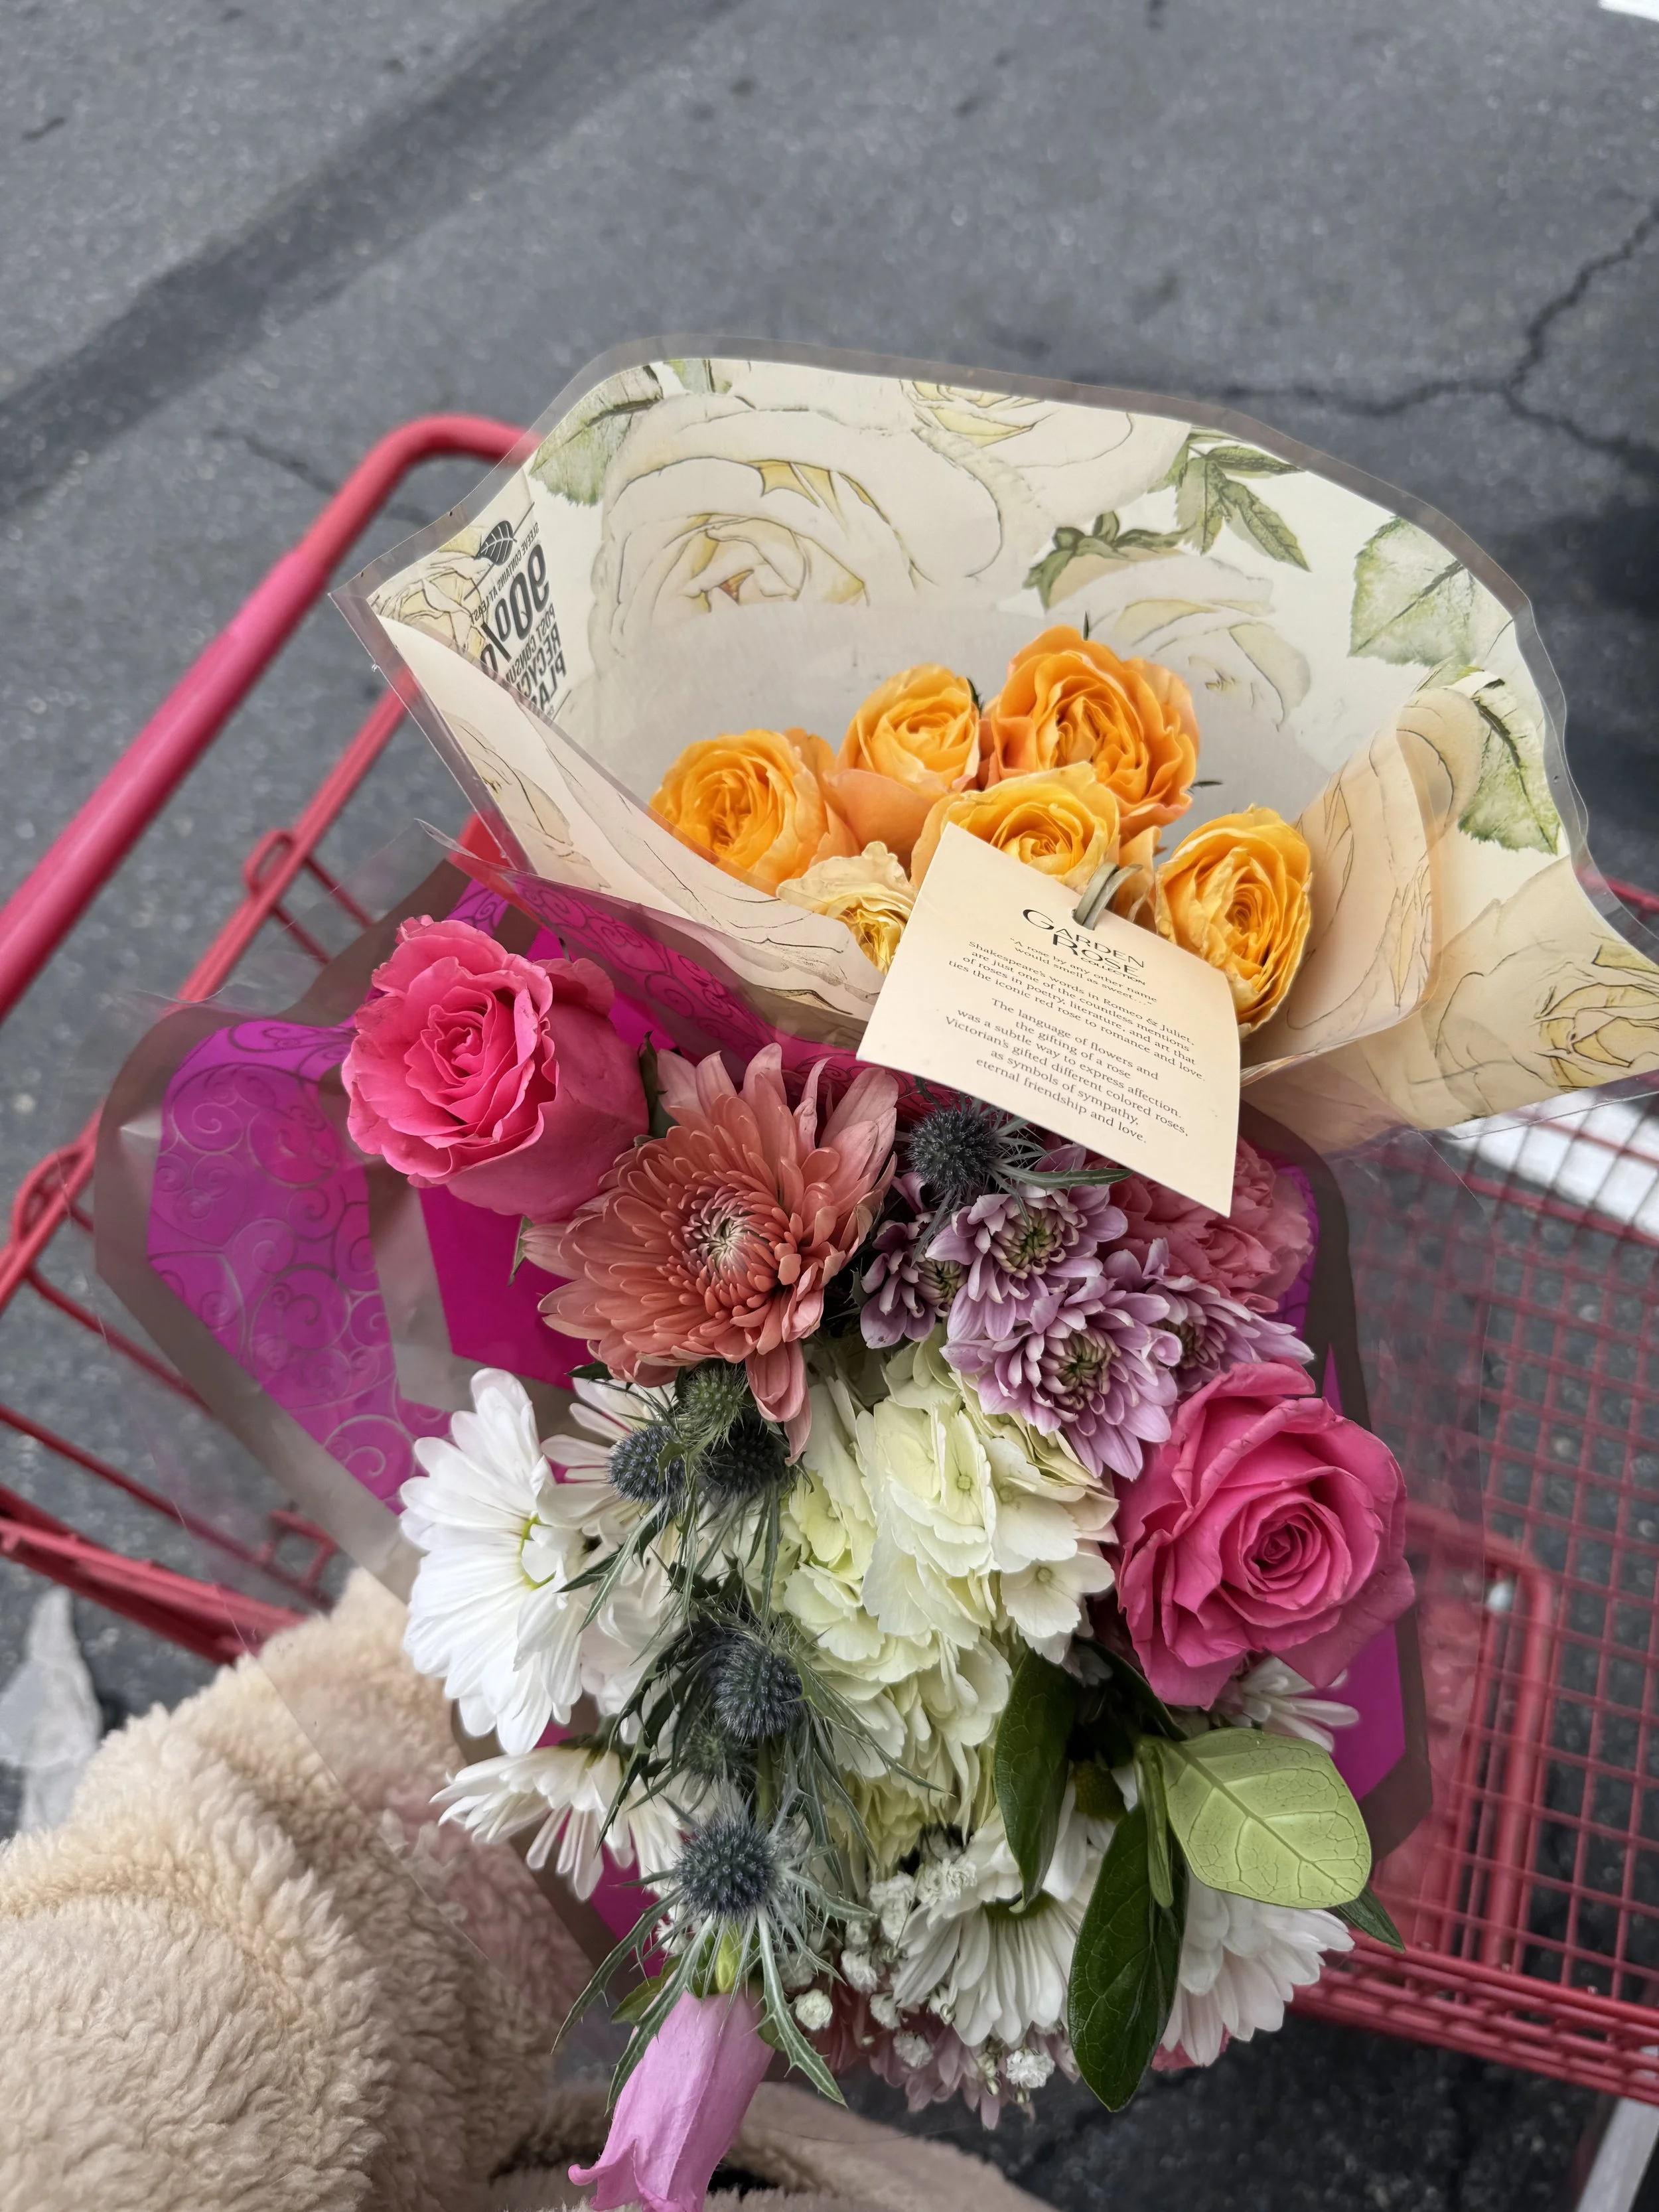
I’d escaped to Trader Joes that evening and inspiration hit me right as I walked in the doors. The flower section is the first thing you see. We love grabbing flowers from Trader Joes—they have fun options at reasonable prices. I picked two bouquets, one of those pre-made bouquets with lots of flowers as well as a bouquet of yellow roses—totalling somewhere between $15 - $20, to bring home for a last minute ask of Maureen.
My idea? How many times do we grab a grocery-store bouquet, but not quite know what to do with it other than trim the ends and stick them in a vase? Sure, they look pretty good as-is, but there must be a way to elevate these into a more artful arrangement. My vision was to have Maureen show me how a professional floral designer would transform a grocery store bouquet into a floral masterpiece at home.
Luckily, Maureen was more than up for it. The arrangement became a full family activity and I learned a lot. Below I’ll outline my observations of her process and the tips and tricks I picked up from this exercise. This could be timely heading into Easter weekend for some beautiful spring arrangements!
How to Transform a $15 Grocery Store Bouquet into a Floral Work of Art
Floral arrangement designed by: Maureen Christmas, AIFD, CFD, EMC, of Floral Notes
Observed, written and photographed by: Shannon Christmas of Noelle, L.L.C.
On a chilly mid-February day, I got home from Trader Joe’s and plopped a pre-built flower bouquet and a bouquet of yellow roses on the counter in front of my mother-in-law. “Maureen… could you transform this into something beautiful?” I asked. All she would have access to was our limited supply of floral tools, our backyard, and these bouquets (which in total I think were somewhere between $15 - $20). Maureen was more than up to it.
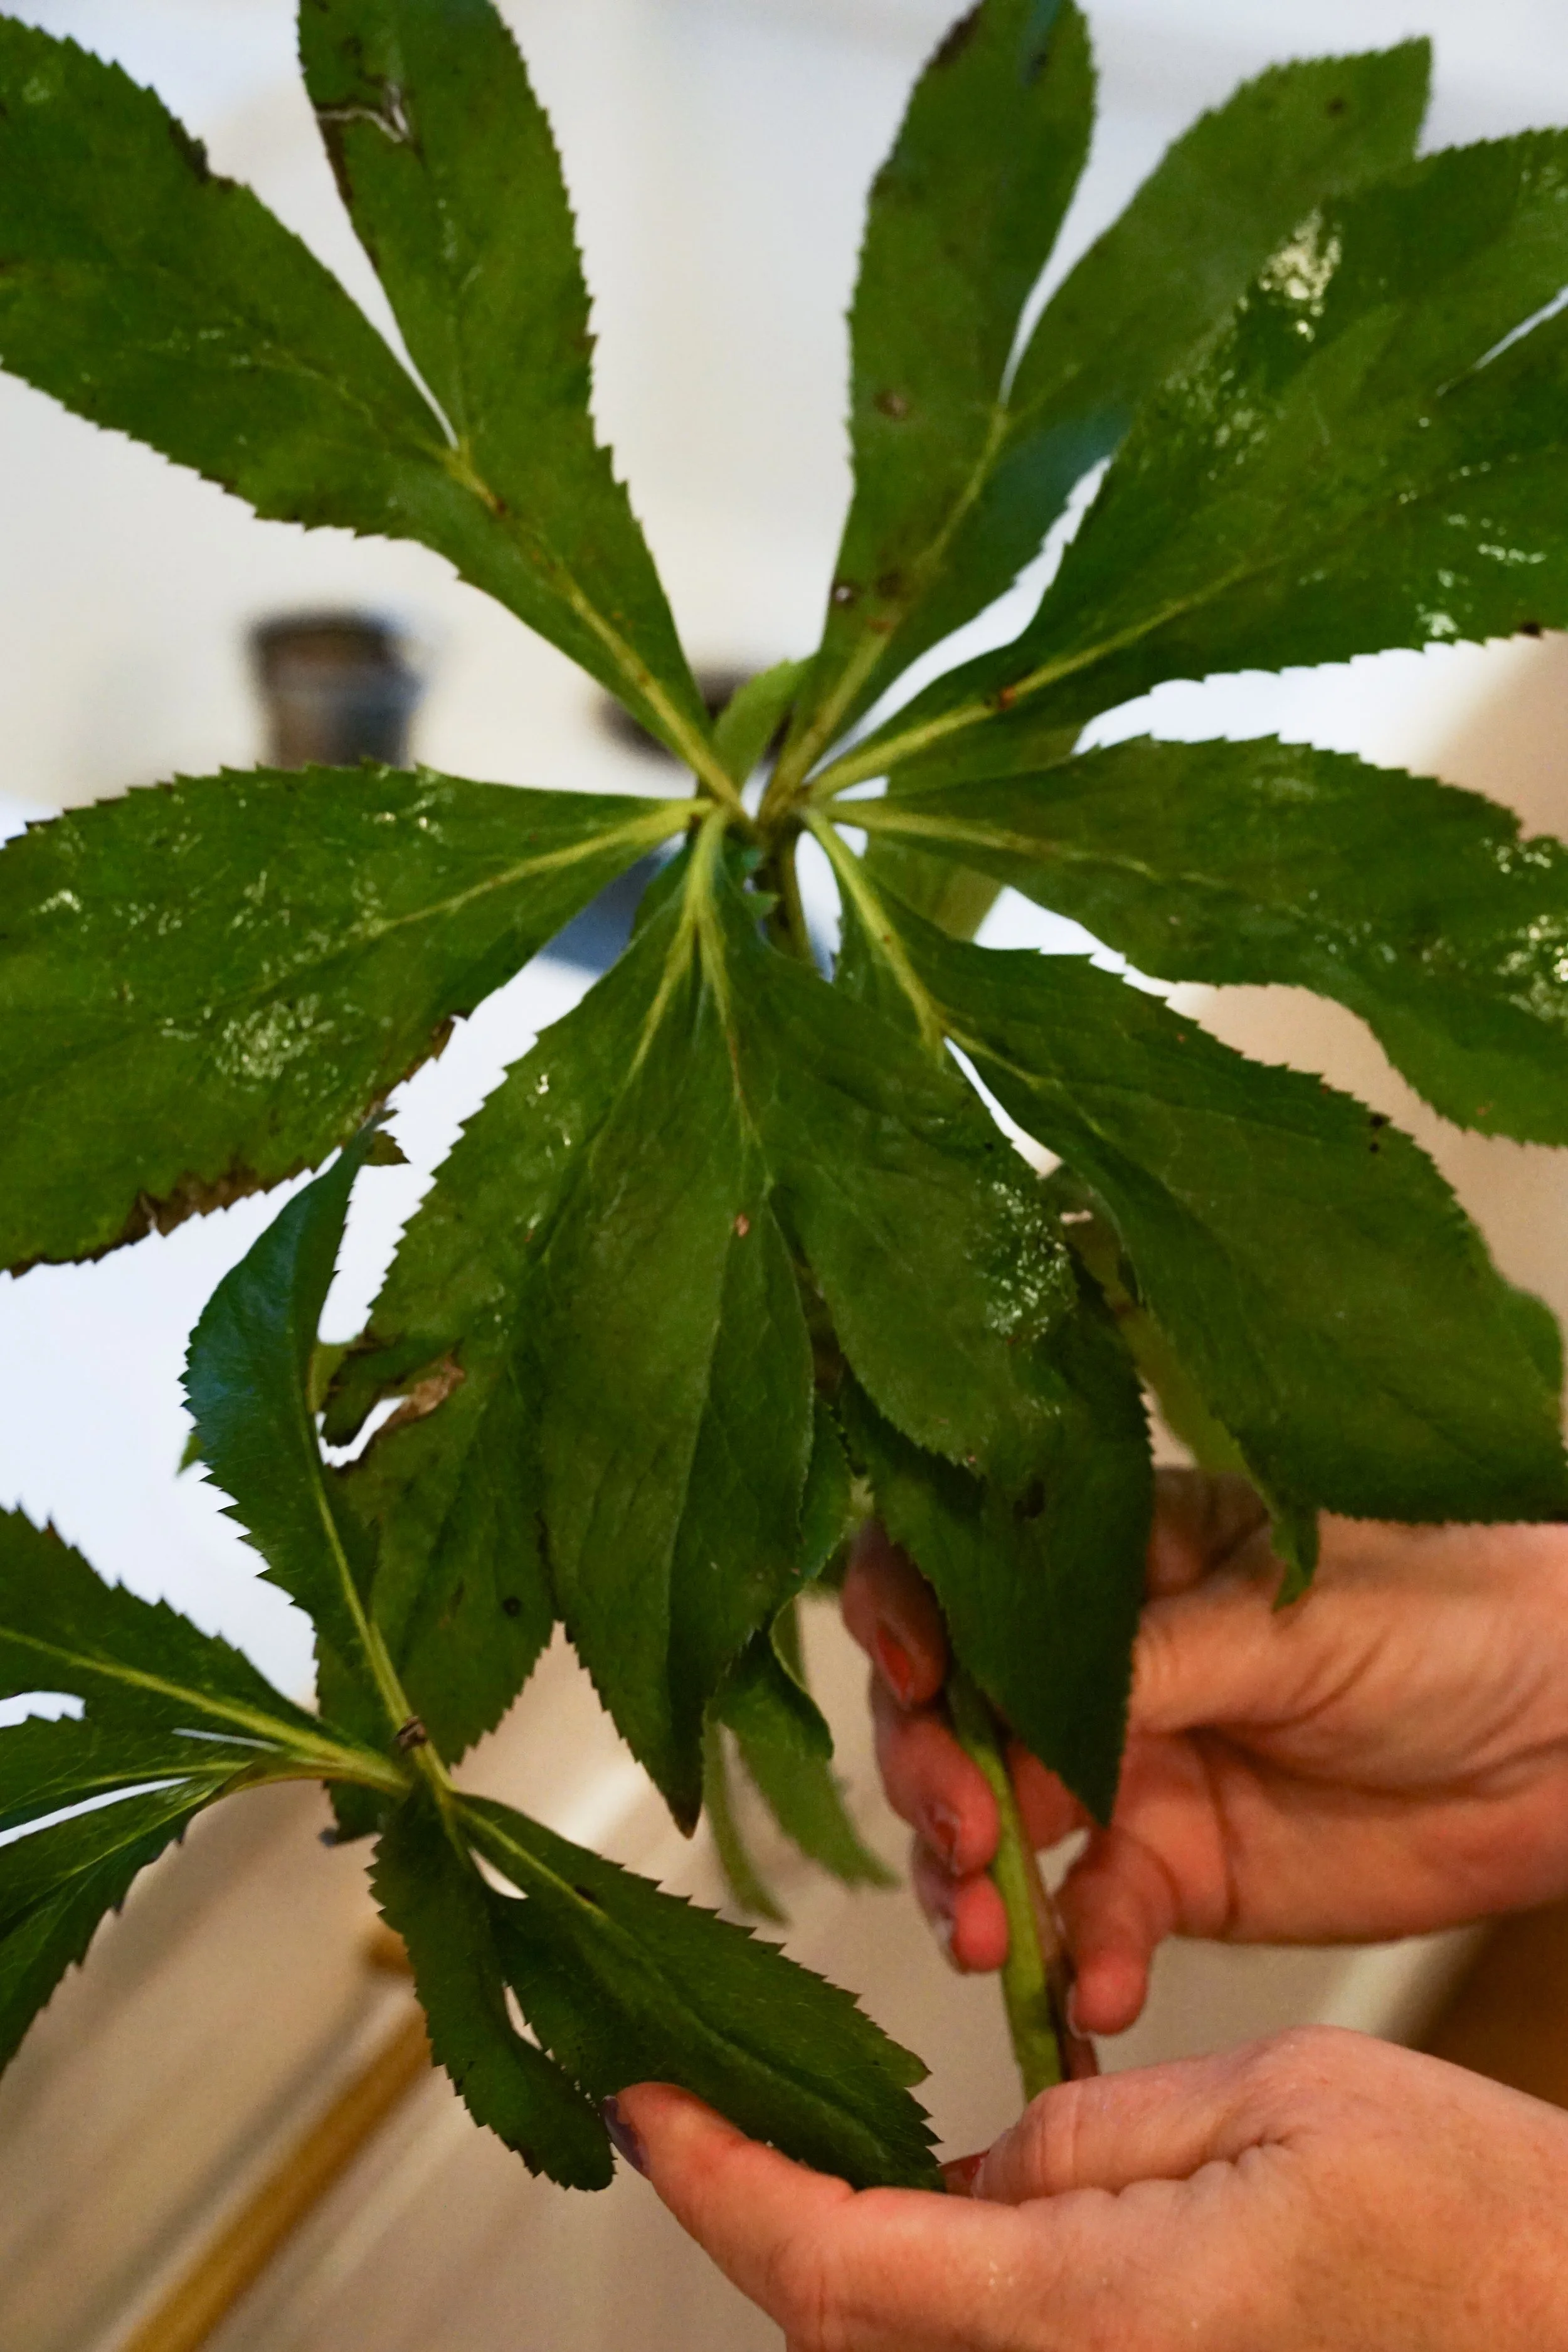
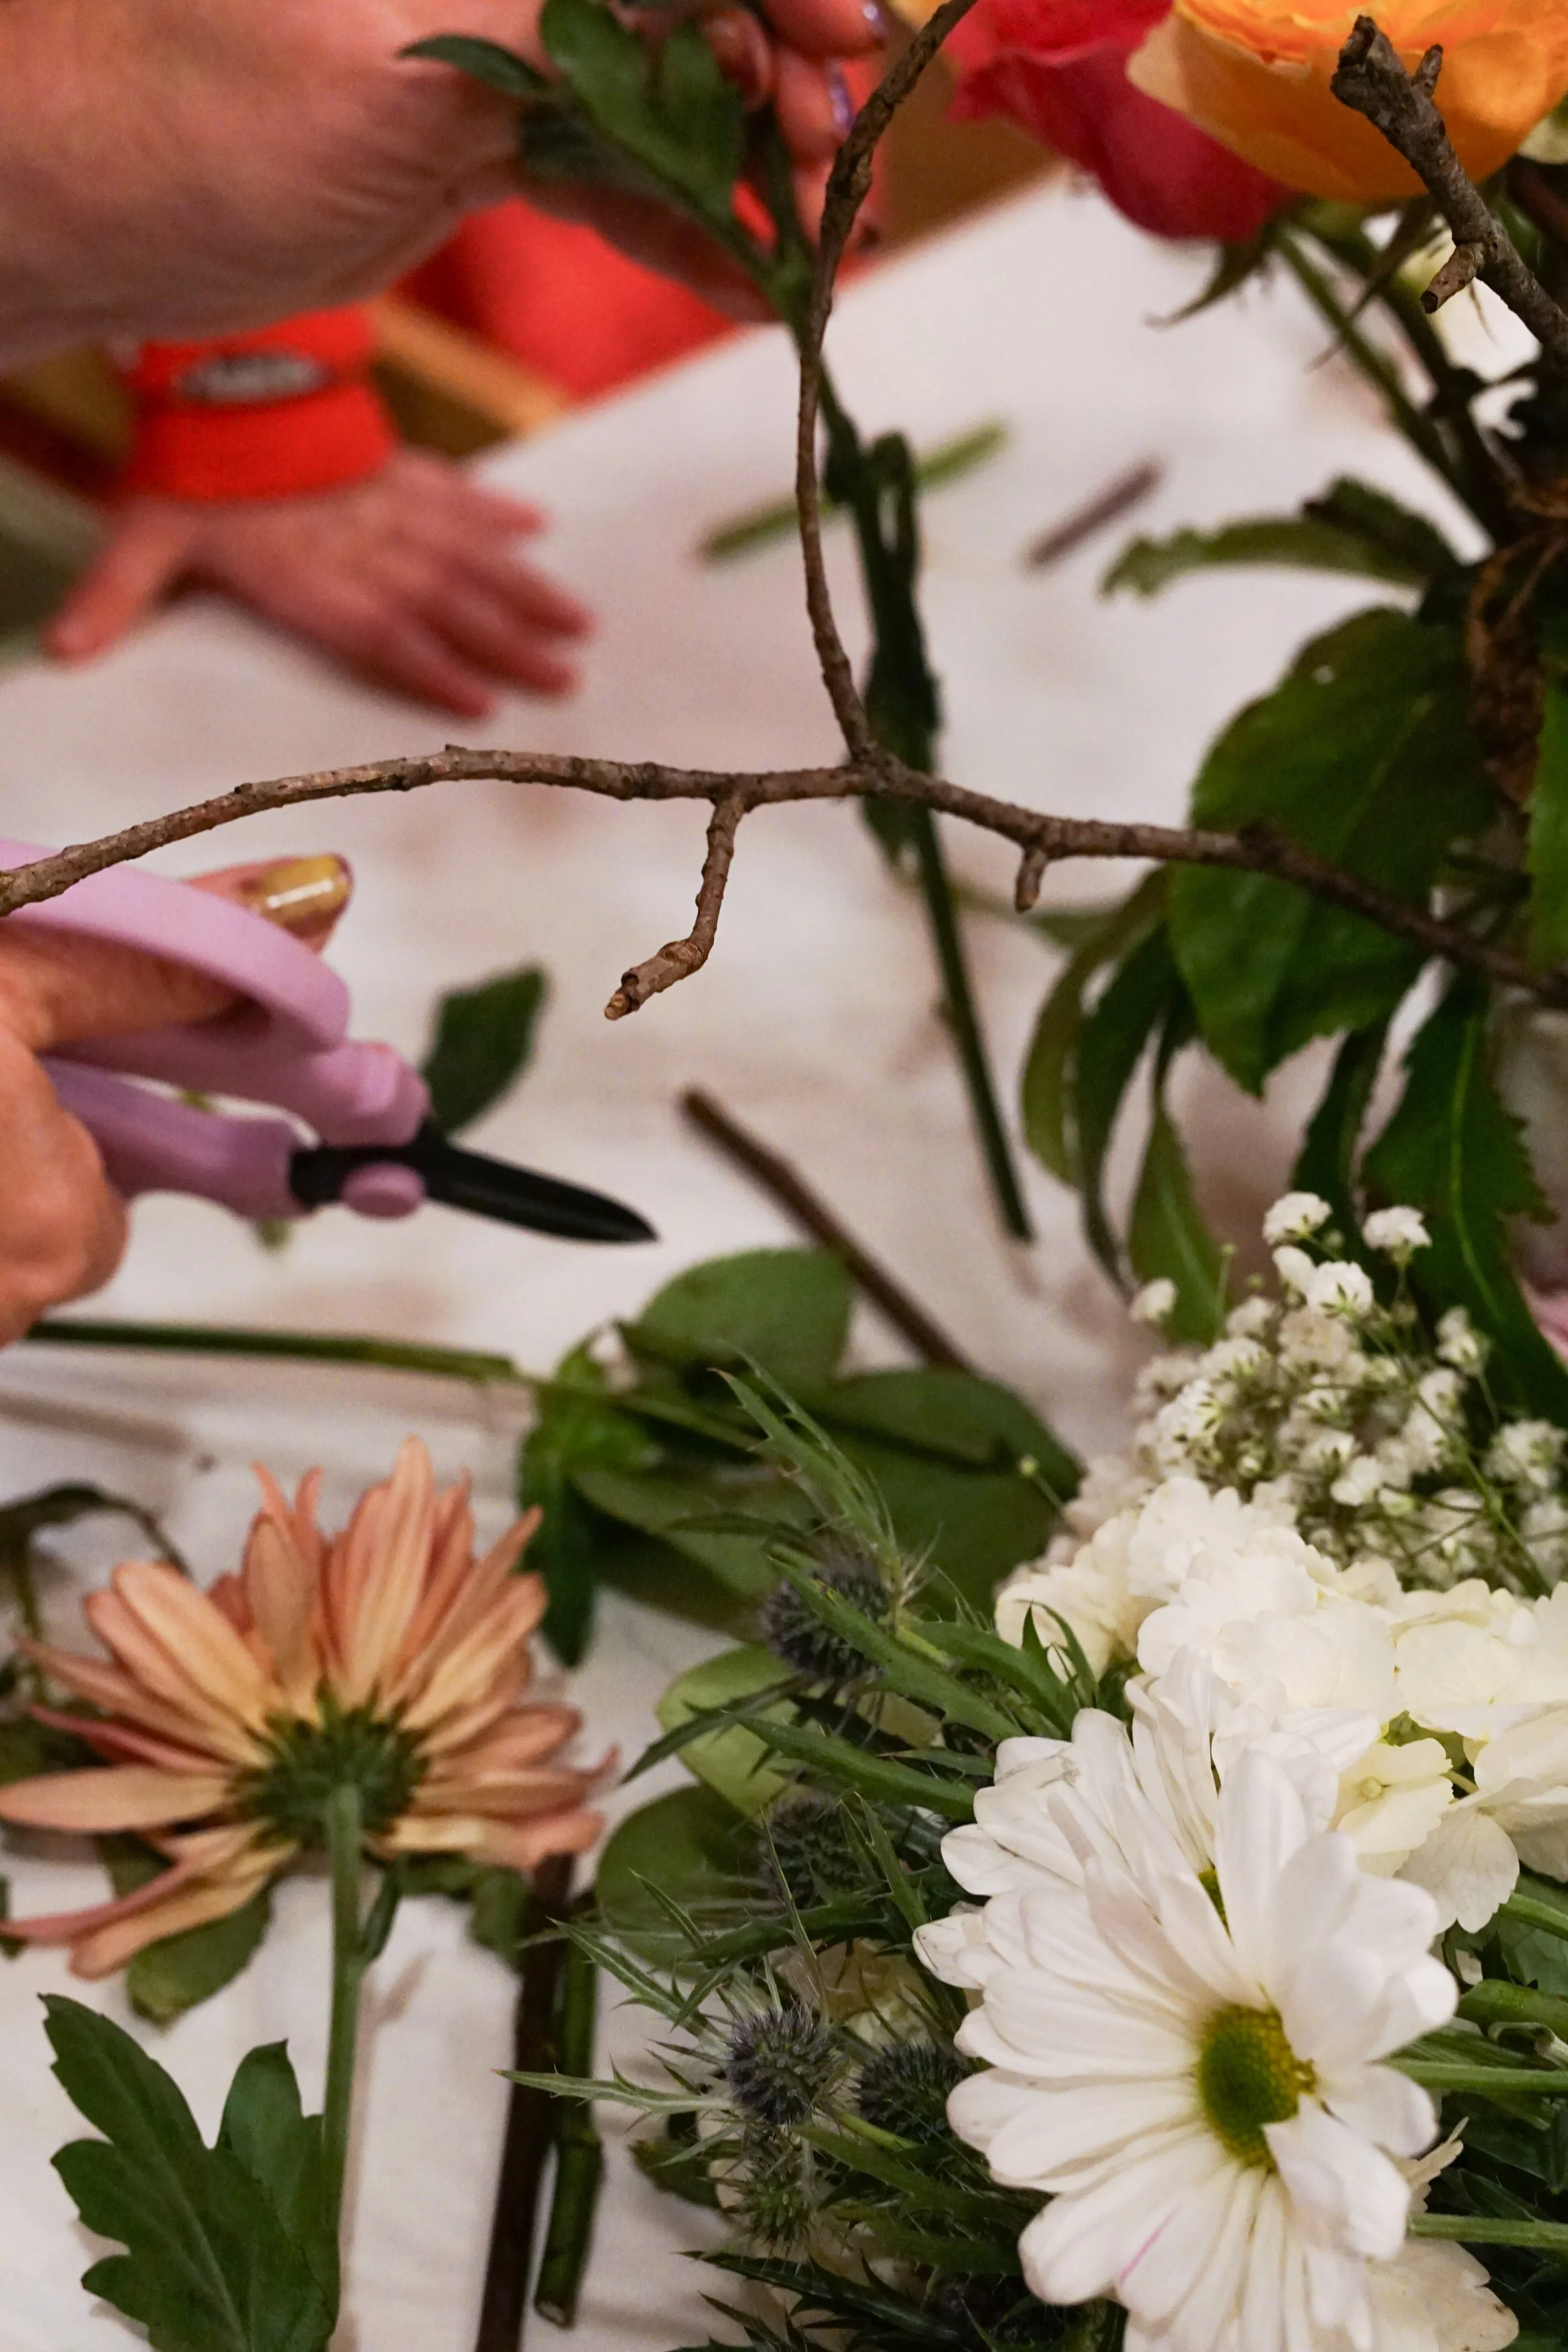
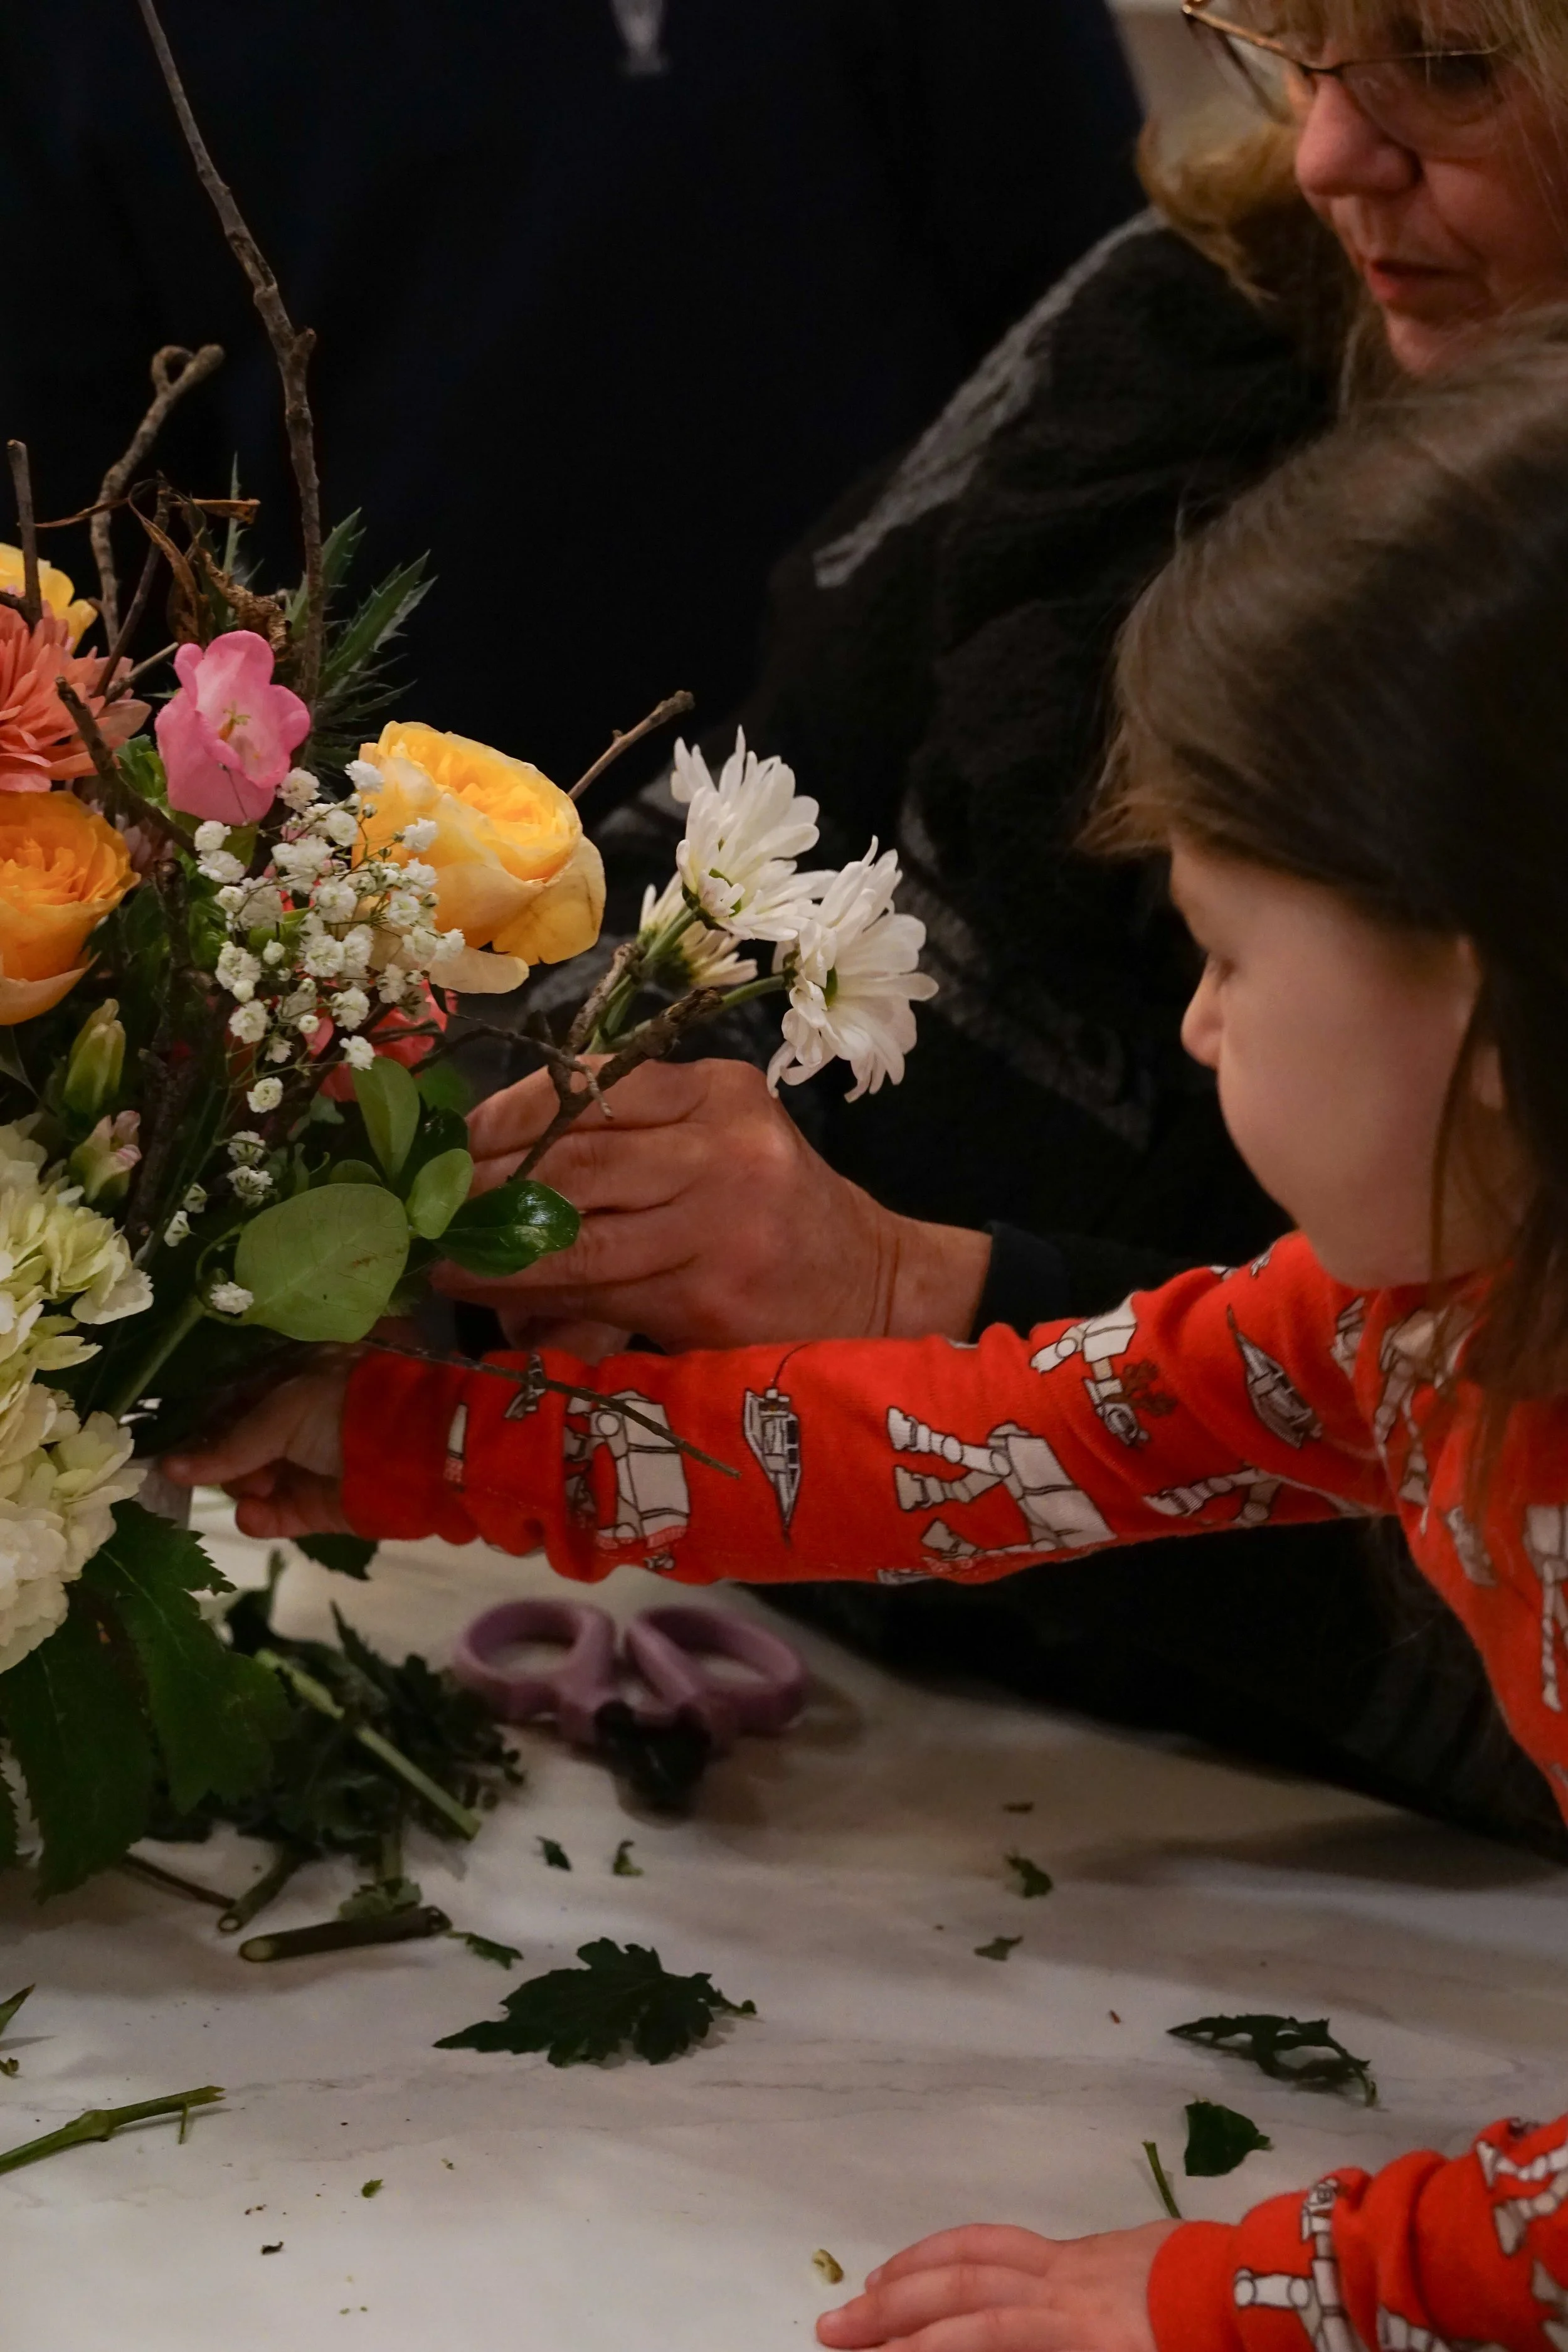
The first thing she did, before getting the bouquets into water right away, was get her shoes on and march outside. The kids and I watched as she strolled around the backyard, examining greens and picking things up off of the ground. She came back inside with a collection of sticks in various shapes and lengths, and hellebore greens—most showing the signs of the seasons, with a mixture of green and browning parts.
Major Observation # 1: Embrace the Seasons
When we bring flowers inside, we are reflecting the outdoors. Maureen’s first point was that it’s okay if not every piece going into an arrangement is perfect, in fact, imperfection adds to the arrangement. You’re reflecting what you’re seeing outside, bringing true nature inside. I absolutely love this tip. This simple shift in perspective can shape the way you see the greenery and nature in your own backyard, and how you can incorporate it into arrangements. Plus, the obvious life lessons in finding beauty and meaning in imperfection.
The next thing Maureen did was search our hall cabinet for a suitable vase. We happened to have one that is filled with slots, allowing for easier arranging. You can use any vessel, though, and use other tools to add structure.
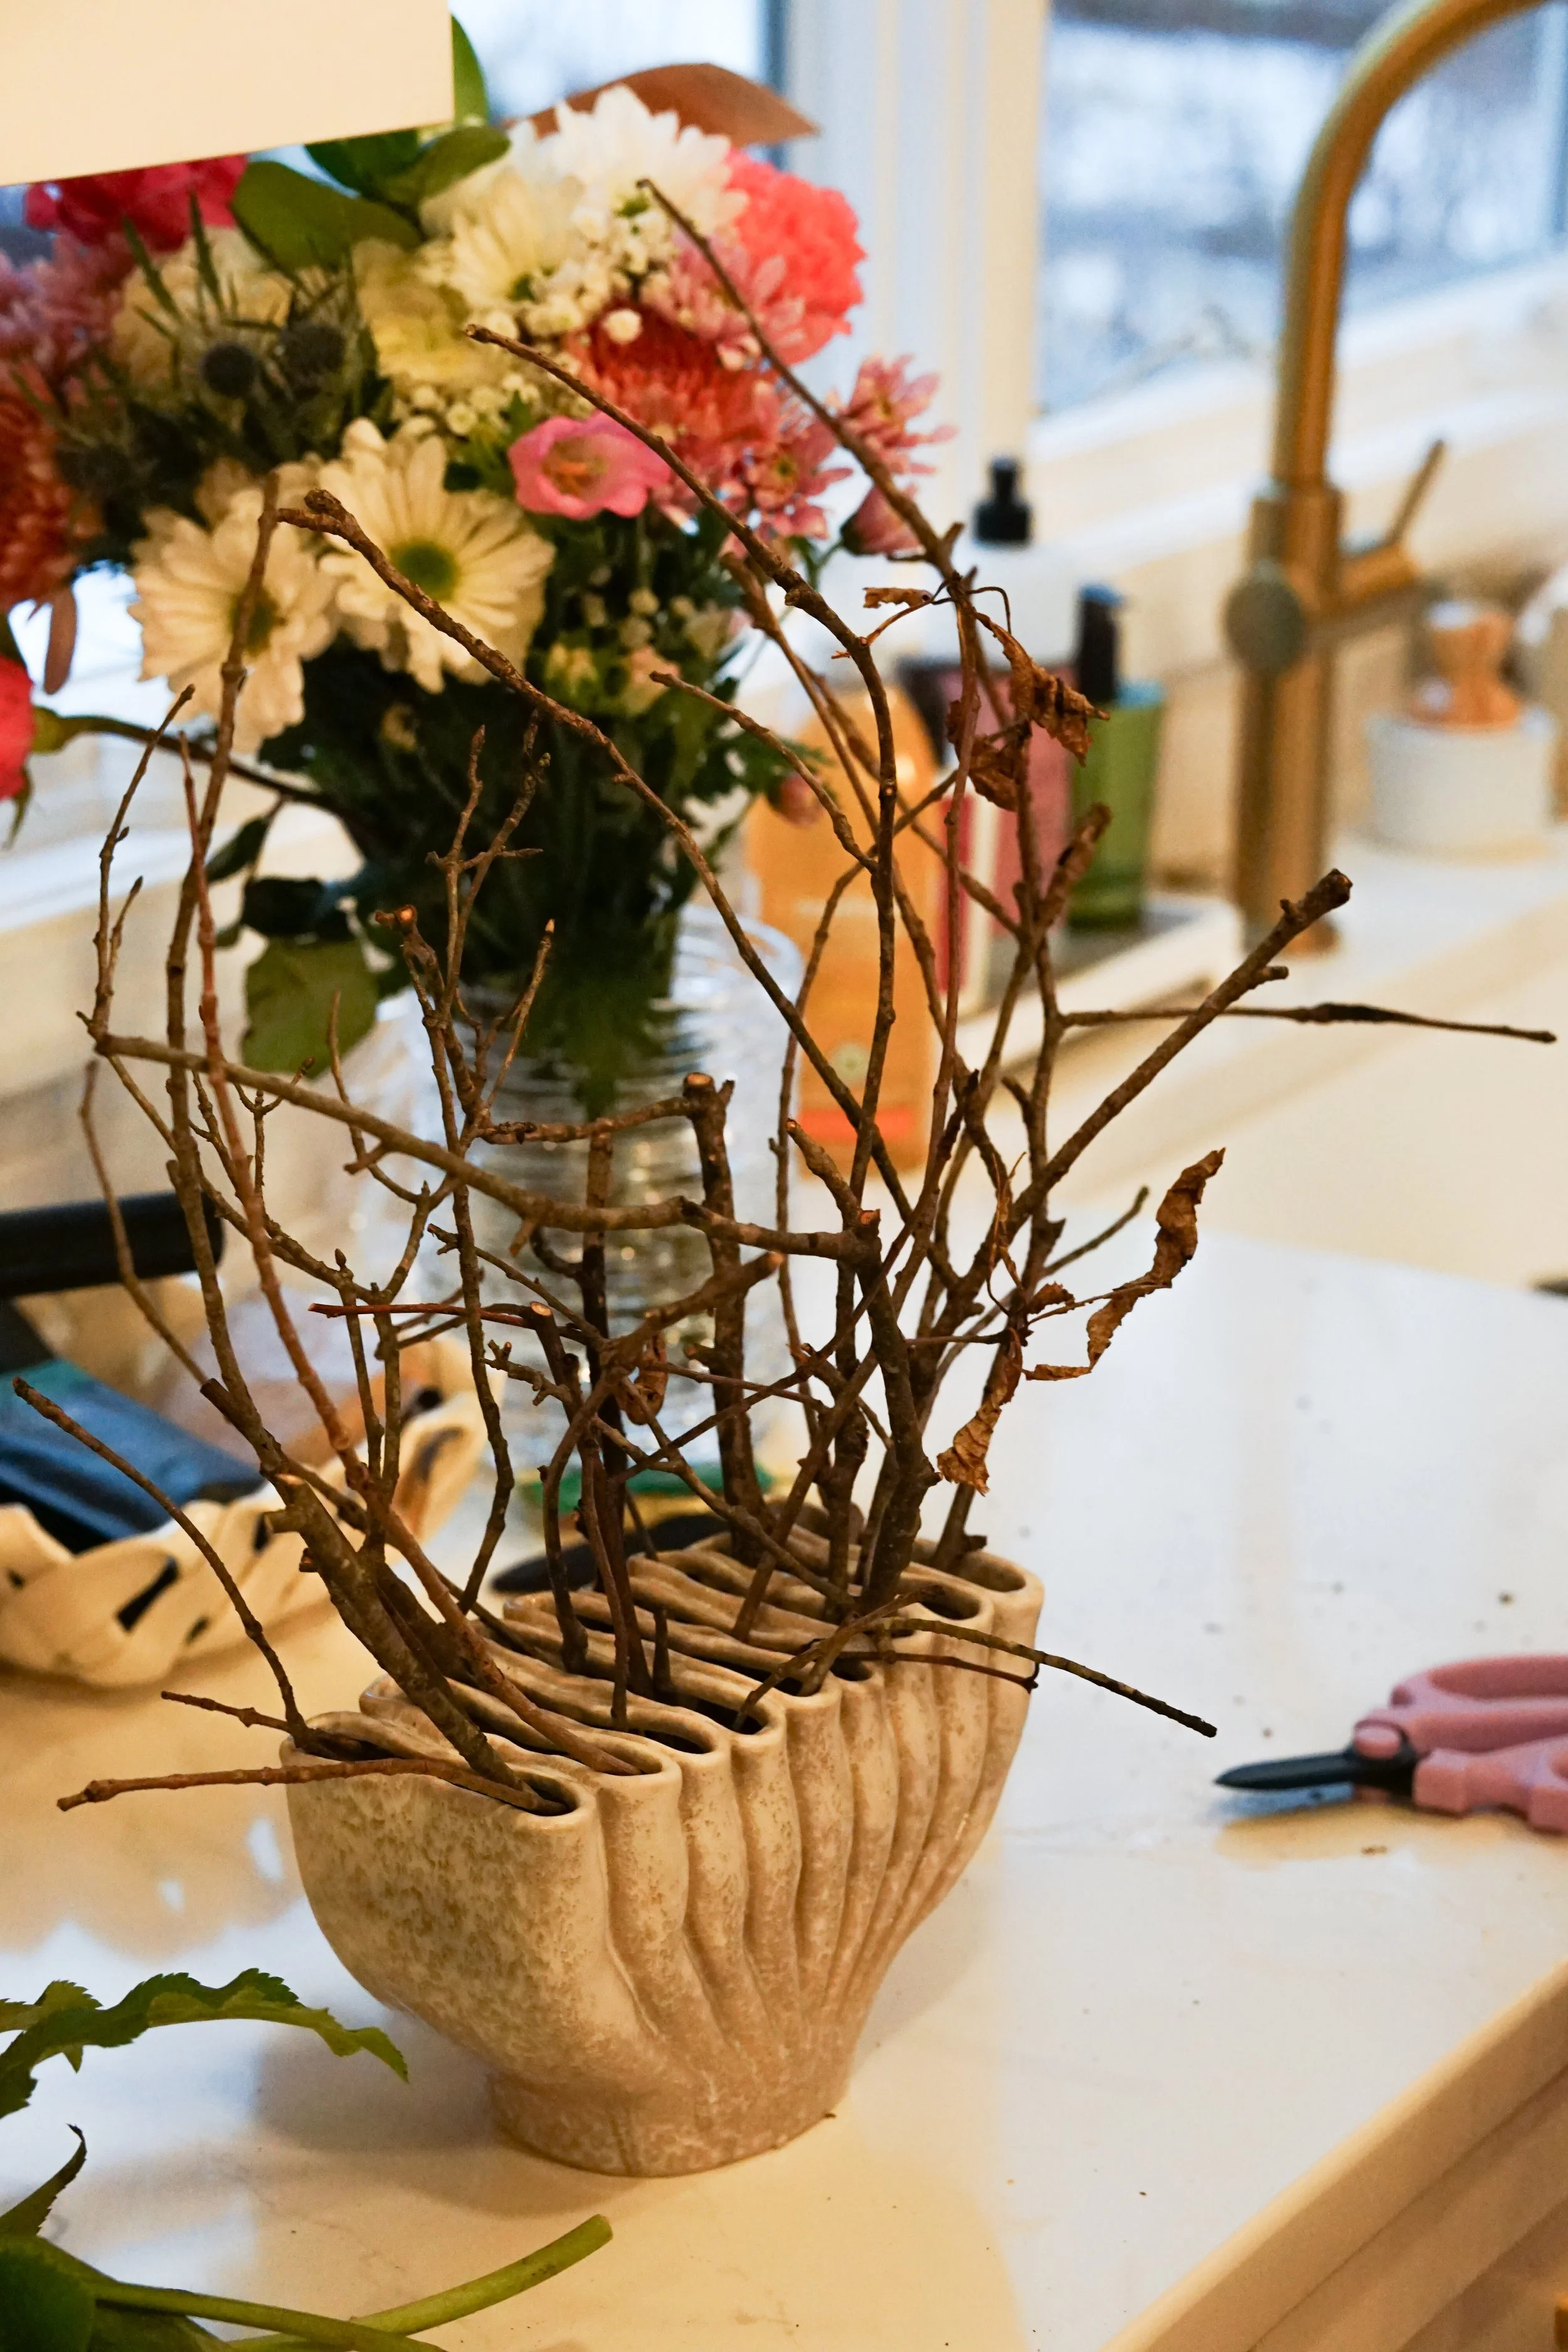
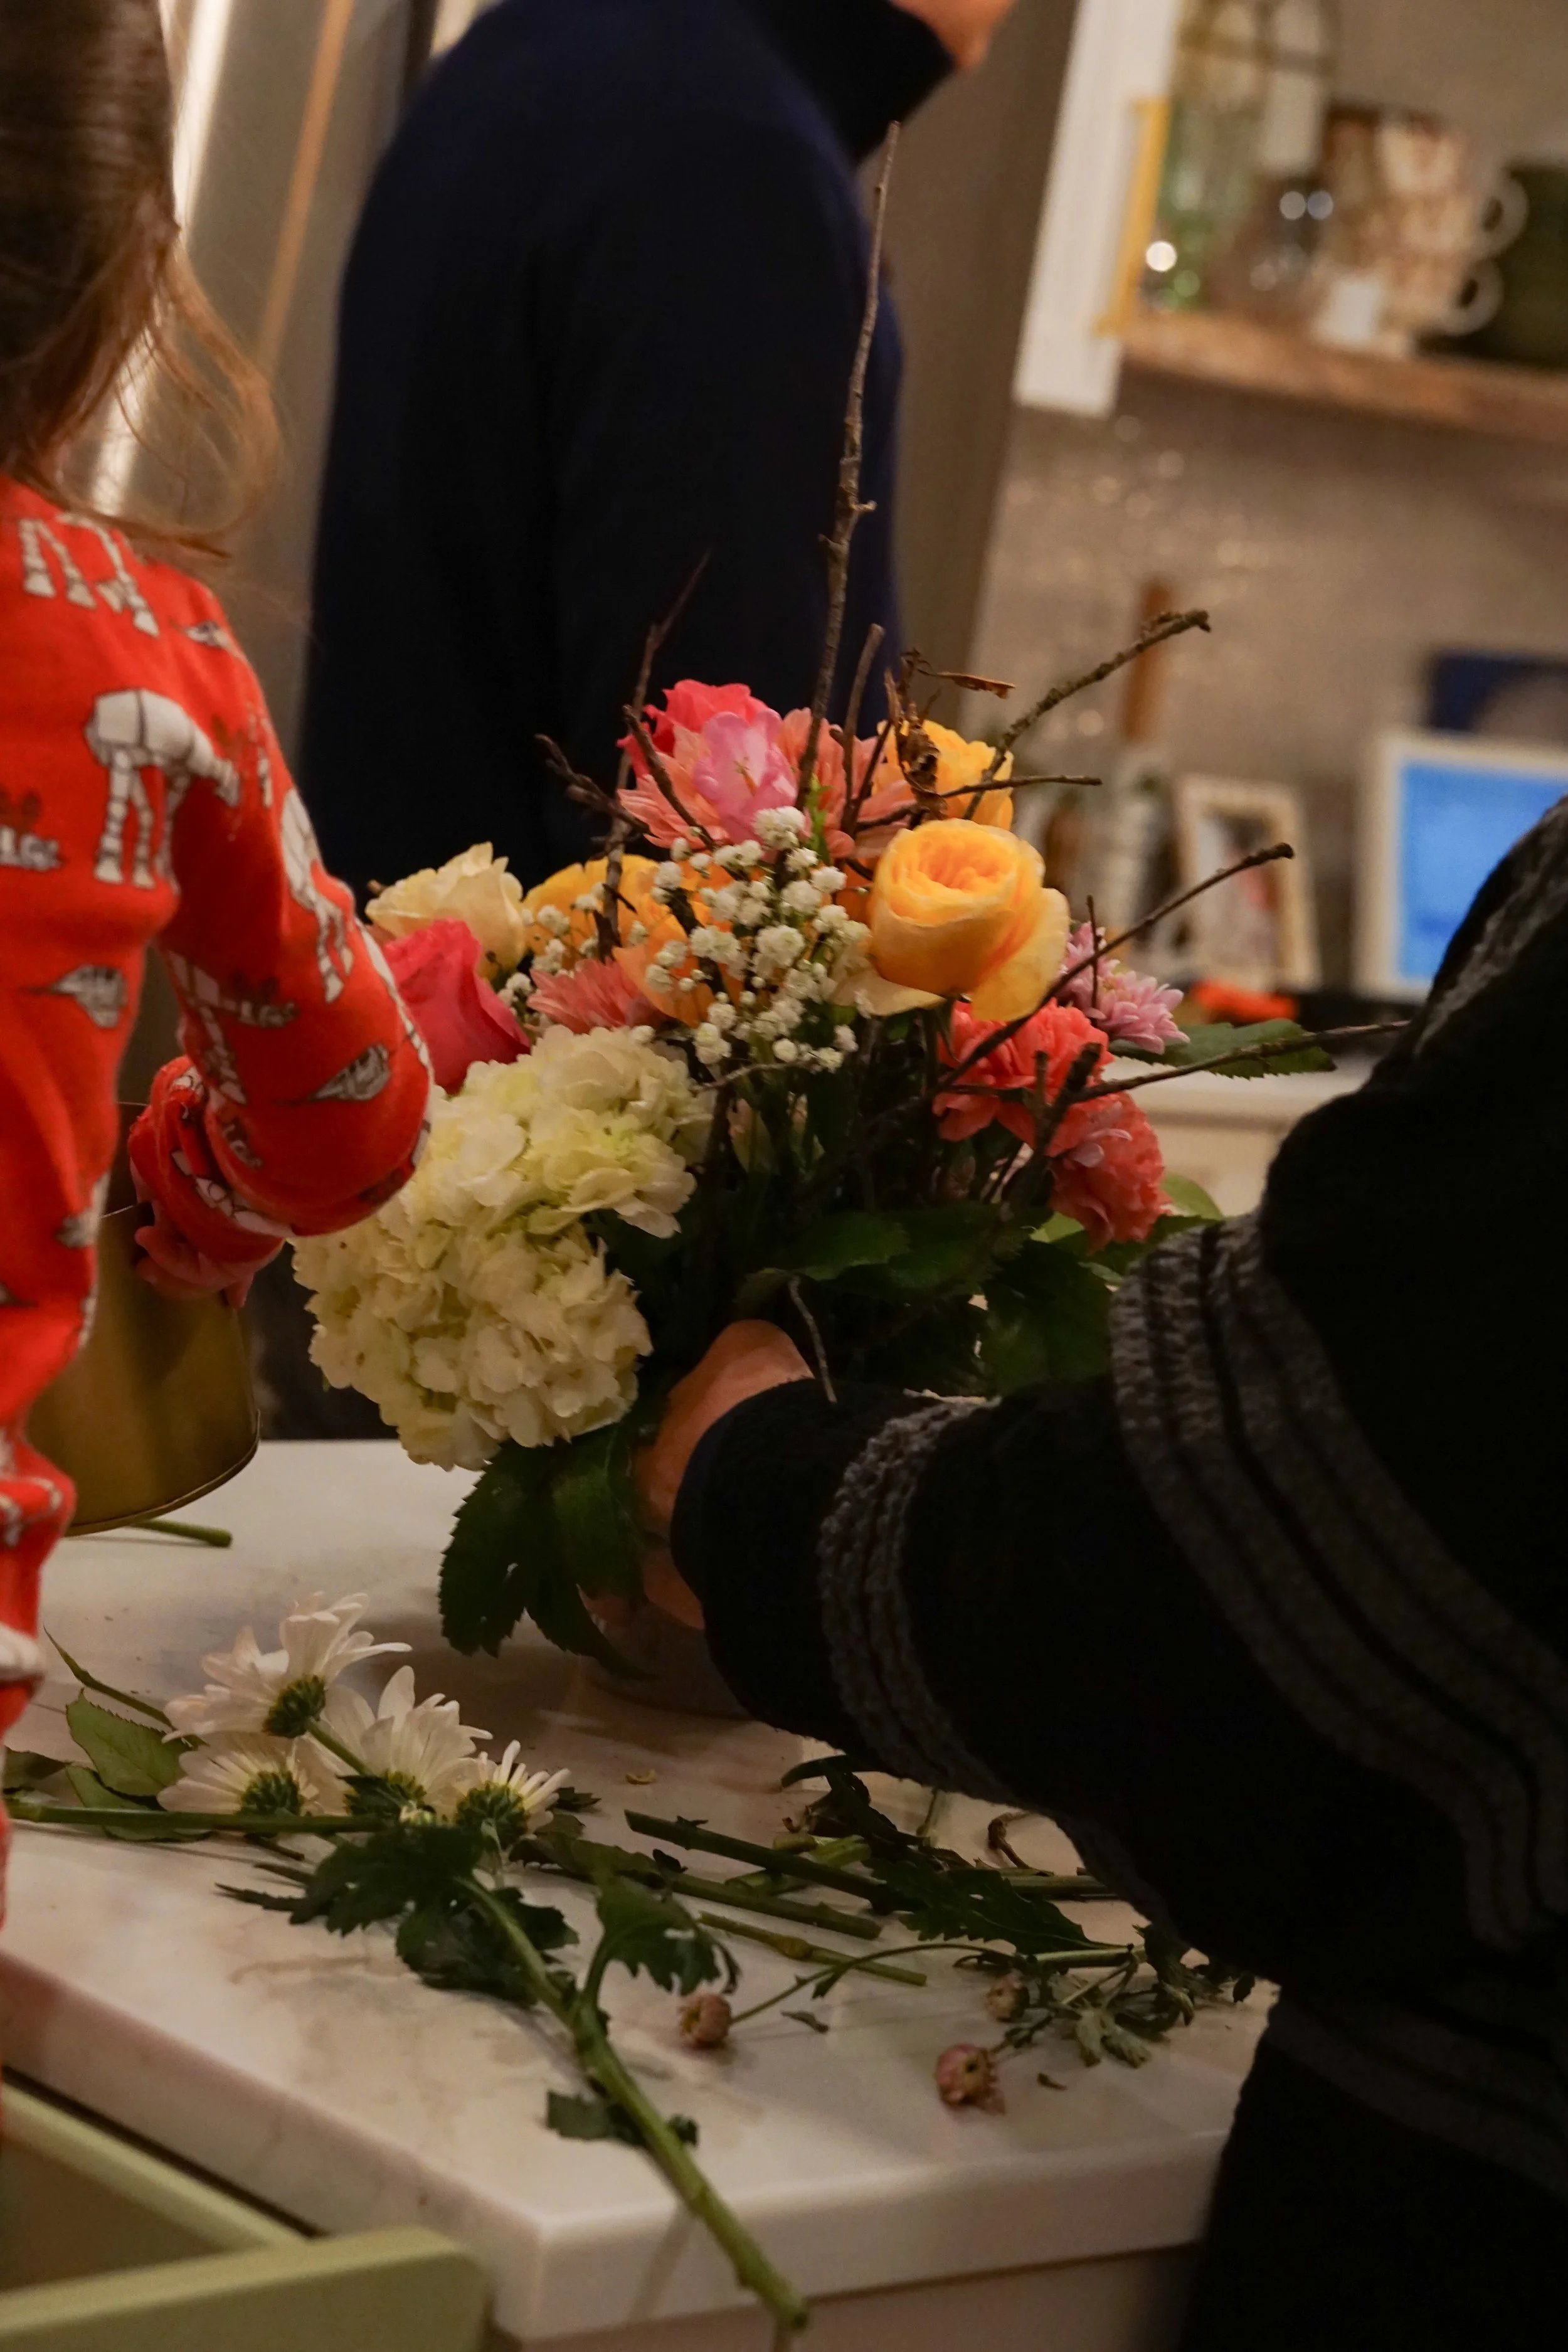
Major Observation # 2: Create a Structure
Creating a structural base for your arrangement is key. You’re giving your flowers and greens a place to rest, a mechanism for you to more easily execute a beautiful design. With this arrangement, Maureen achieved her structure in two ways: 1 - the built-in slots in the vase, and 2: the sticks she brought in from outside. While I half chased my kids around and half observed, she placed the sticks throughout the vase, intertwining them to create an interesting shape with plenty of resting space for flowers to-come.
Other tools you can use to add structure:
Flower Frogs: these tools come in many shapes and sizes and sit at the bottom of a vase. They have protruding spikes that pierce the bottom of stems, allowing them to stand up in your vase. The tool is a little scary when you have tiny children—we keep ours in a very high-up cabinet—but it’s super useful when we pull it out.
Wire cages (we have a plastic one too): another item to put into your vase, allowing you to place flowers a little more intentionally without leaning.
You might have seen or heard of floral foam. Maureen is great about eco-friendly options so this isn’t the top of the list—it’s single-use and non-biodegradable (it breaks down into microplastics, ick)—but certainly works if you have nothing else.
After creating her structural base, the fun begins! Both of my toddlers climbed into their towers to help Maureen with flower placement. This was so much fun to watch. Maureen talked me through what she was doing and a lot of technical concepts and practices came my way. Here’s what I took away:
Flower Arranging Observations
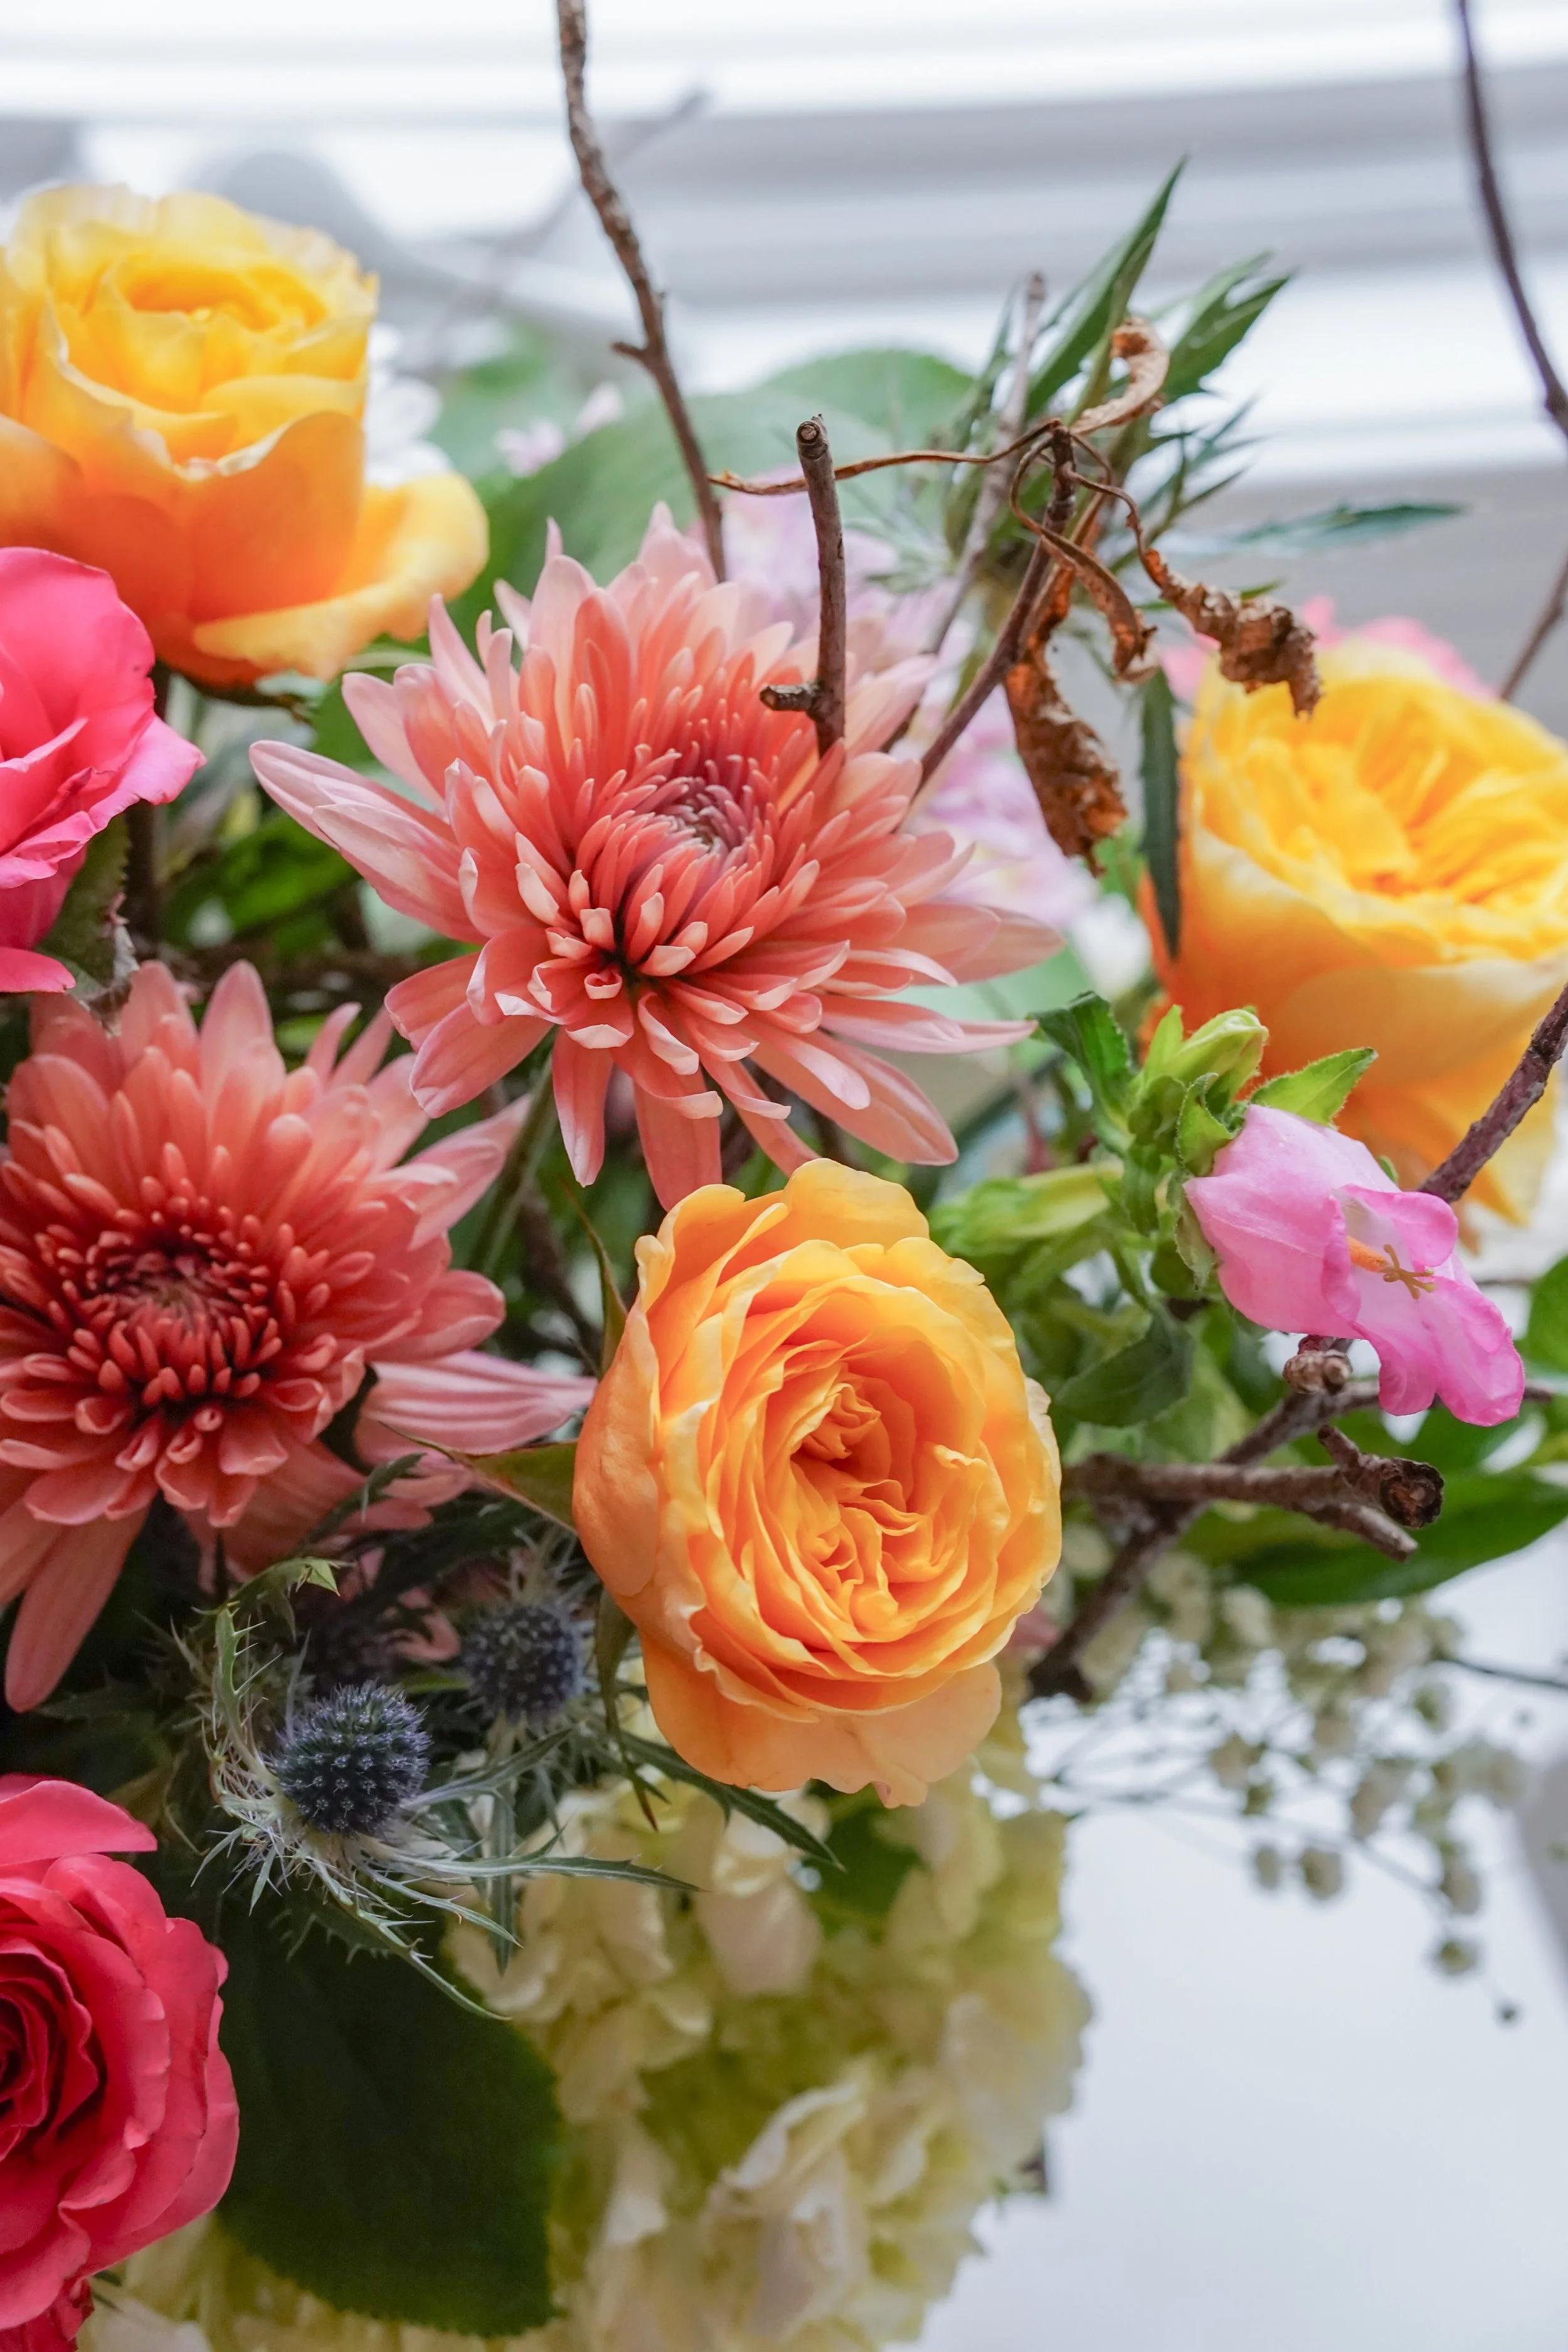
Think about your colors! Maureen was very glad I had bought the yellow roses. Without these, the arrangement might have been a little bland. I remember hearing a tip from florist Sarah Raven last year to use when picking colors: “you want a bride, bridesmaids, and wedding crasher.” This basically means, you want to have some similar colors that complement each other, but also something that contrasts and brings everything to life. The yellow roses did this for us.
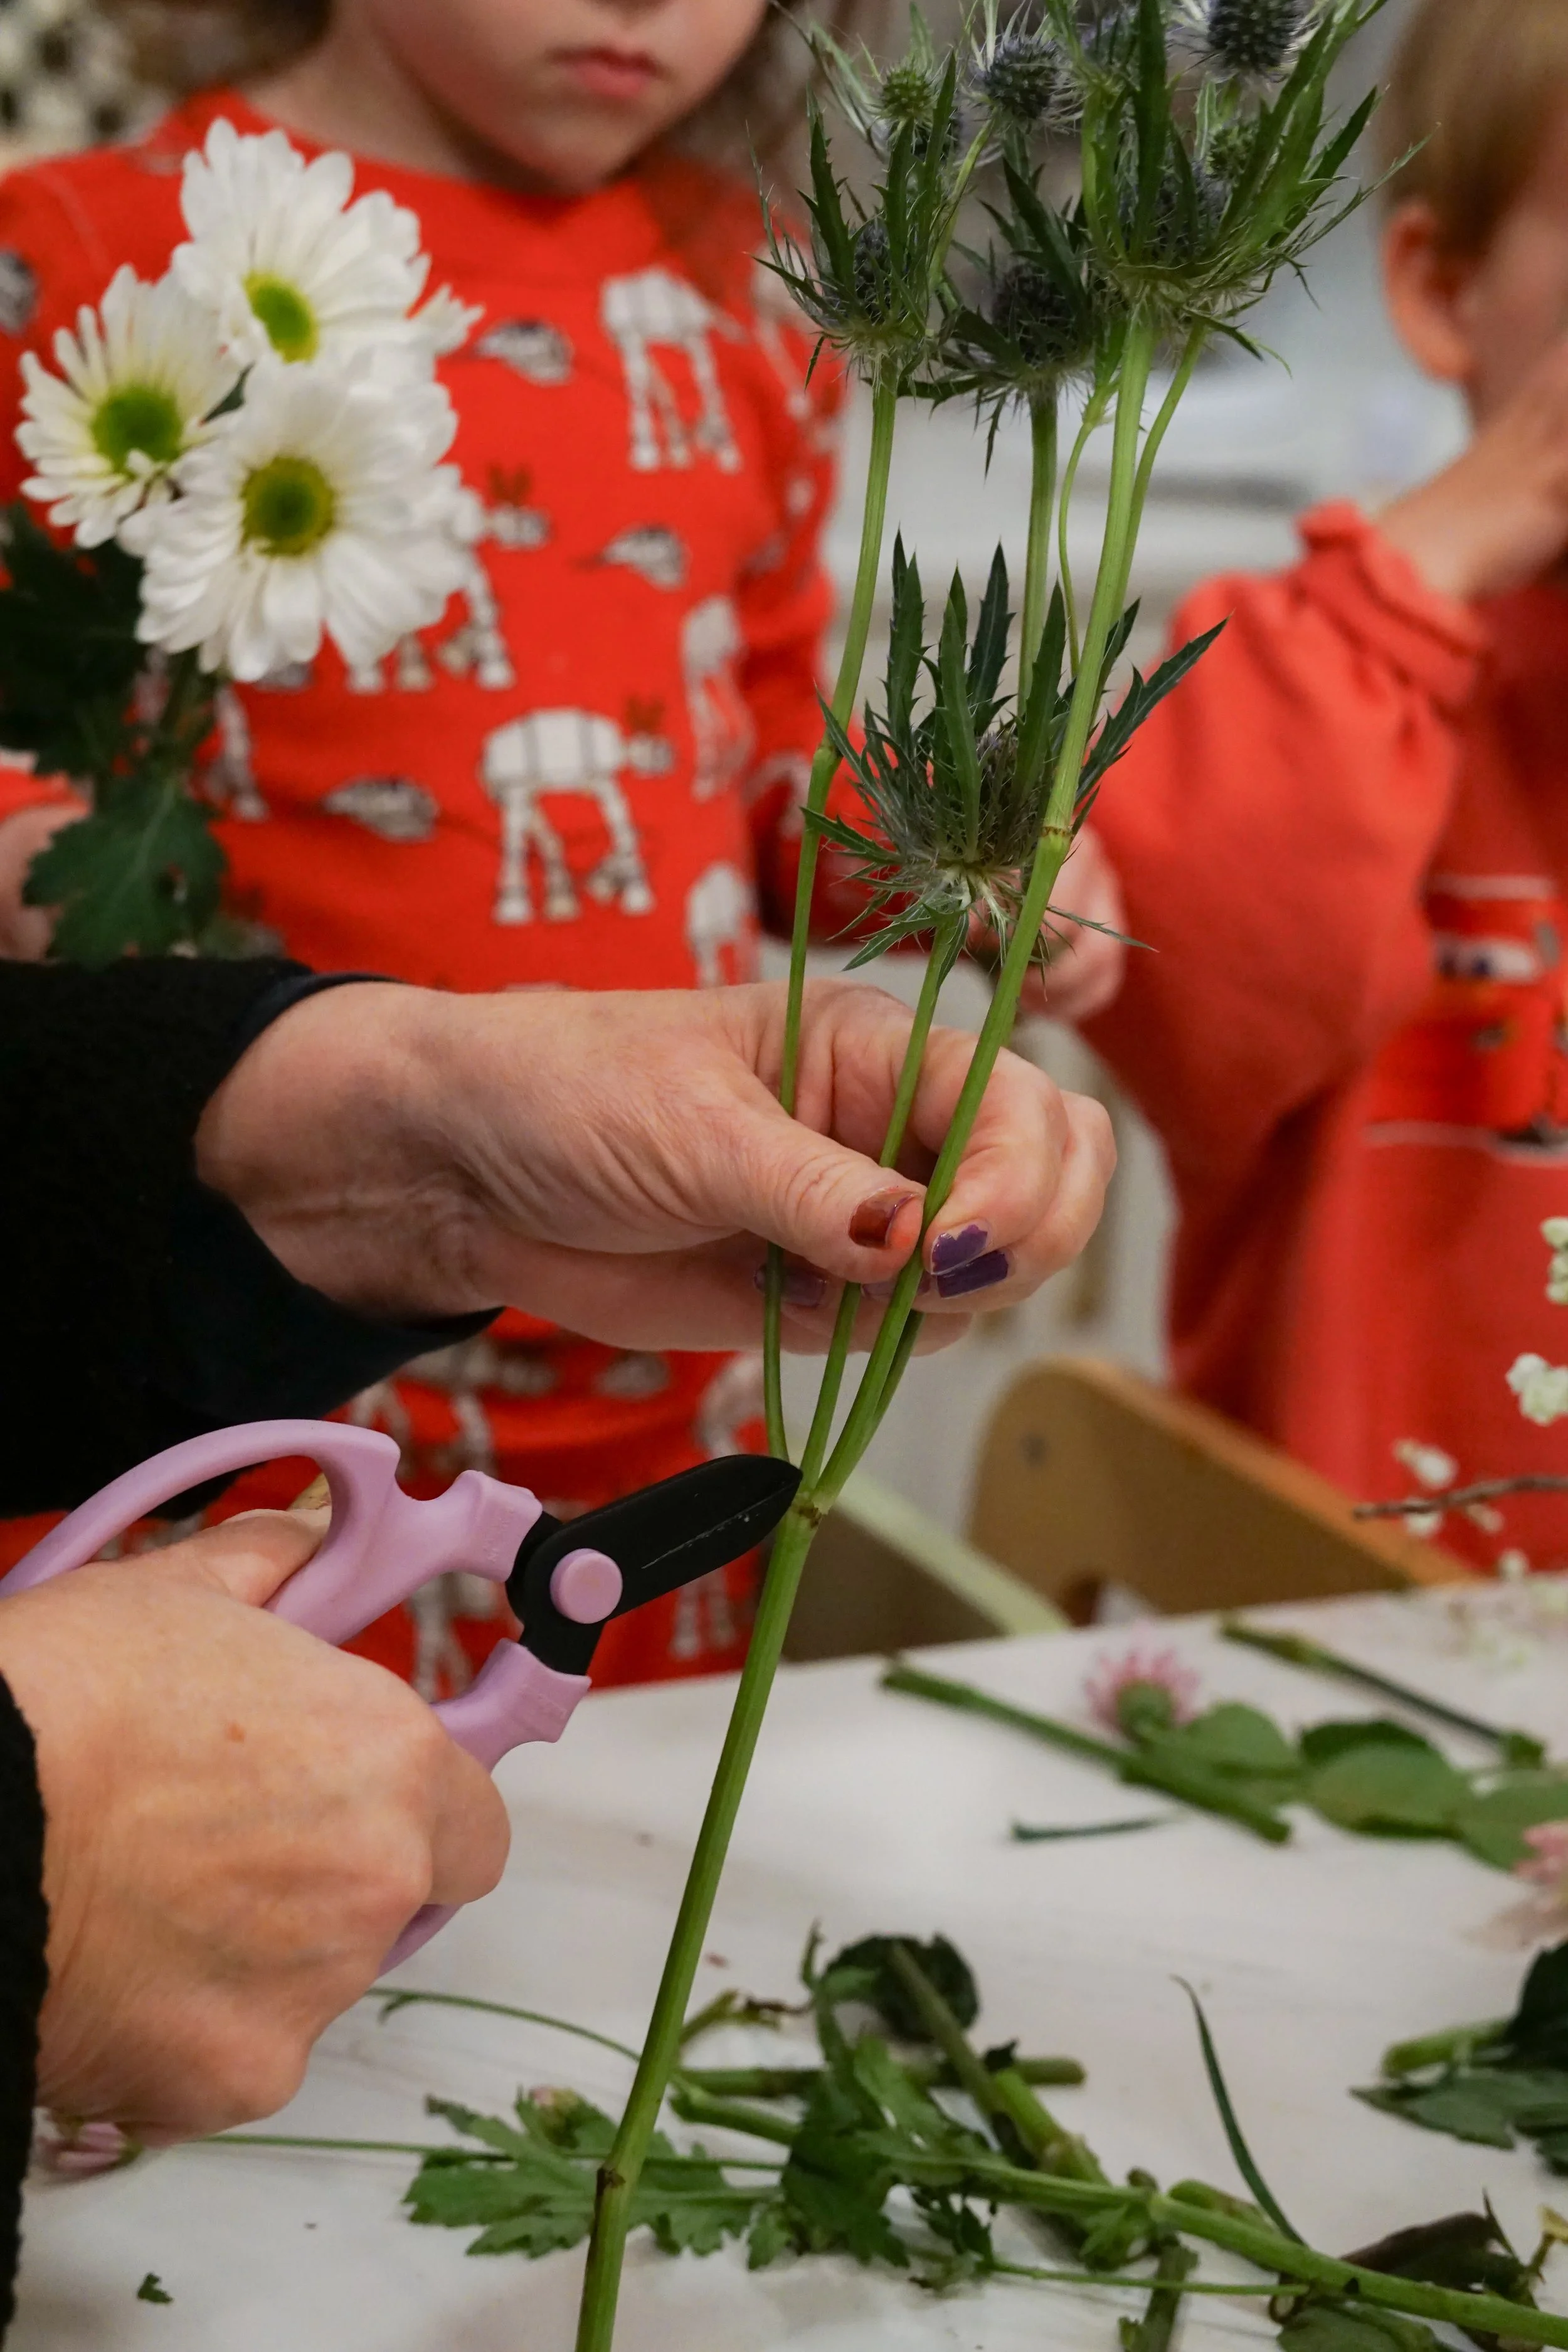
Trim flower stems at an angle as you go, and maintain some greenery. I remember sometimes stripping flower stems of all of their leaves before adding to a vase. Not necessary! You can remove some, but leave some too. Maureen recommends removing any leaves from stems that would end up underwater, or that look untidy. Leave a couple of leaves near the top of the stem—they’ll act as little pumps, bringing water up the stem.
Maureen would trim each flower as she added it to the arrangement, so that she could eyeball where she wanted it and trim the appropriate amount off. Make sure to trim the stems at an angle, too, to prevent the stem from falling flat on the bottom of the vase, unable to take in as much water. Think about kids drink cups whose straws are angled so that they can get that last little bit of water.
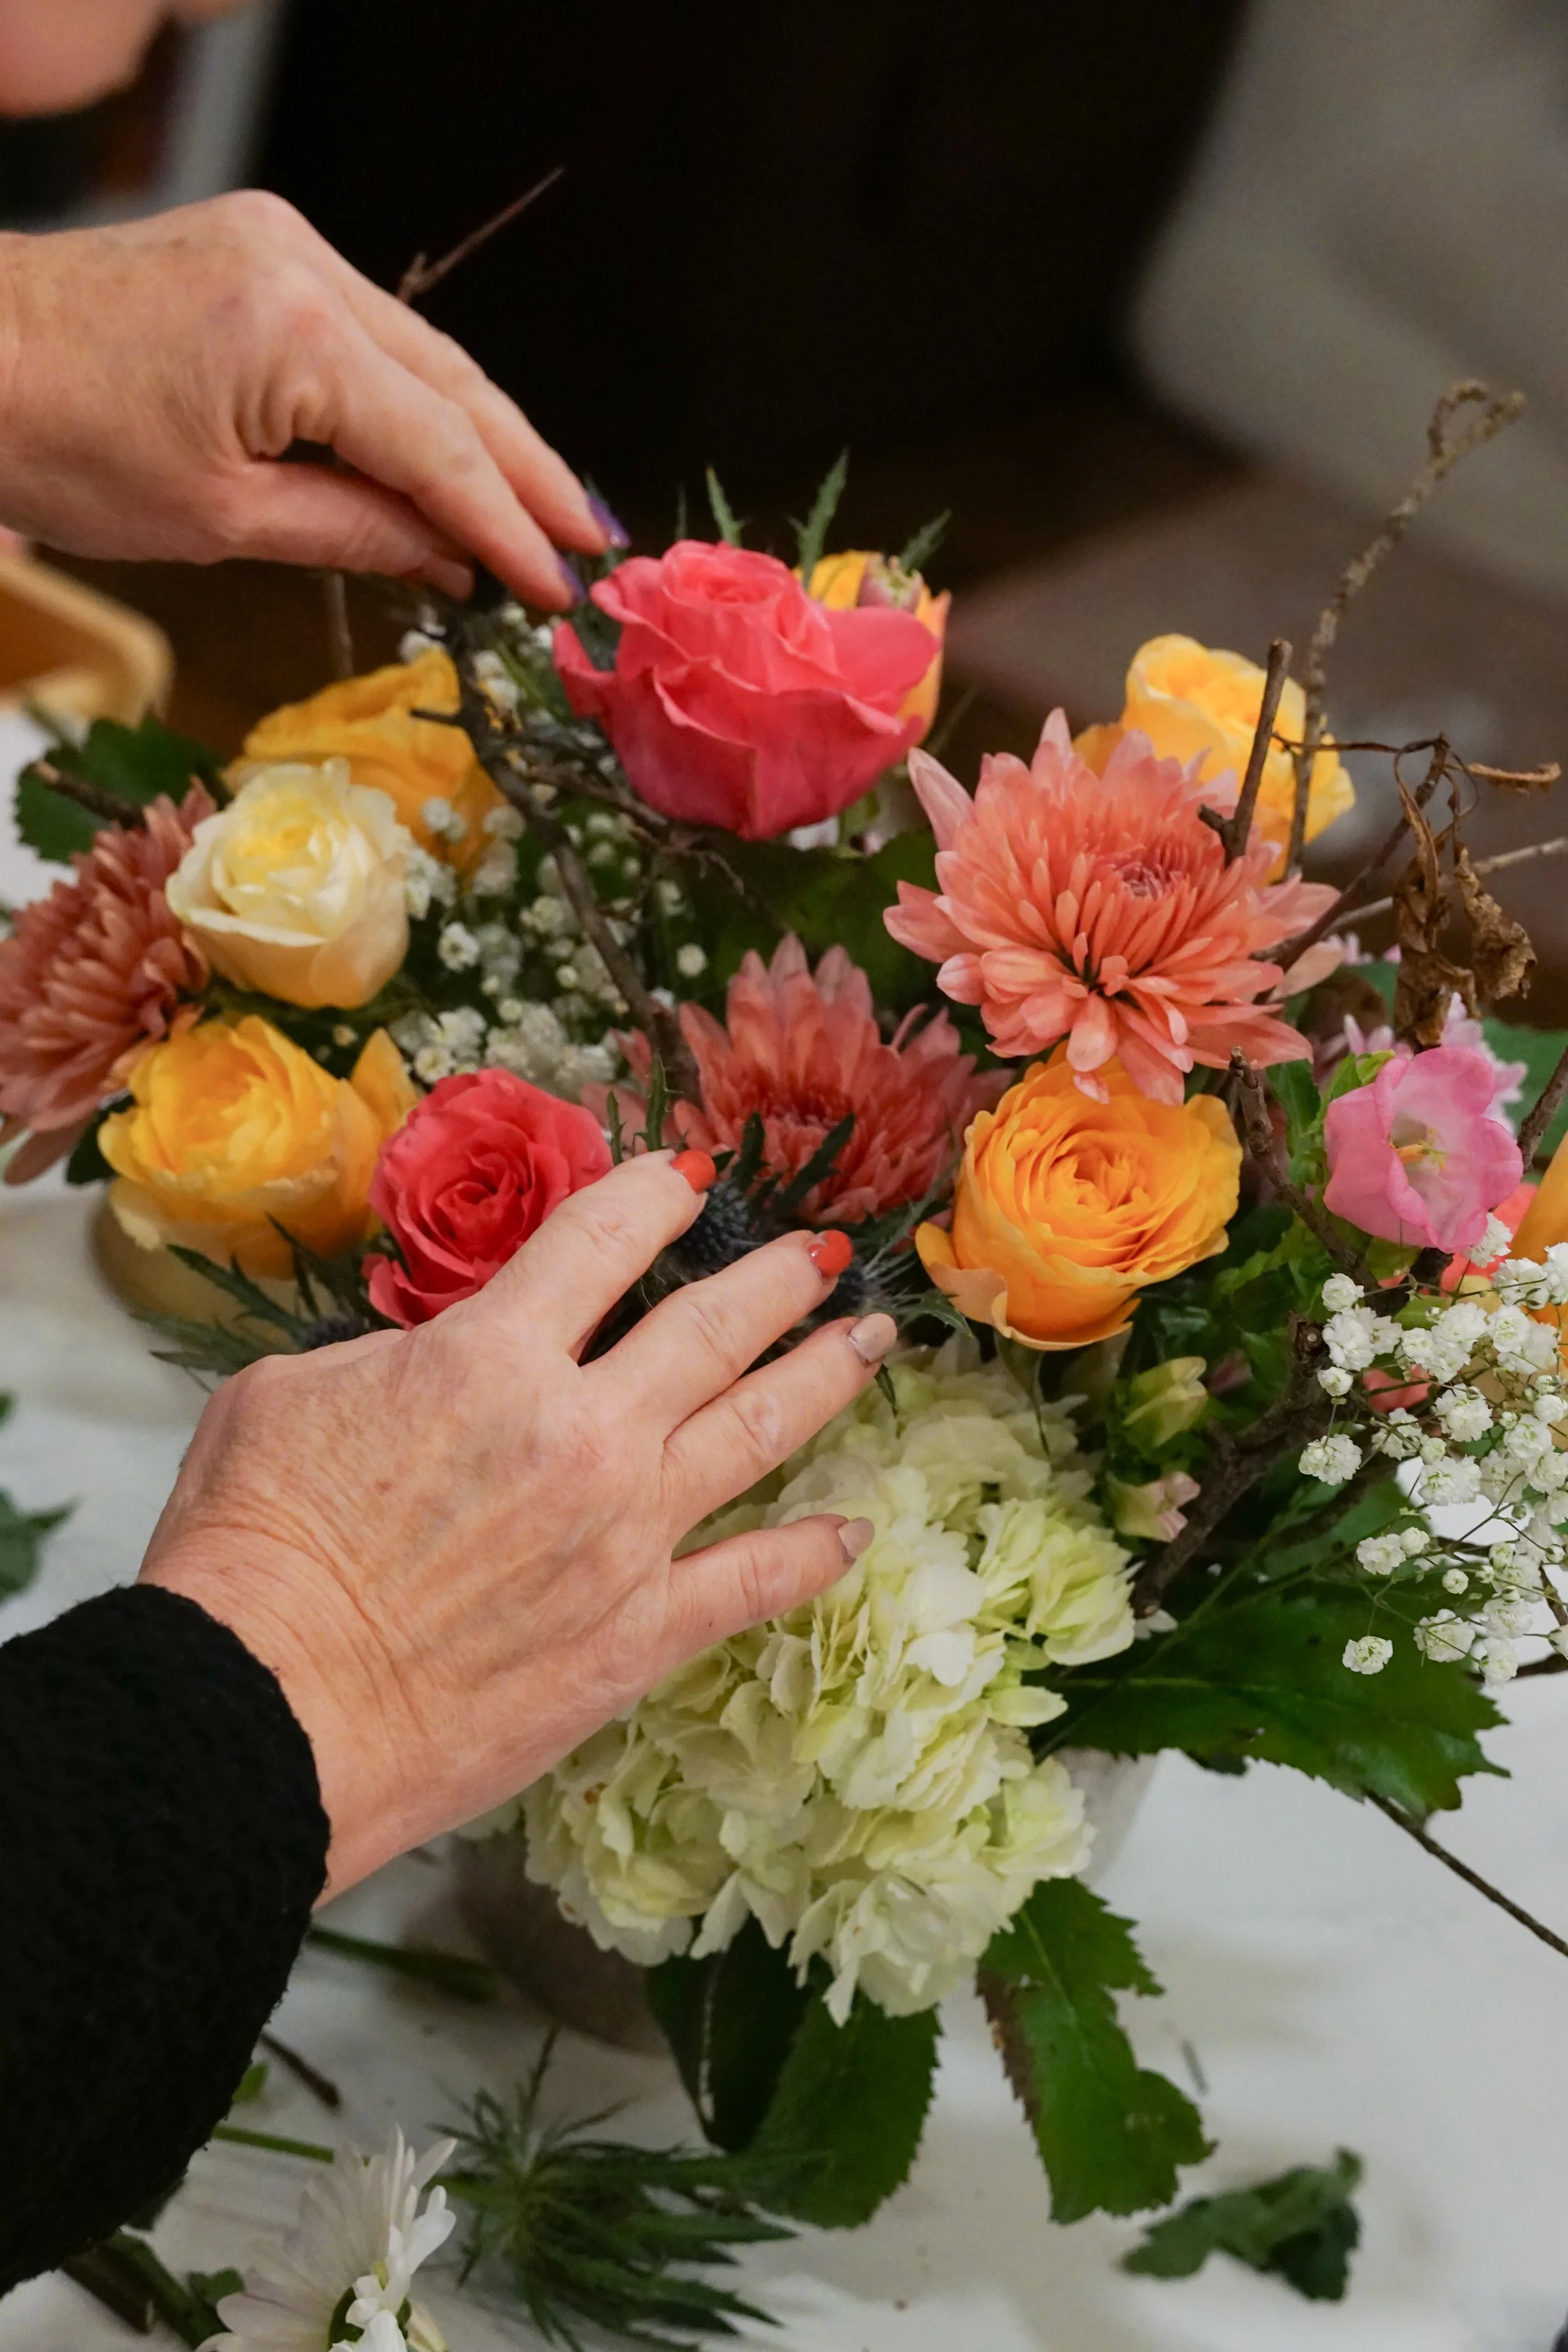
“Arrange in 3s” - create triangles. This tip has paid me major dividends already and is a great place to start. Pick 3 of the same flower and start placing them. Can you draw a triangle between the three? The triangles can be different shapes and sizes, close together or far apart, but avoid equilateral triangles (equal length sides).
Aim to have flowers of the same type on different eye planes. This is a continuation from the triangles tip. If you can draw a triangle between 3 flowers, and each is on a different horizontal and vertical plane, you’ve done great and created something interesting for the eye.
“Put the money in the front”. Think about where your arrangement will live. Put most of the florals into the side of the design that will be most viewed. If the arrangement will be seen at multiple angles, make sure the back still looks nice; maybe add more foliage to the back side so that it’s still a complete design for those moments you’ll see it from another angle.

Obviously, Maureen’s extensive knowledge and experience take over. She knows what she’s doing, how to place things, and what looks good. She placed the hellebore greens from our backyard near the bottom of the arrangement.
The above tips can help those of us who aren’t professionals practice and start to build something new. We can take our time, try something, rearrange it, try something else. Adjust the arrangement as you go, stepping back to see where there might be a gap or to shift something around.
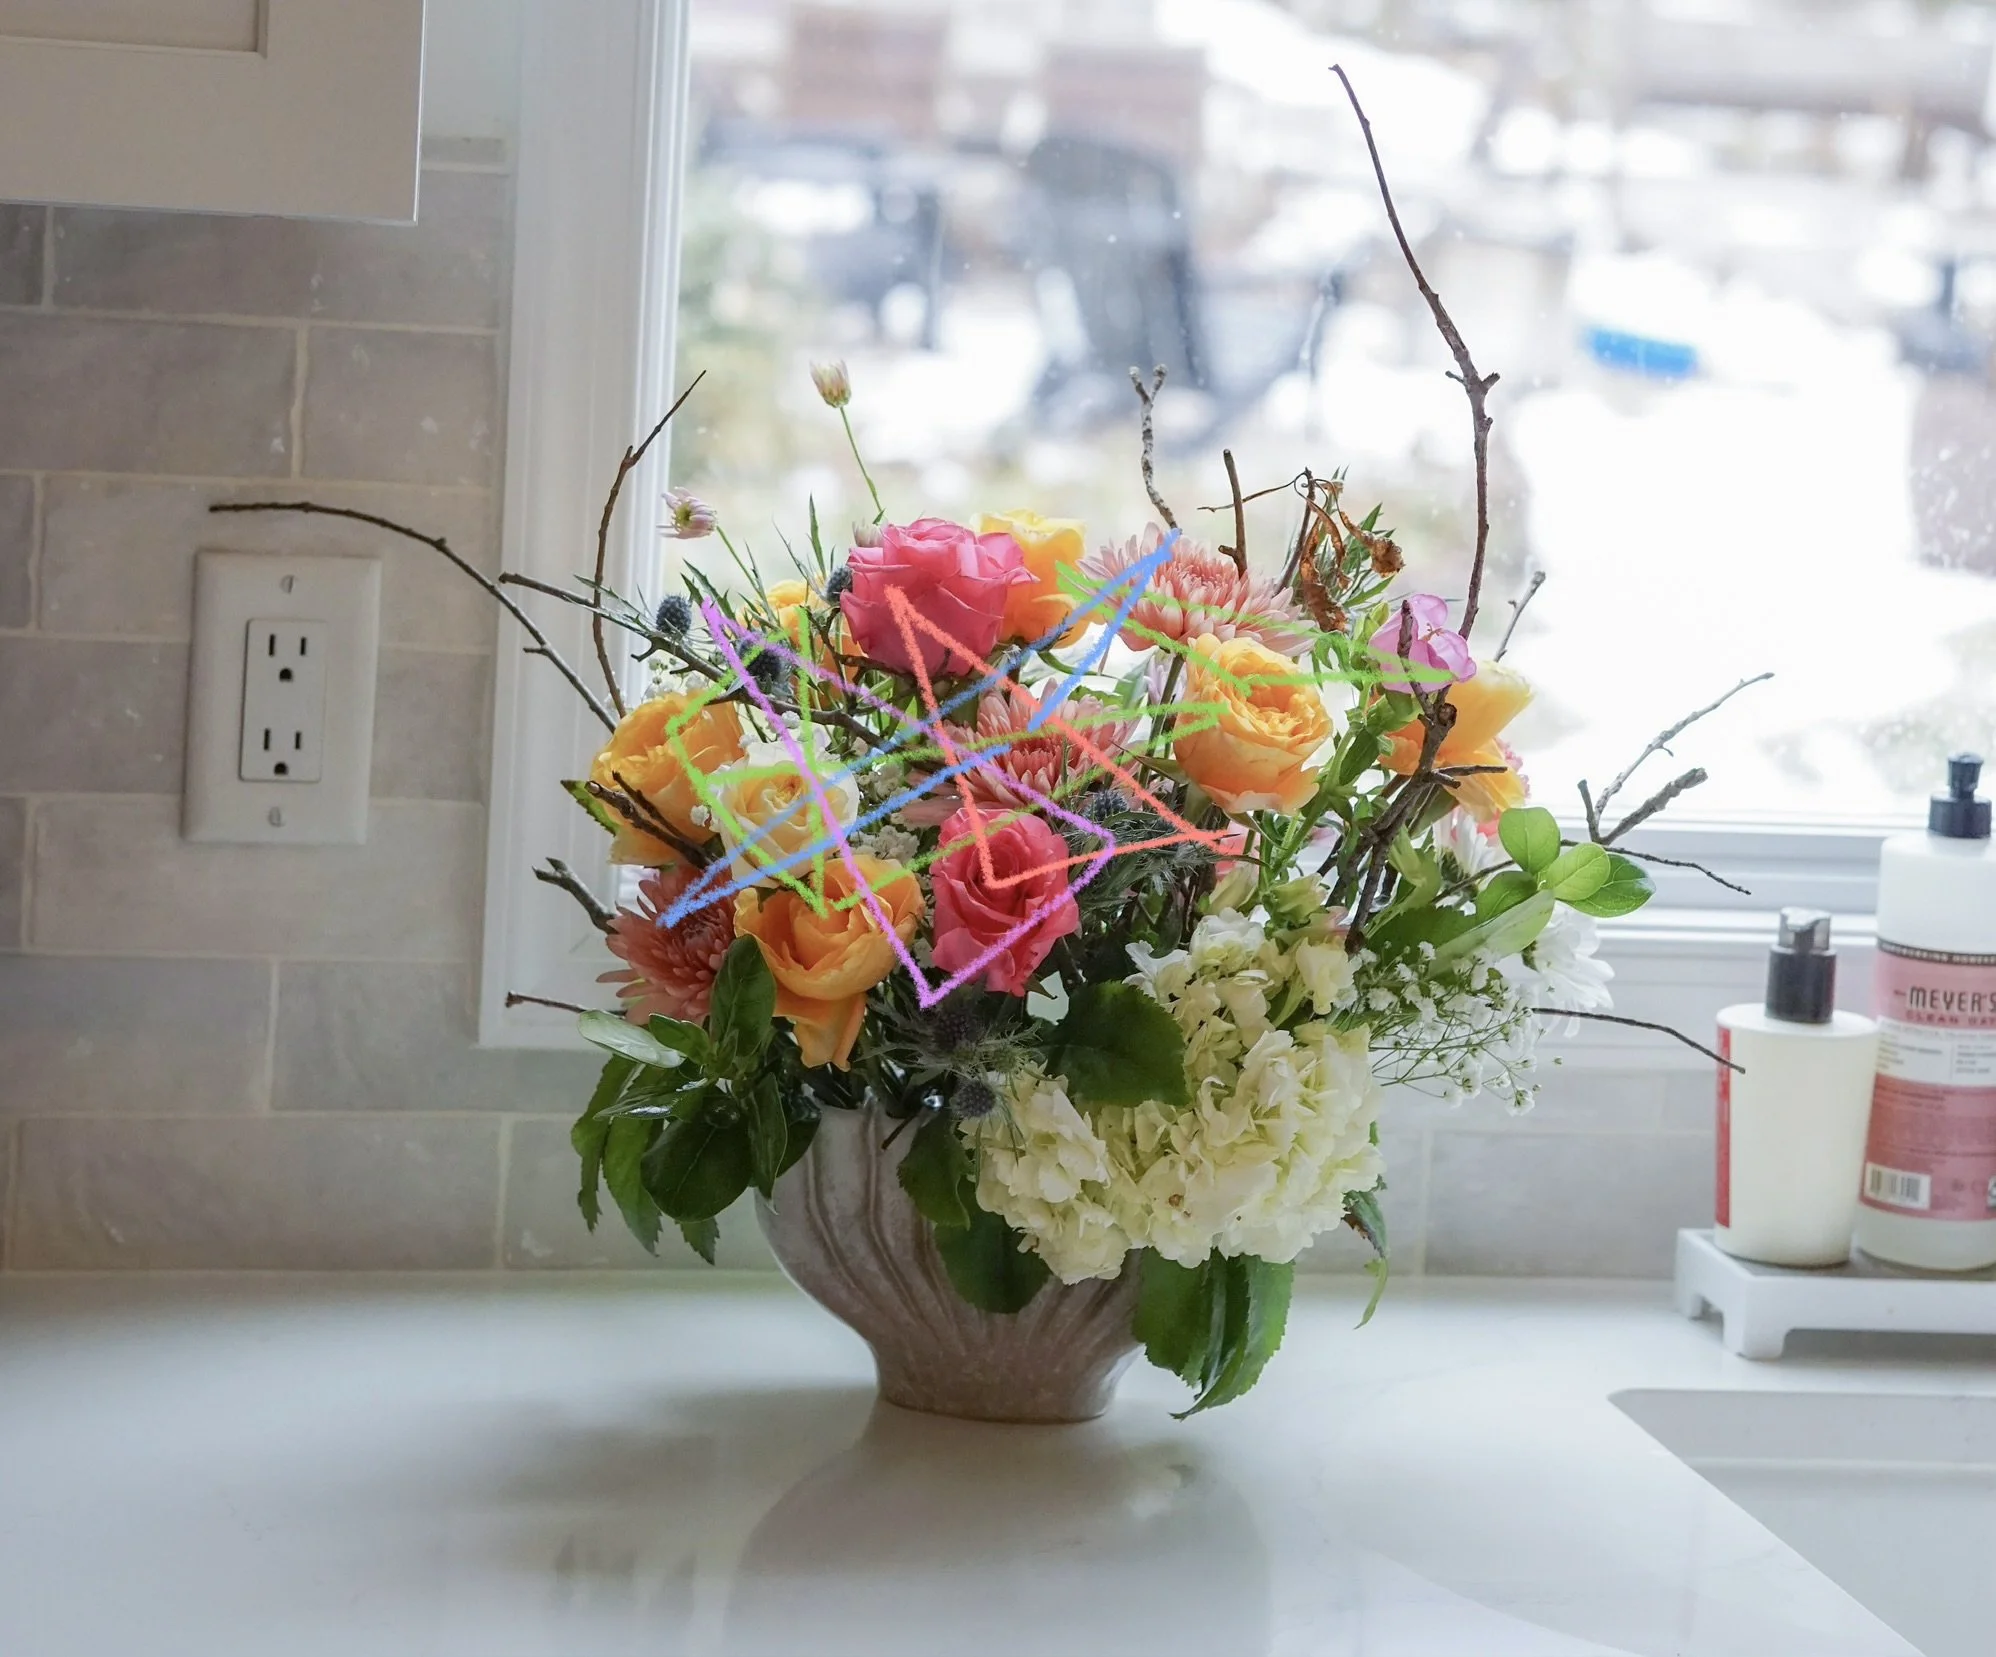
Notice the placement of flower types on different horizontal and vertical planes, as well as the various triangle shapes we are able to see
After you’re done — there’s maintenance. Maureen is also a fan of Trader Joes, but as a professional florist, she gets flowers for her arrangements directly from flower markets. Market flowers are likely to last longer due to a number of factors. But our grocery-store bouquet arrangements still have a good life ahead, especially with good maintenance!
Maintaining Your Arrangement
Water, and think about conditioning! Yay, a new flower term! I learned from Maureen that different flower varieties like different amounts of water—the conditioning of the flower. So, don’t just fill your vase to the tippity top with water. You don’t want the water line to drop below any stems, because the flowers will obviously wilt much faster, but you also don’t need a full vase. As you get to know your flowers, you’ll learn more intiutively what they need. Some flowers might only need a couple of inches of water, but some need more. Google can help those of us non-flower professionals while we’re learning. For an arrangement with multiple flower types, add enough water to meet the thirstiest stems’ needs; in this arrangement, the hydrangea needed the most water so Maureen added enough water to meet that flower’s needs.
You can also spritz water on certain blooms to keep them perky, for example, hydrangeas.
When greens and blooms do start to droop, pull them and adjust your arrangement. Maureen instructed me to spritz the hydrangea in this arrangement when she was gone to see if it might perk up, but if not, to remove it immediately. You can then shift things around to cover any gaps, bearing in mind the arranging tips from above.
I hope you picked up a few useful tips. Thank you of course to Maureen for being the brains and teacher behind this experiment. We are so grateful to learn from you and bring a little more beauty into our homes!

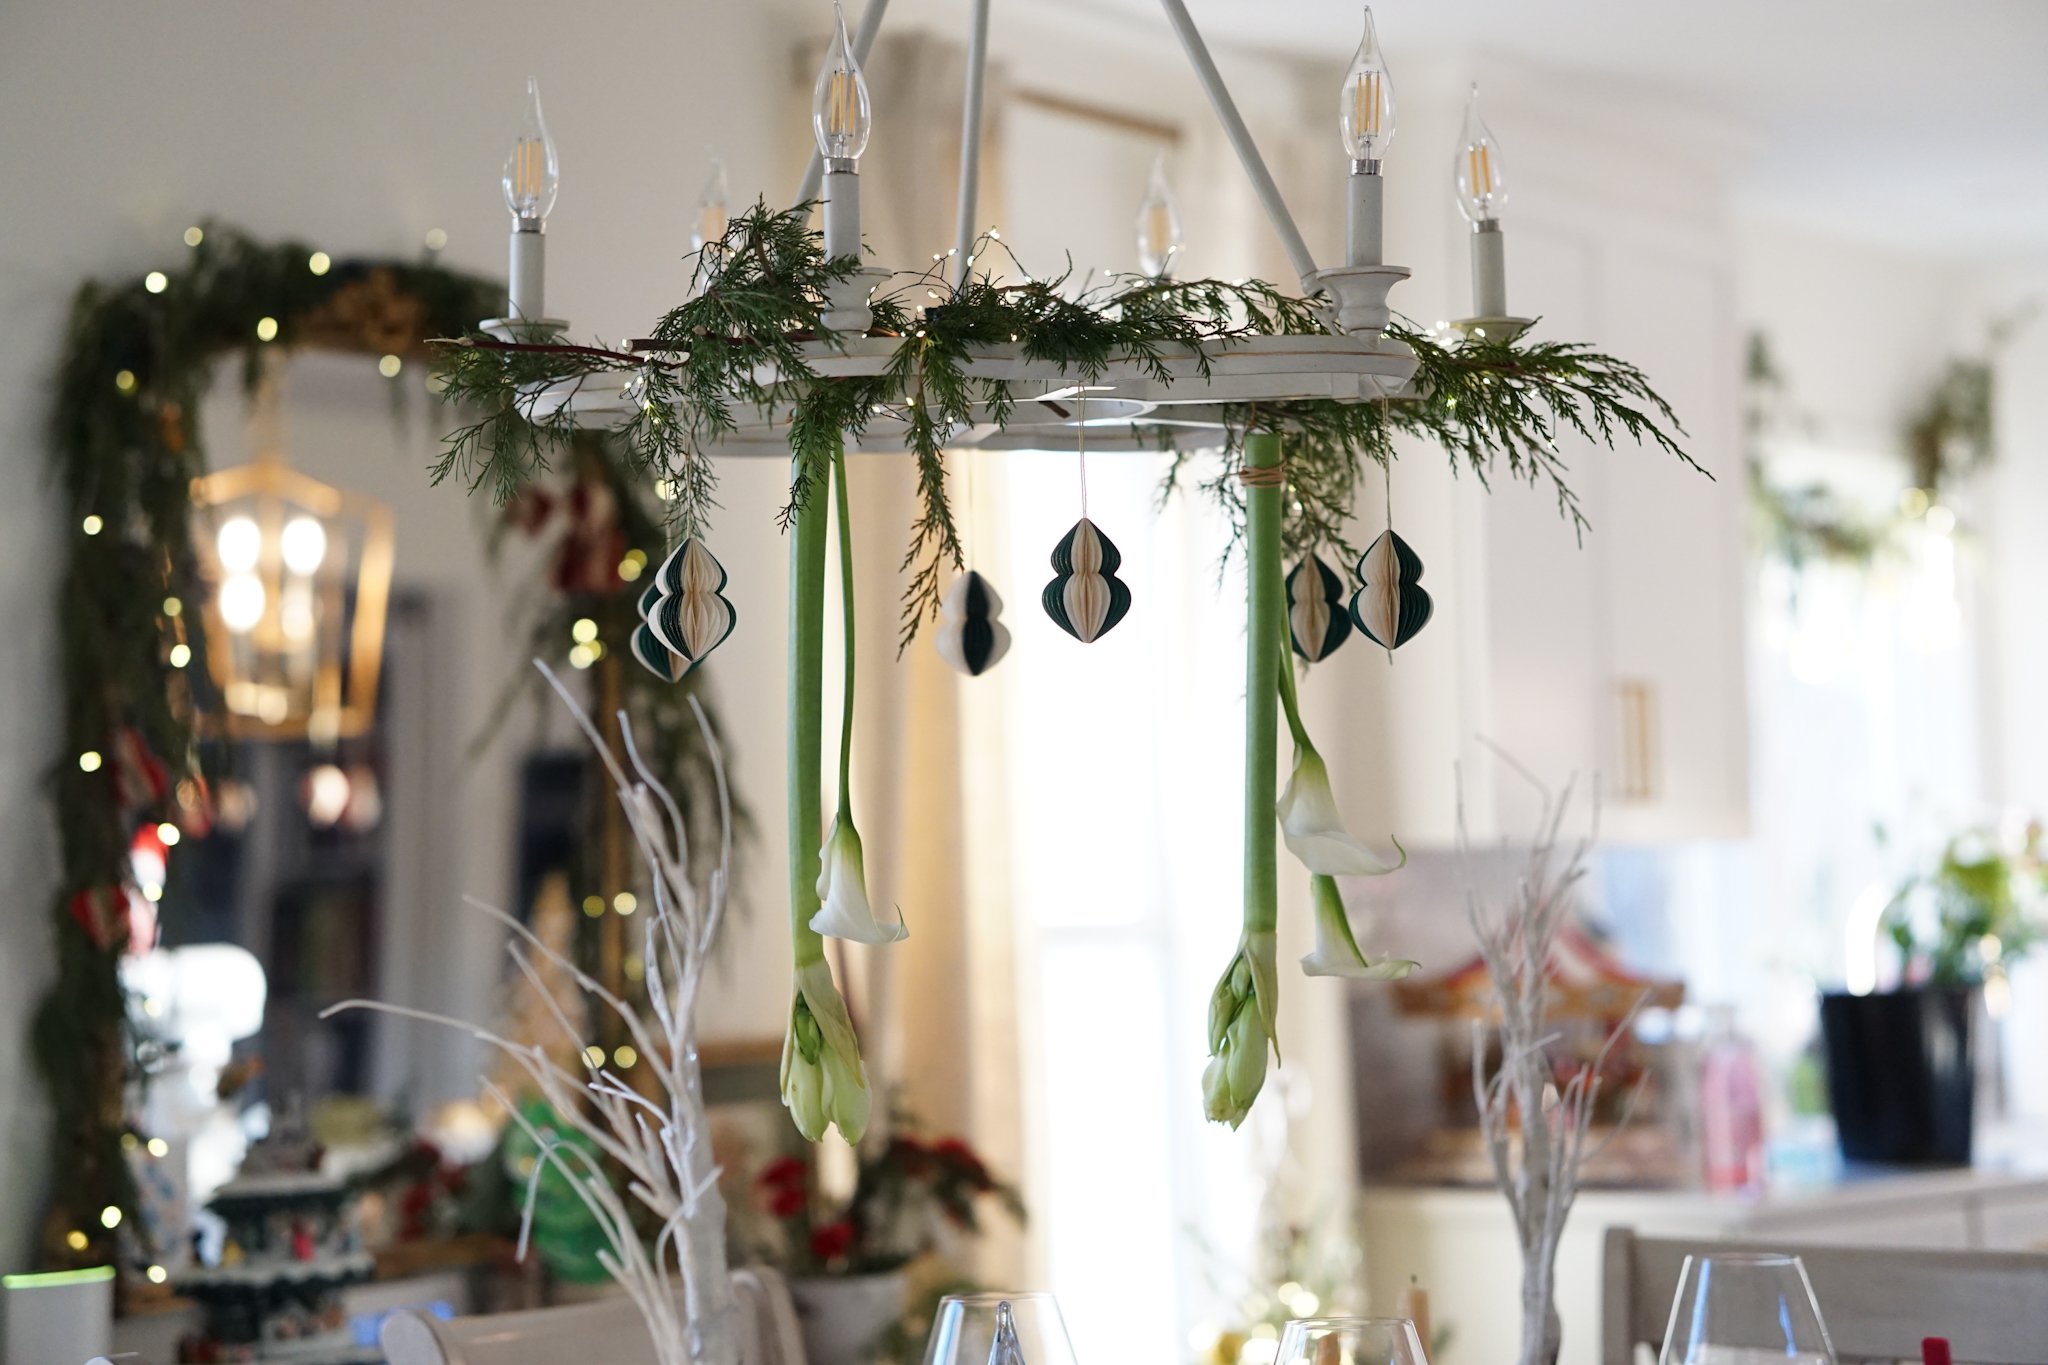
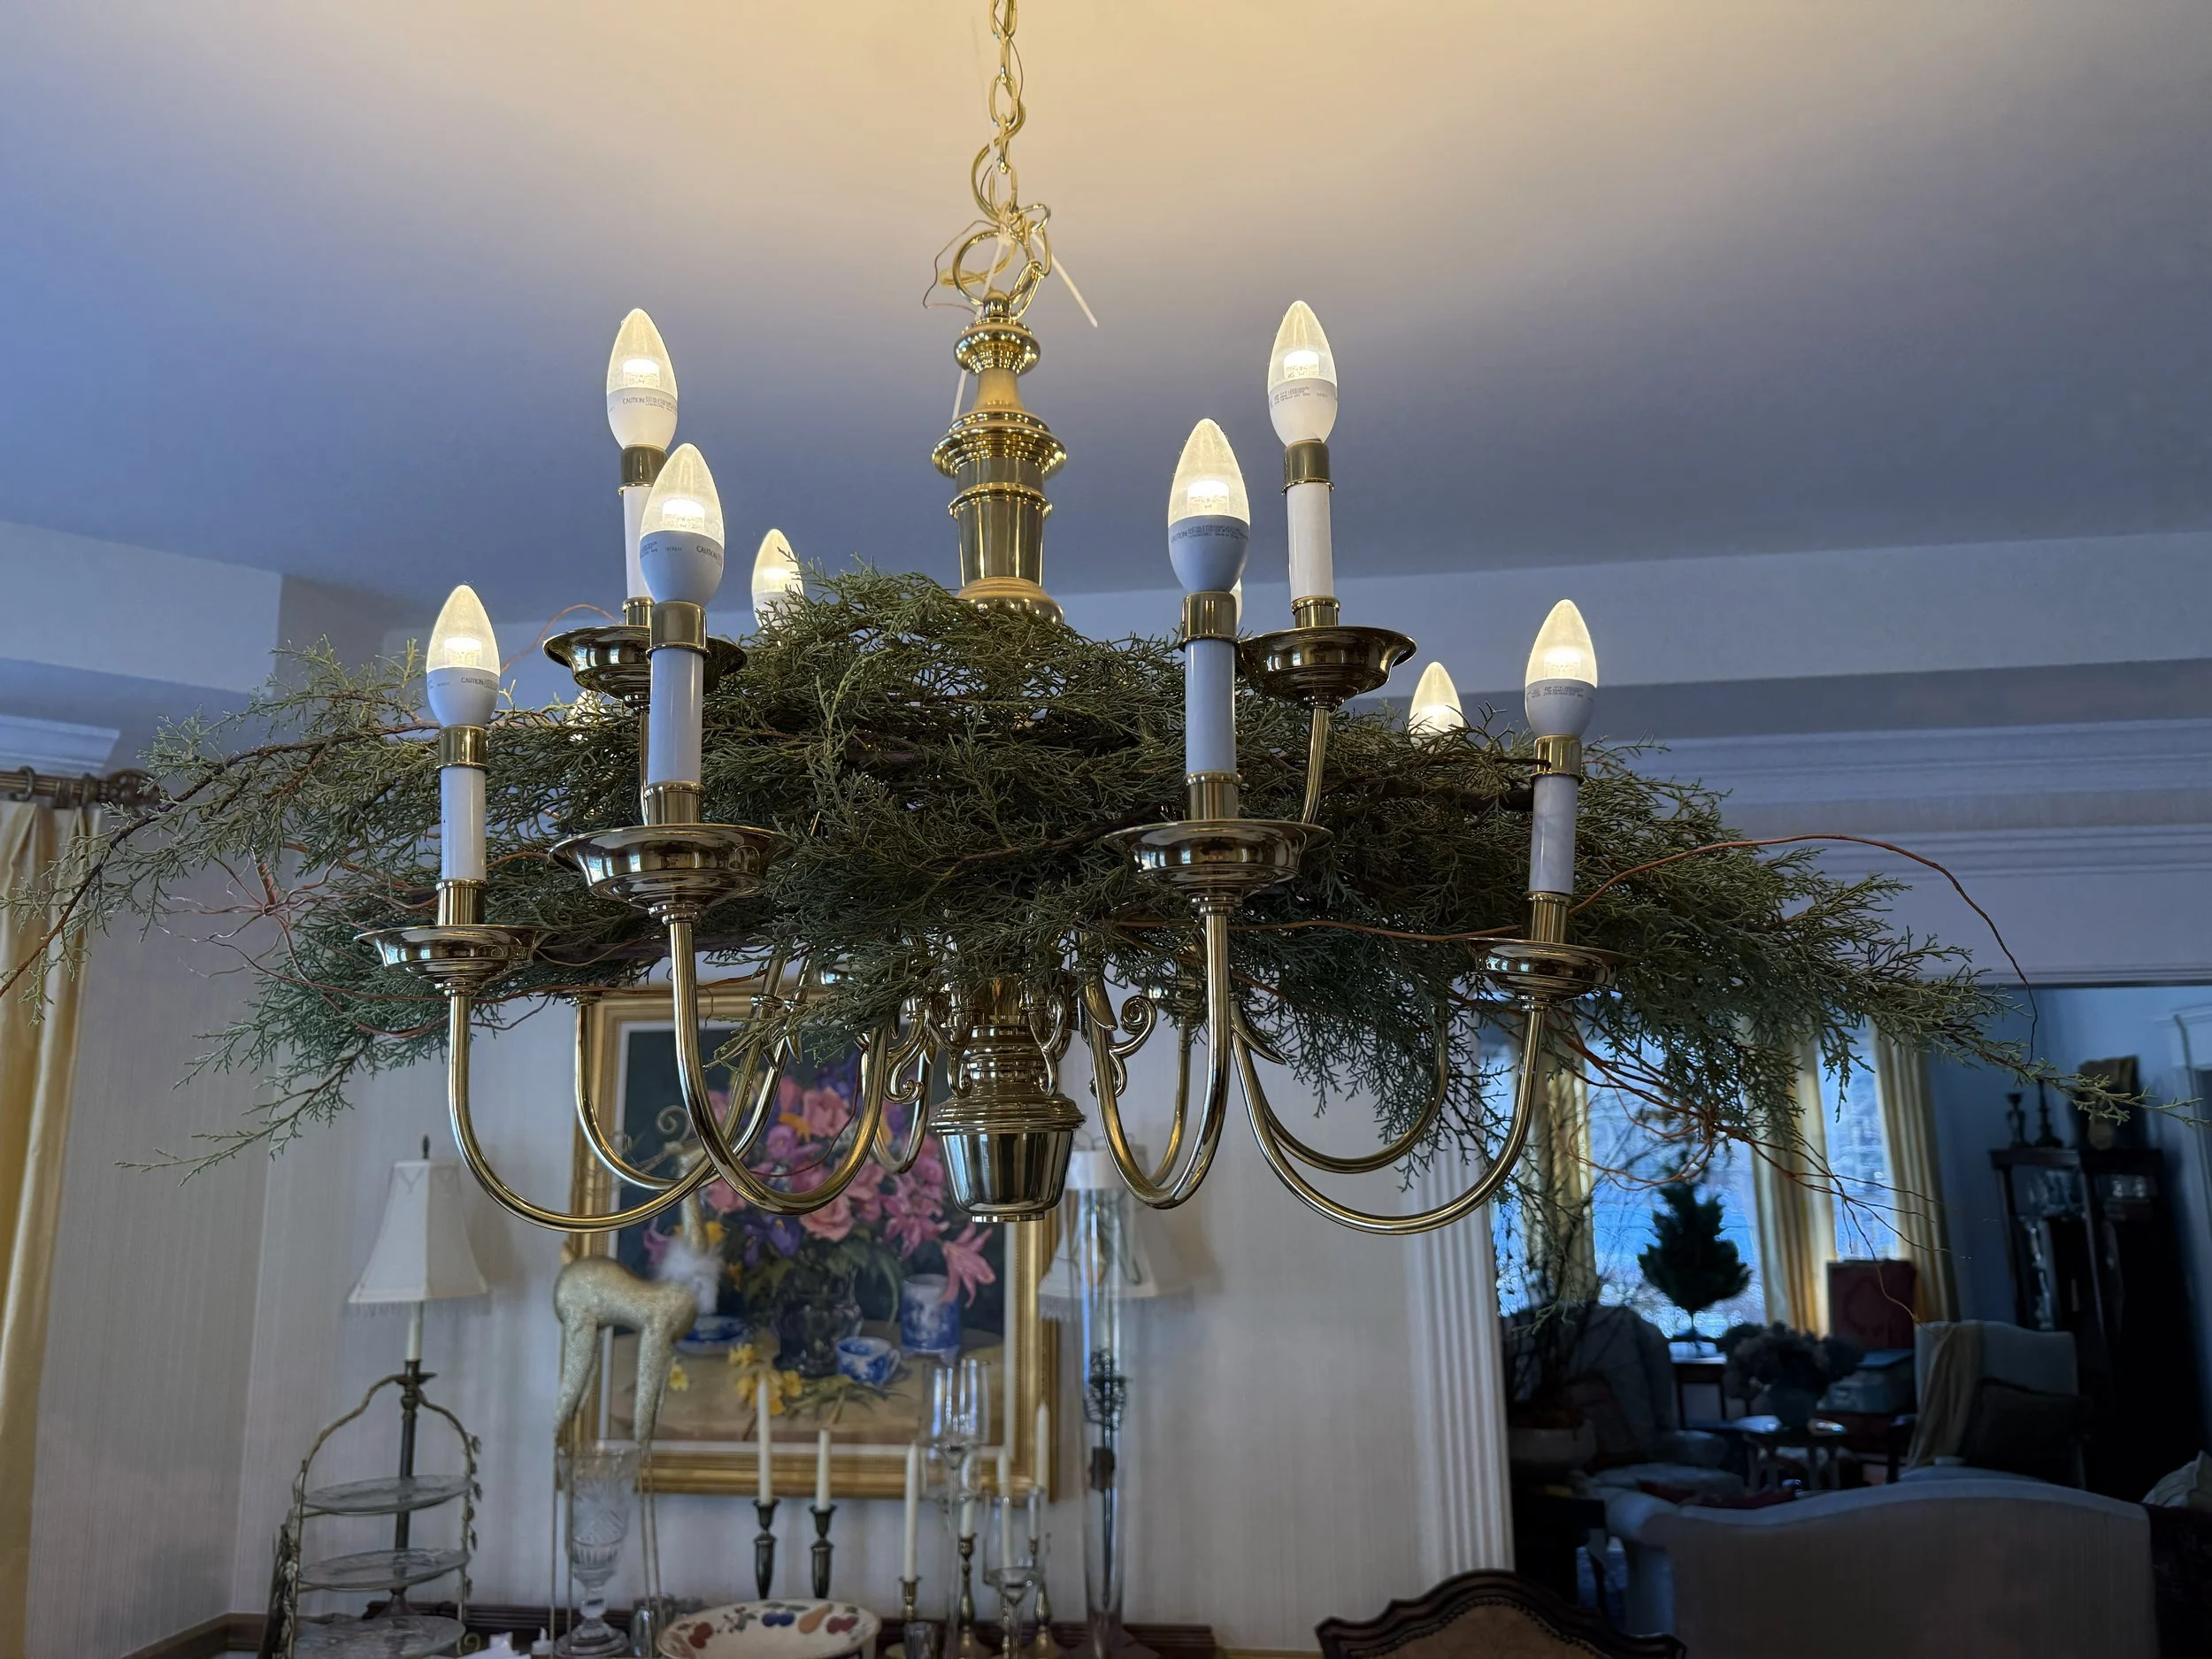
A truly magical chandelier floral arrangement
Full of greenery, cascading flowers, and twinkling lights—this statement floral centerpiece will take your breath away.
When I started Rue Noelle last month, my brain was overflowing with ideas. It has been fun to let them slowly marinate and evolve. One of the first and most tangible, exciting ideas that Tommy and I had was to collaborate with his mom, my mother-in-law, Maureen Christmas. Maureen is a floral designer based in Massachusetts—her company is called Floral Notes—and her work is stunning. She creates true works of art, follow the link and see for yourself!
Maureen has done flowers for the Dalai Lama. Her work has graced museums like the Boston Museum of Fine Art. She did the flowers for our wedding and countless others. She participates in and judges flower shows. She travels the world both to learn and teach techniques. She has a long list of accolades and certifications. Tommy and I once “modeled” flowers for her during a floral conference in Boston. Though we were aware of how talented Maureen is, it was beyond impressive to see the huge crowd she was instructing—pen and paper in audience members’ hands furiously taking notes—as we walked across the stage literally wearing her floral designs.
I love having flowers and greens around the house and take great pleasure in putting together my own little arrangements, well aware that I have no idea what I’m doing but am very happy putting together something that brings me joy. Whenever Maureen would travel to see us, I remember gazing at my suddenly feeble looking arrangements and thinking, well… this is going to get ripped to shreds. Having someone who is a true subject matter expert look at your work changes your own lens preemptively. This is true in both work and at home.
However, Maureen taught us what it looks like to not just be a true expert but a true artist. Instead of coming to our home and looking at flowers we’d put together with a critical eye, changing them or telling us what we’d done wrong, she encouraged us. I remember asking her for feedback and she’d say something like, “no, this is great. It’s all about what you love.”
That’s what true artistry should be about, I’ve realized. We’ve all experienced someone giving us unsolicited criticism over some aspect of our lives. How you parent, how you feed your kids, how you spend your time, how you spend your money, how you decorate your house, anything. Sometimes that unsolicited critic is in our own mind. But a true artist encourages. They understand the magic of creating and the beauty in finding what speaks to your soul, translating that into an art form, and how powerful it is when you are the one making those discoveries. So rather than impose their idea of how something should look, they encourage you, empower you, and inspire you.
So for that, Maureen, I thank you.
Despite all of that—I know what a wealth of knowledge experts and artists hold. Their minds are like treasure troves, years of experience lived and knowledge gathered. Being an extremely curious person and a dreamer, aware of this in-depth floral knowledge my mother-in-law has, and knowing that I was on the cusp of starting my own little company, an idea came to me to see if Maureen would be up for gifting us with some of her knowledge. She was!
The goal for this series partnering with Maureen is to help myself and anyone interested increase their floral knowledge and abilities. Maureen has so many tips and tricks, and as with many skills learned in life, some things that seem impossible to achieve from the outside can actually be achieved when you break them down into simple steps. Personally, I’d love to increase the tools I have on hand at home for simple but more elevated arrangements, understand how to incorporate things I have in my home or can find in my backyard, and create some beautiful arrangements. I hope that some of you out there are excited about this, too!
I feel so lucky that Maureen is sharing her knowledge. For this first piece, Maureen and I went back and forth with ideas and she came up with this magical piece. She walked us through step by step, gave an overview of tools to use (most can be substituted with things you likely already have!), and sent plenty of photos and videos to help guide us, as well as live tips on FaceTime. In the post below, I’ve included photos of us creating our arrangements in our home as well as the photos she used too, since she created this for her own Christmas table.
I had intended to get this on the blog sooner but time slips away faster than you think in mid-to-late December so here we are on Christmas eve, my favorite day of the year. A fire is crackling, I’ve got a plate of Christmas cookies and mug of hot tea, and my soul is content. I hope yours is too and for those who celebrate, Merry Christmas Eve.
xo,
Shannon
A Magical Holiday Floral Centerpiece for your Chandelier
Floral arrangement designed by: Maureen Christmas, AIFD, CFD, EMC, of Floral Notes
Written and photographed by: Shannon Christmas (no acronyms), of Noelle, L.L.C.
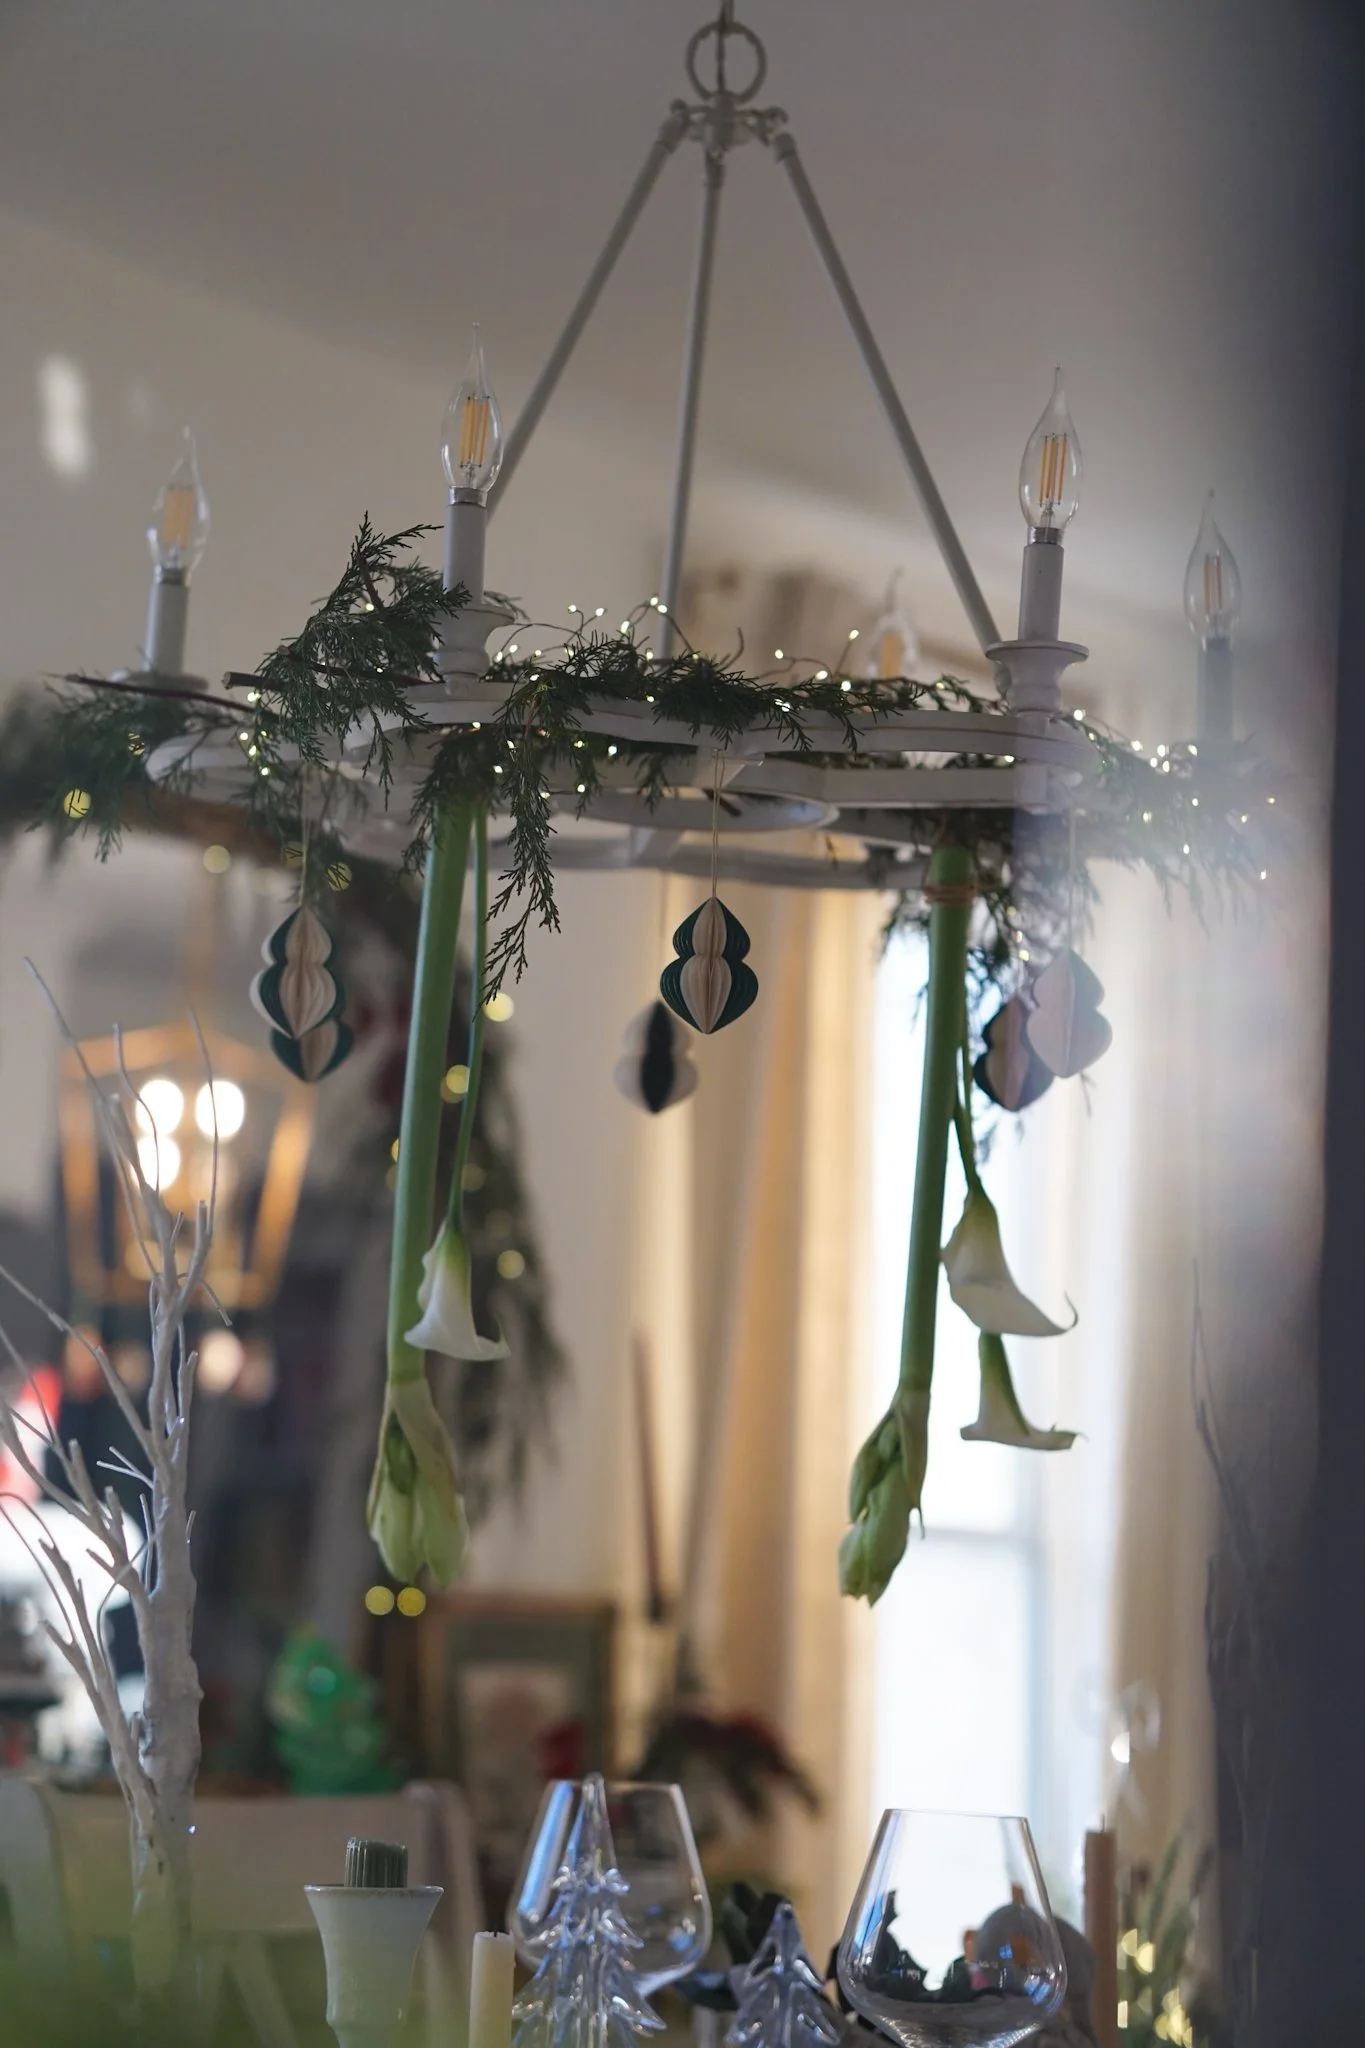
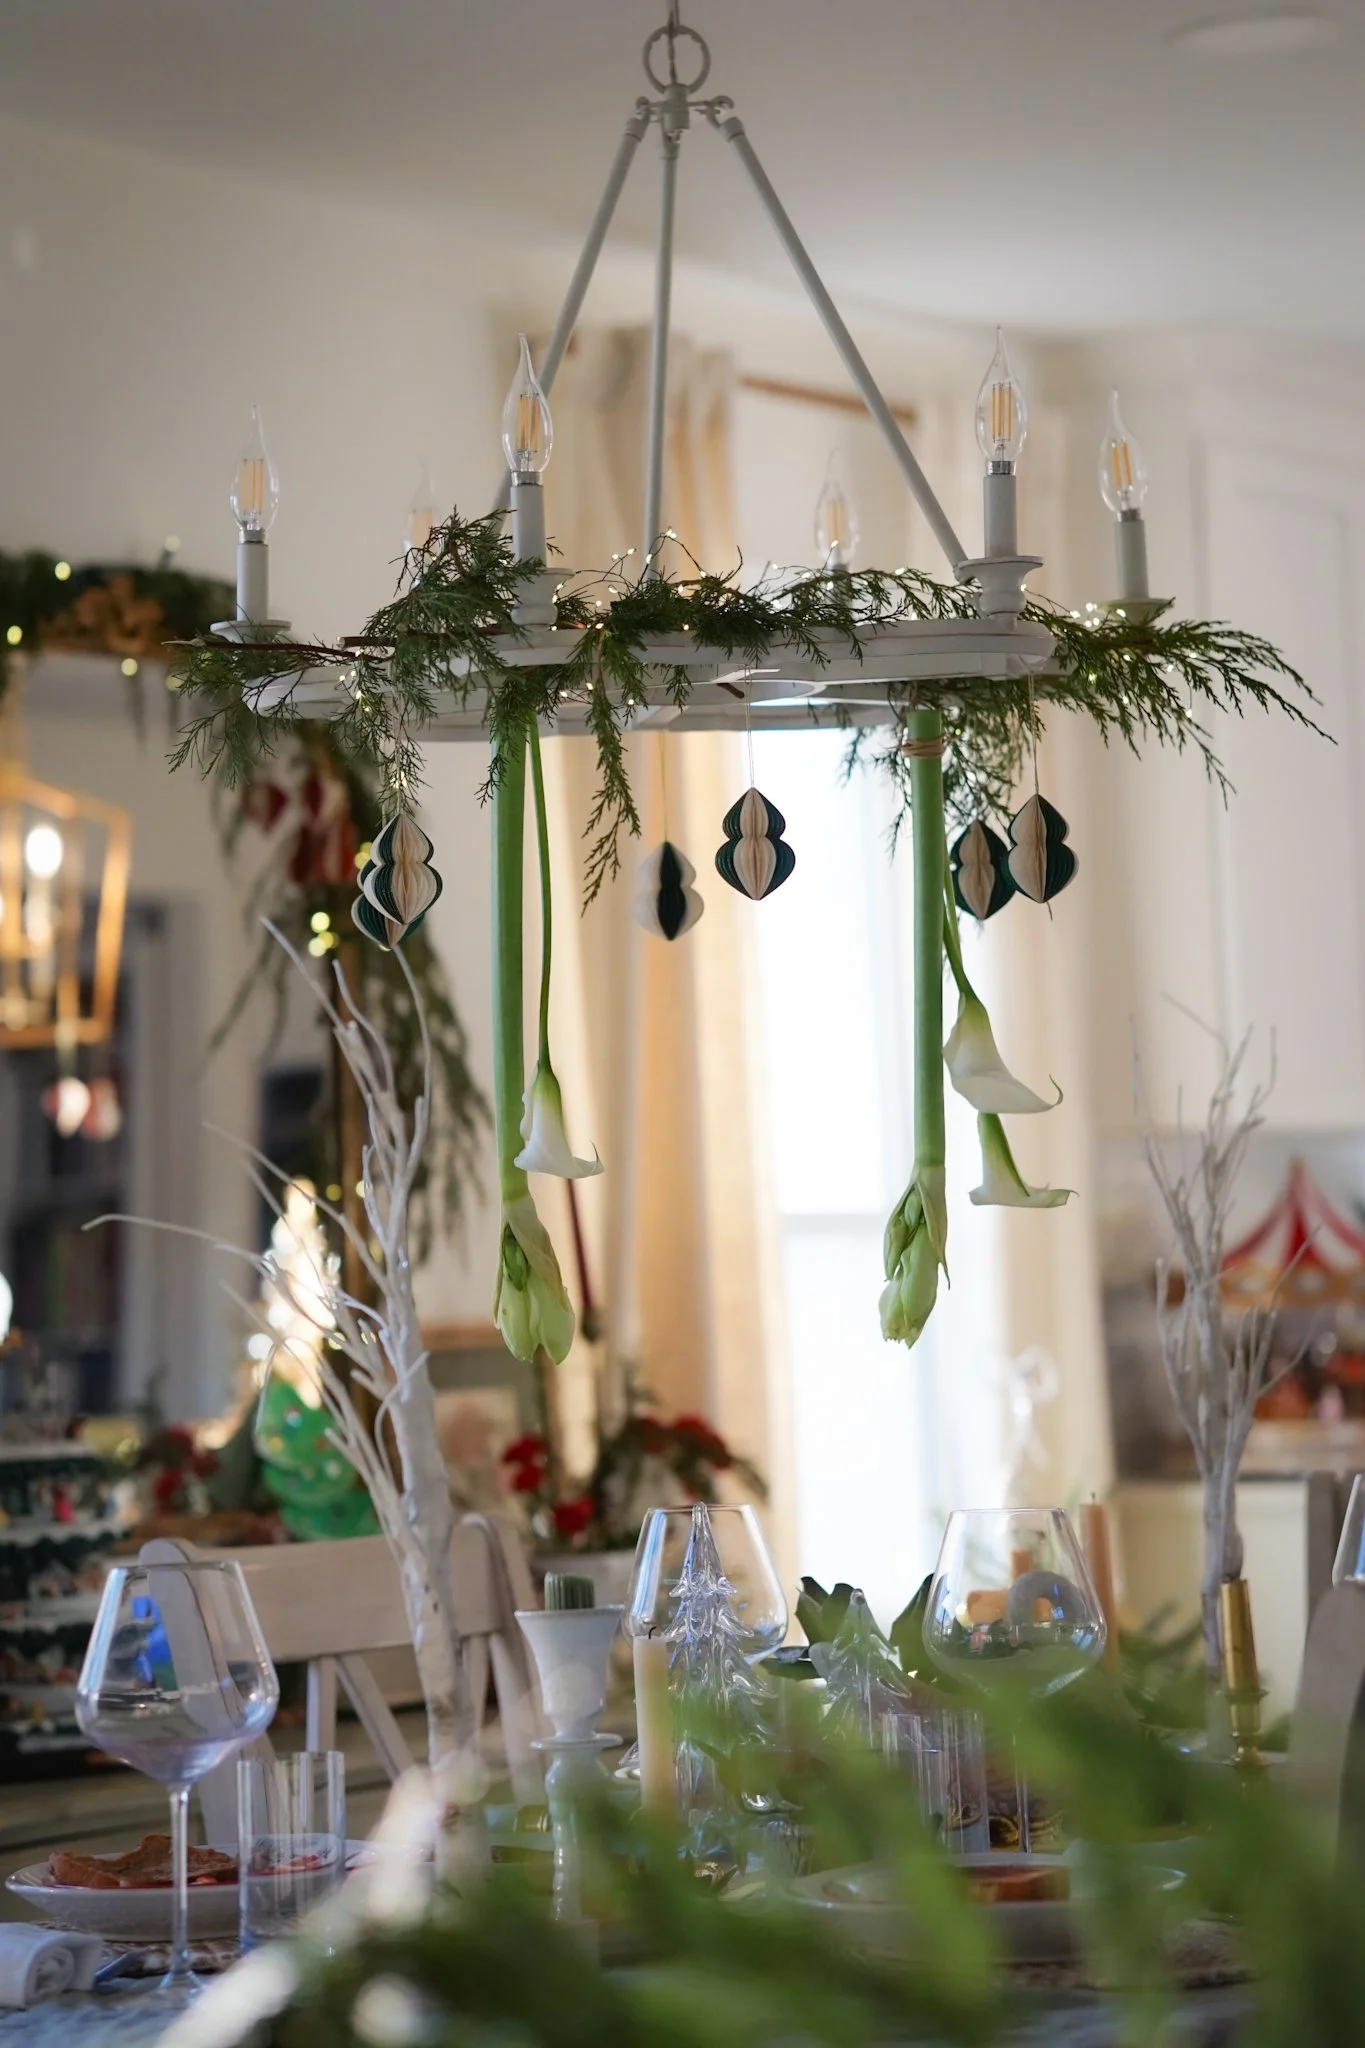
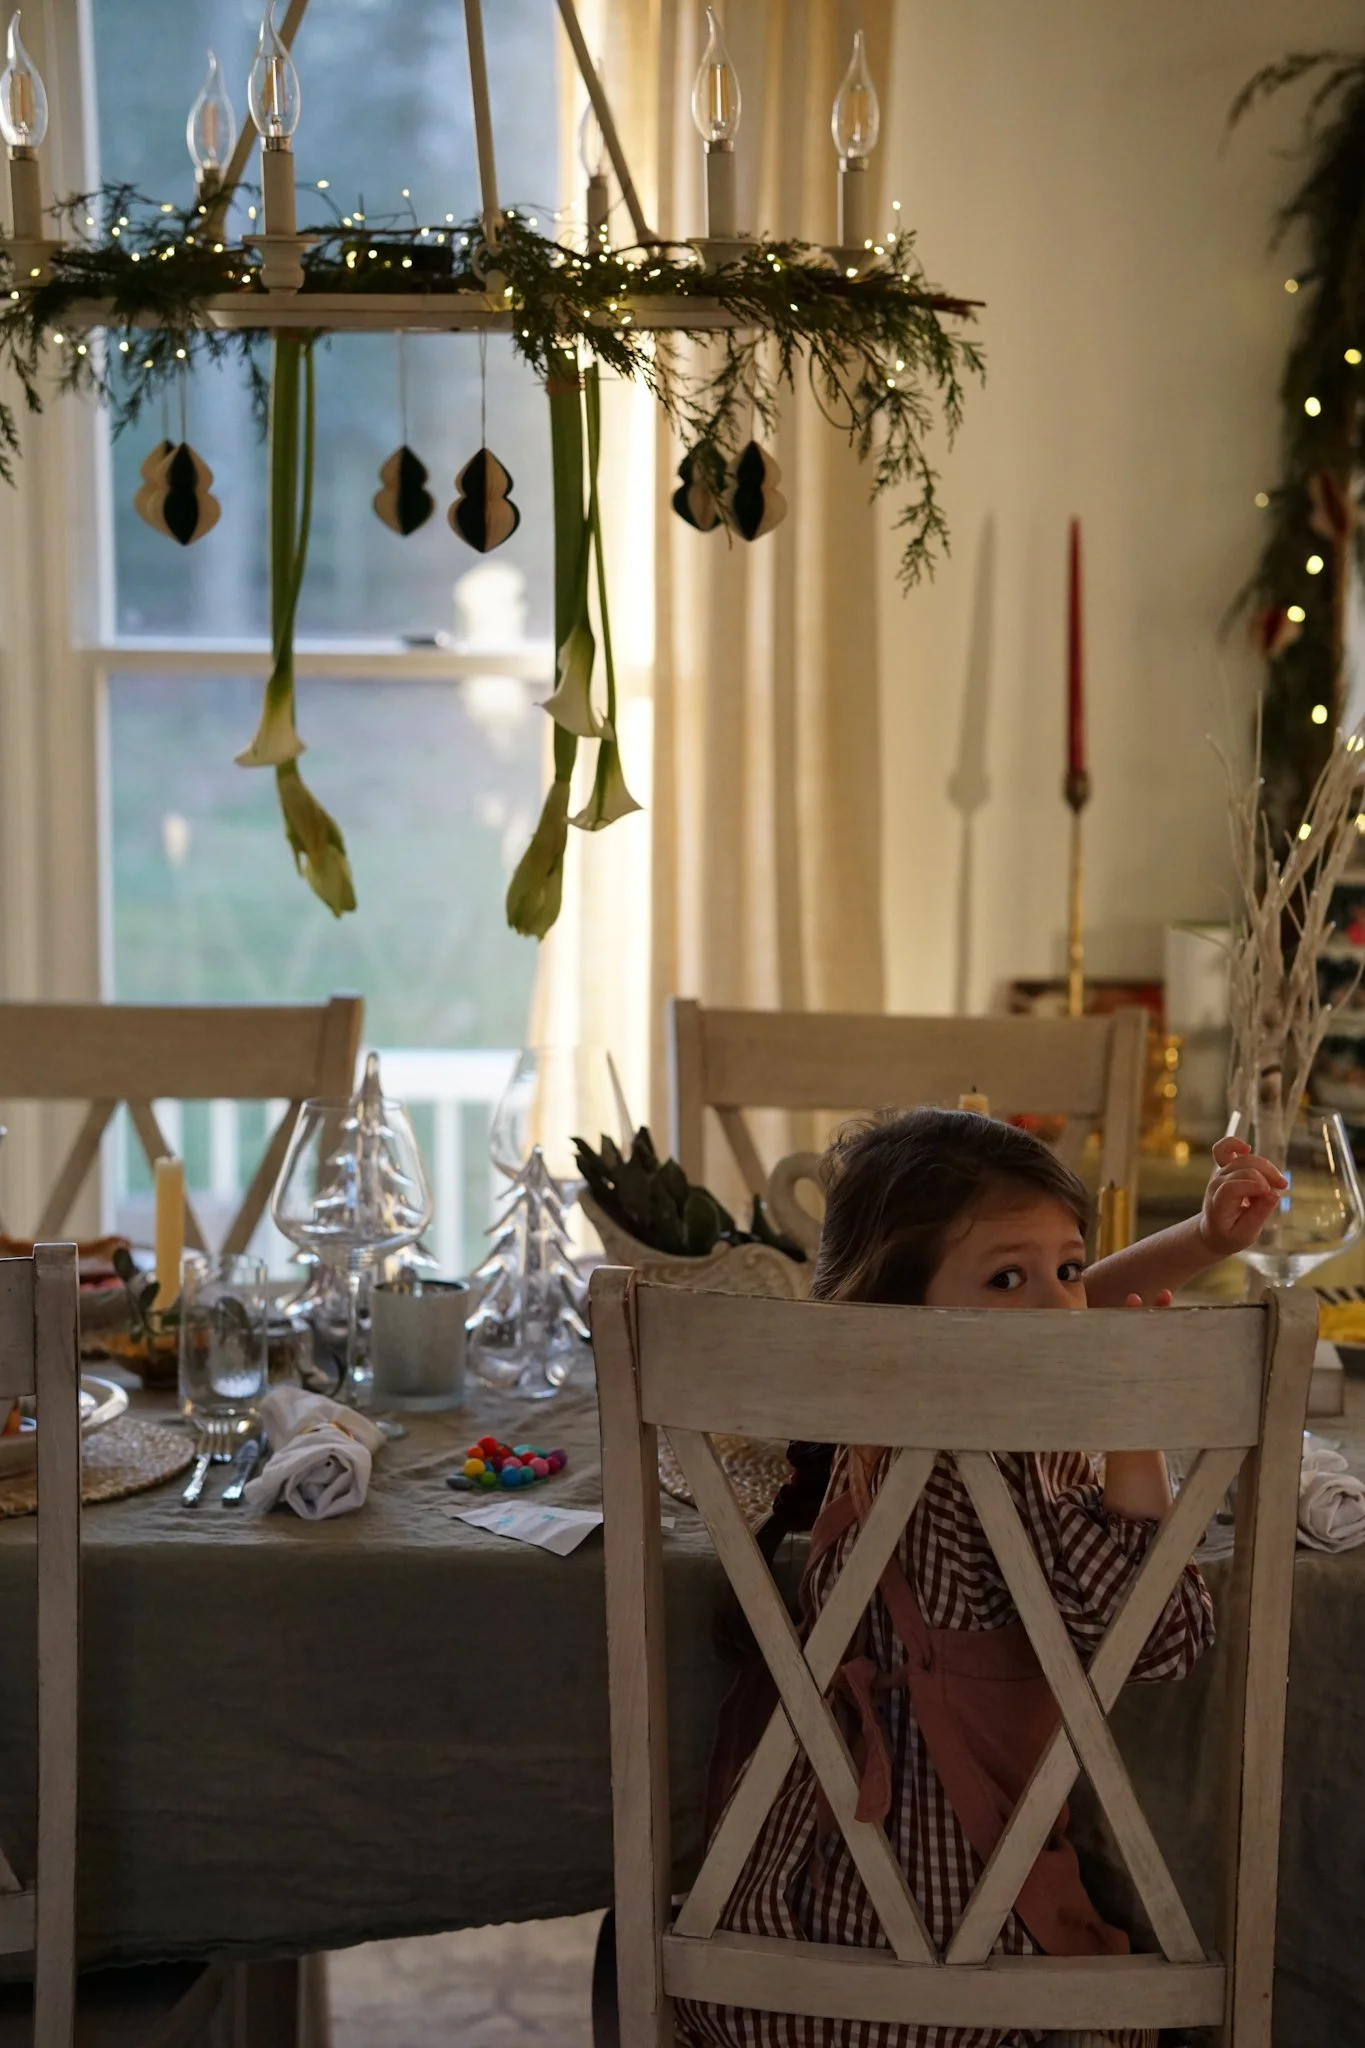
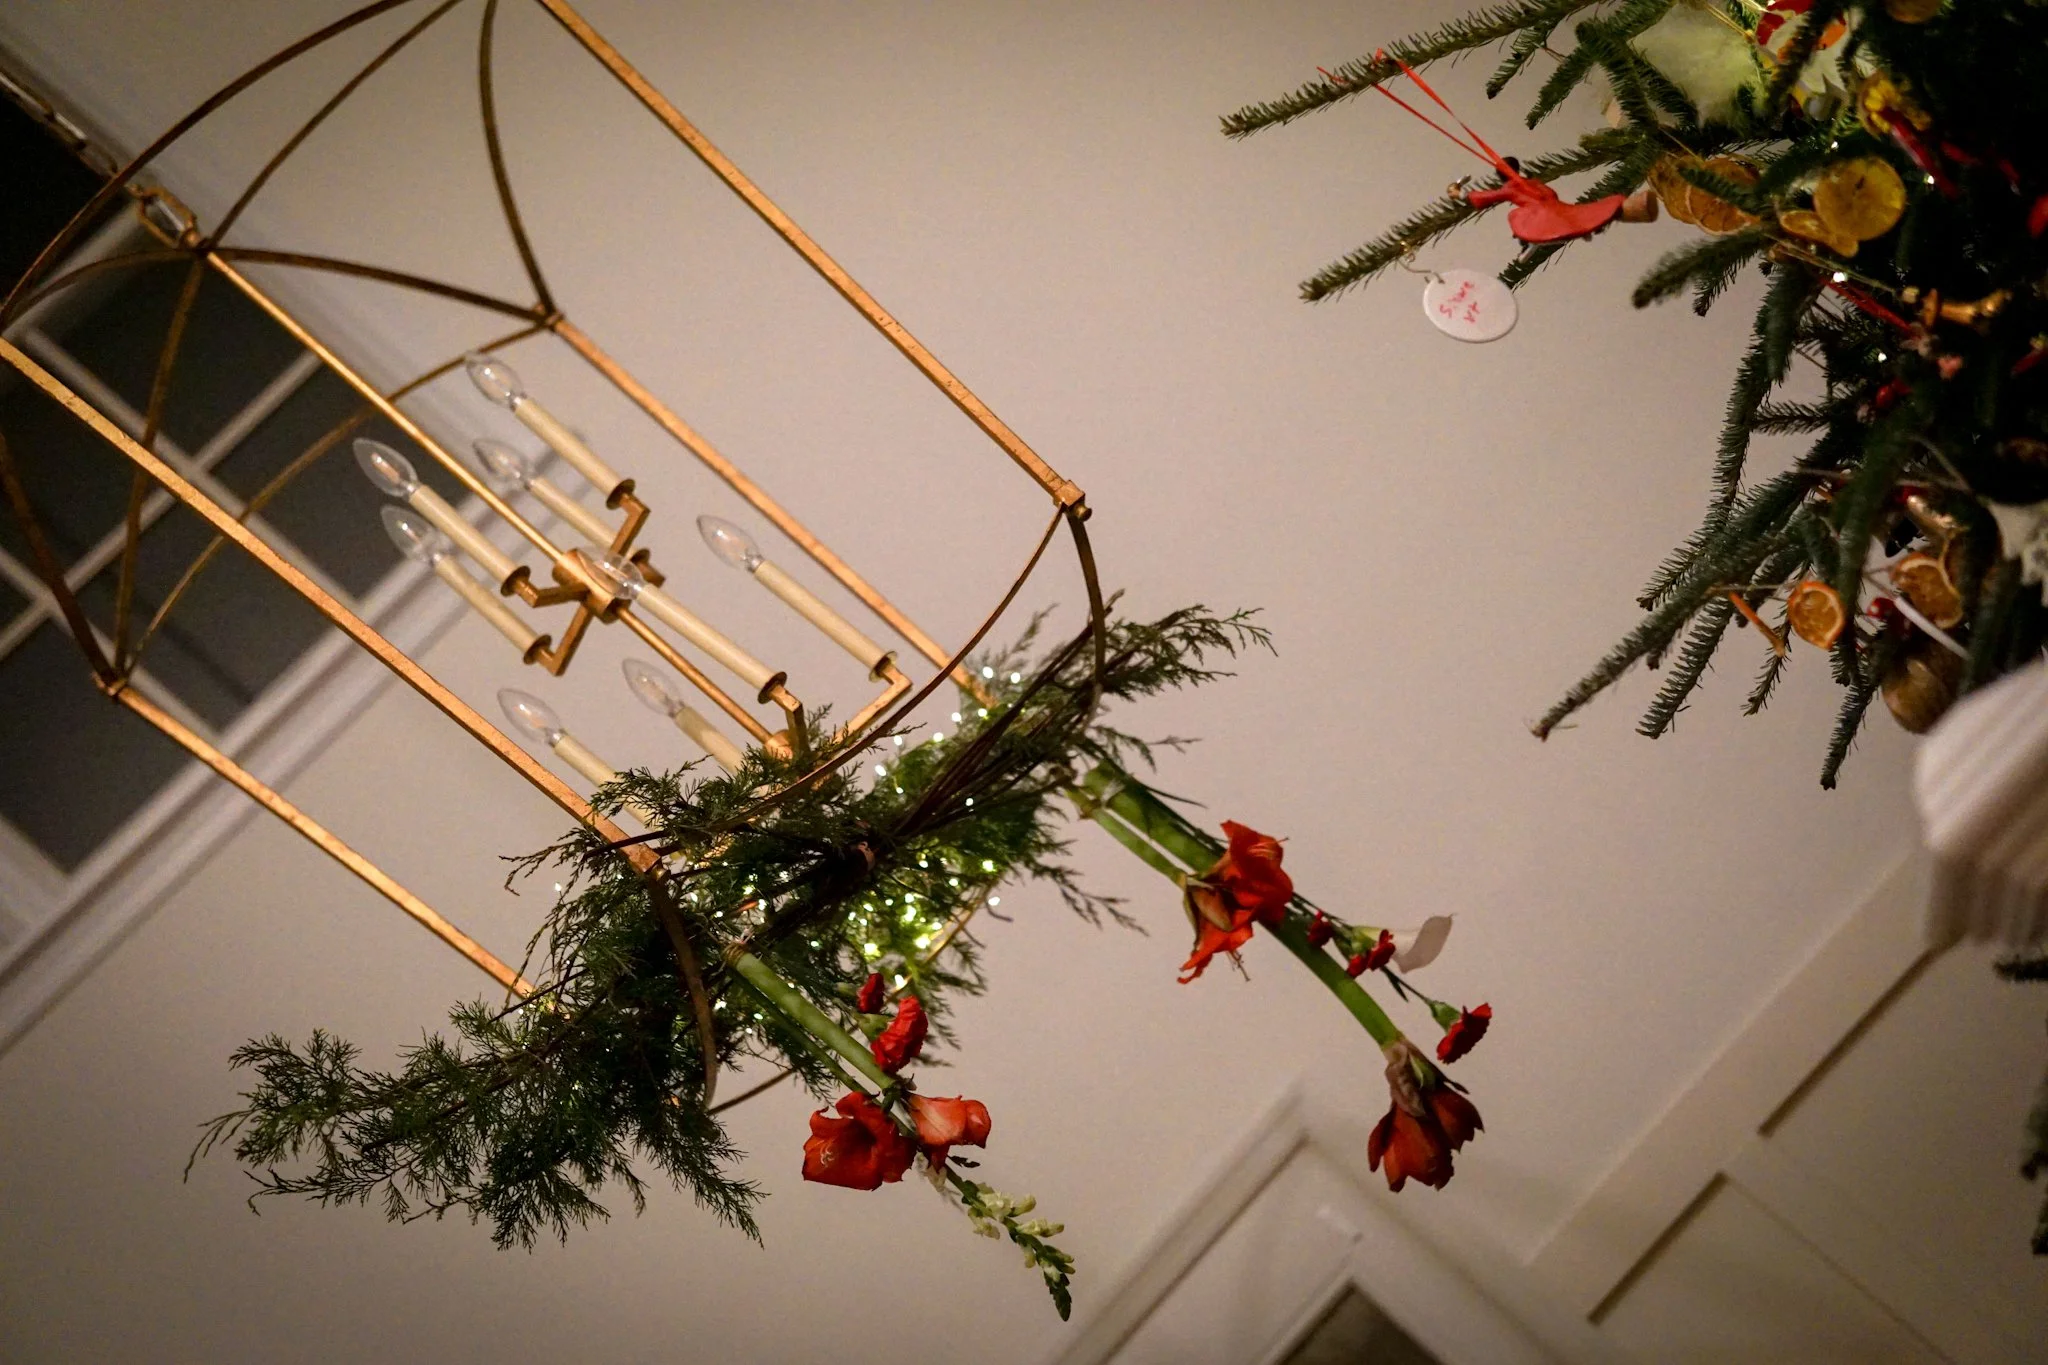
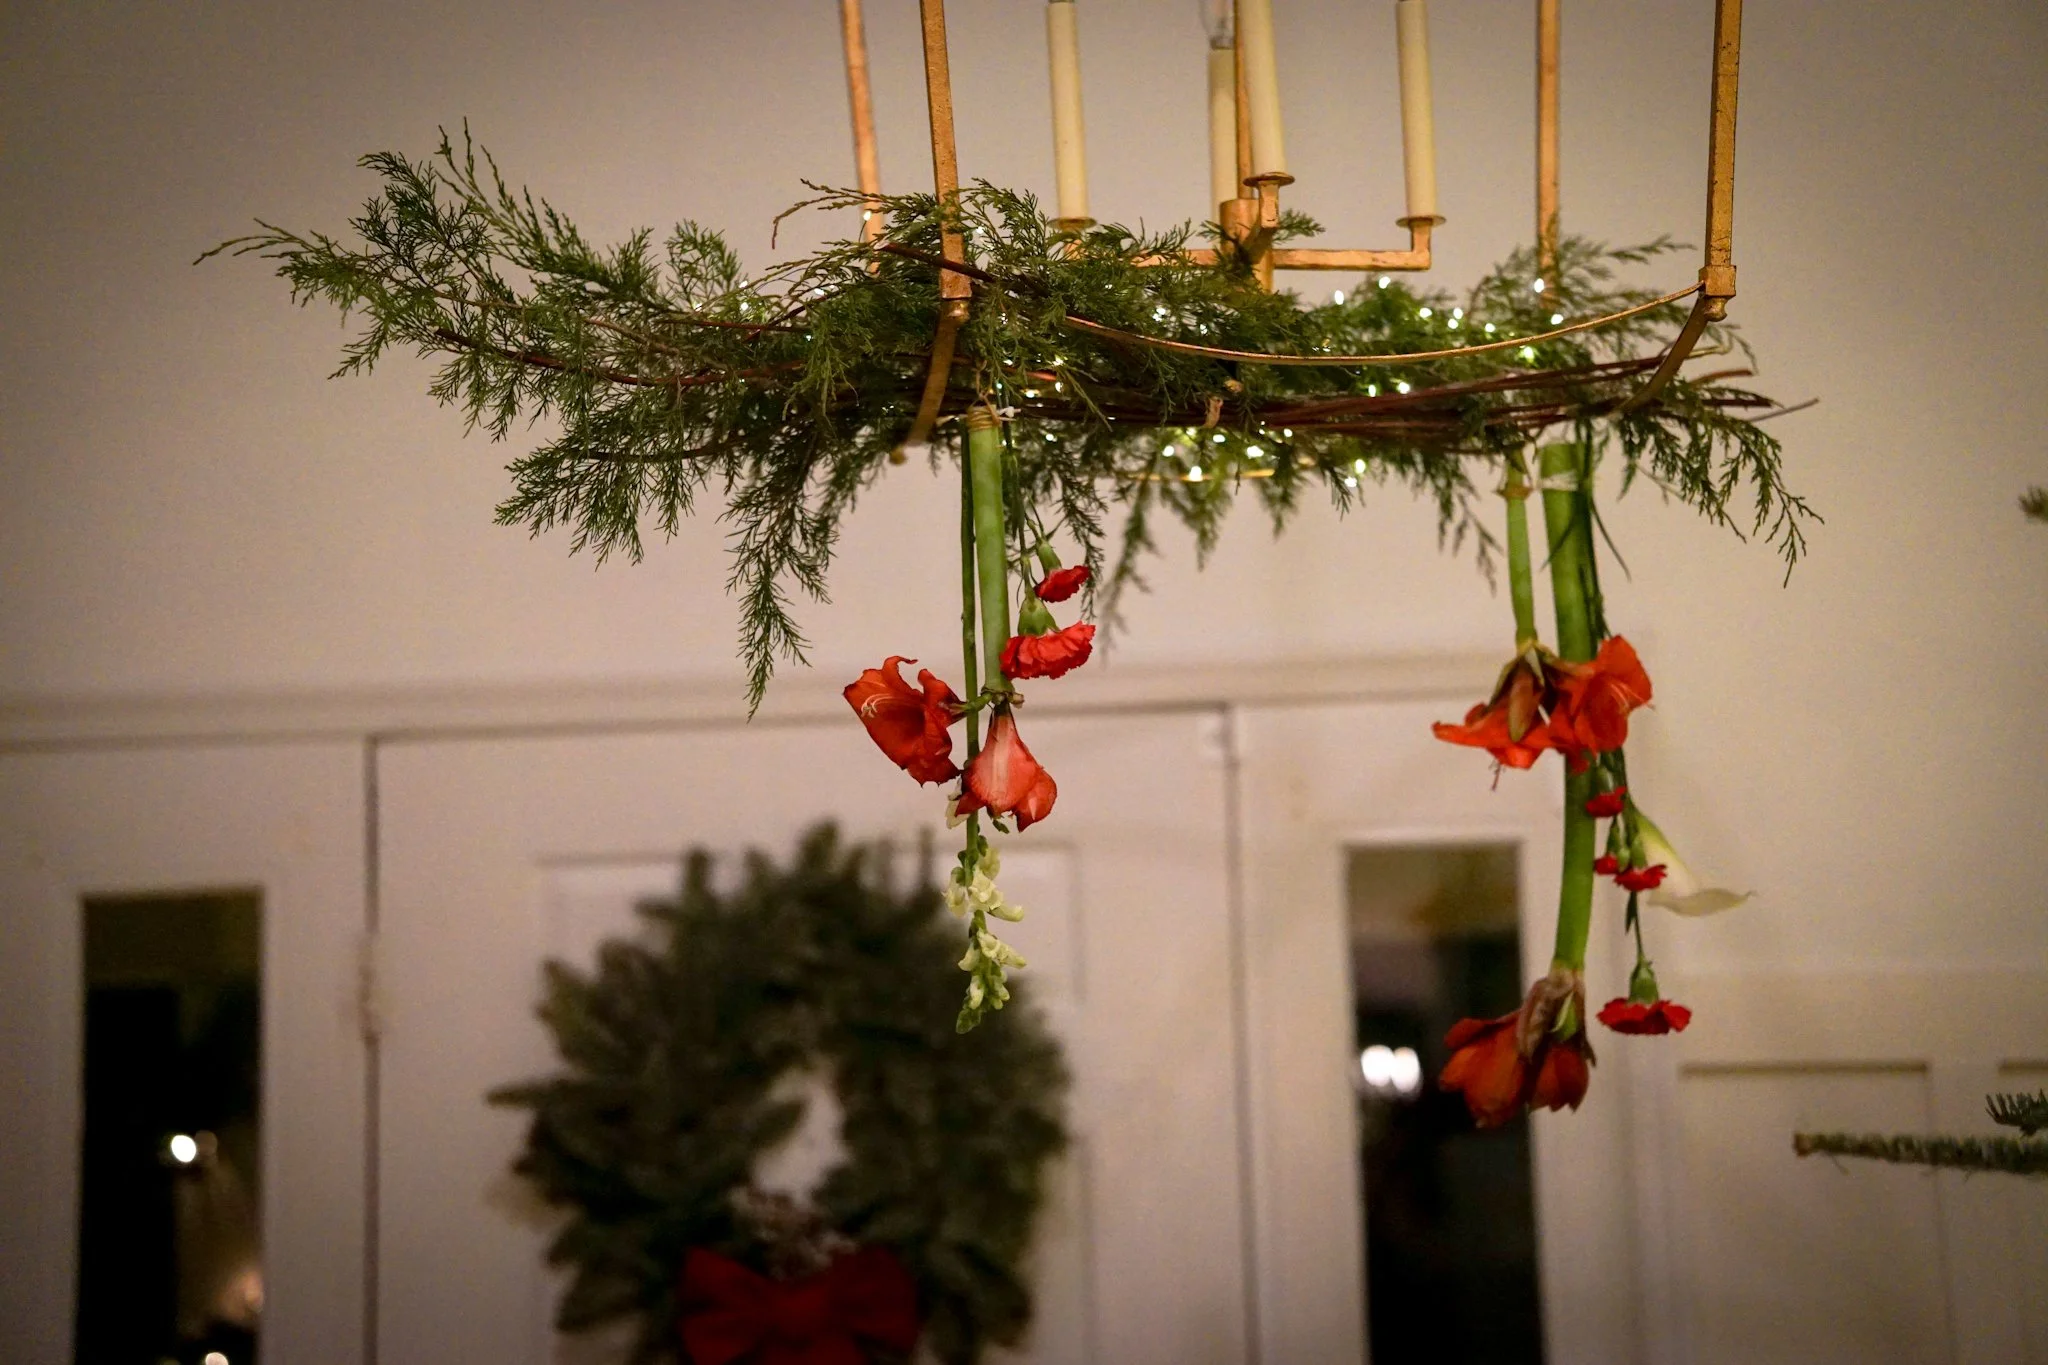
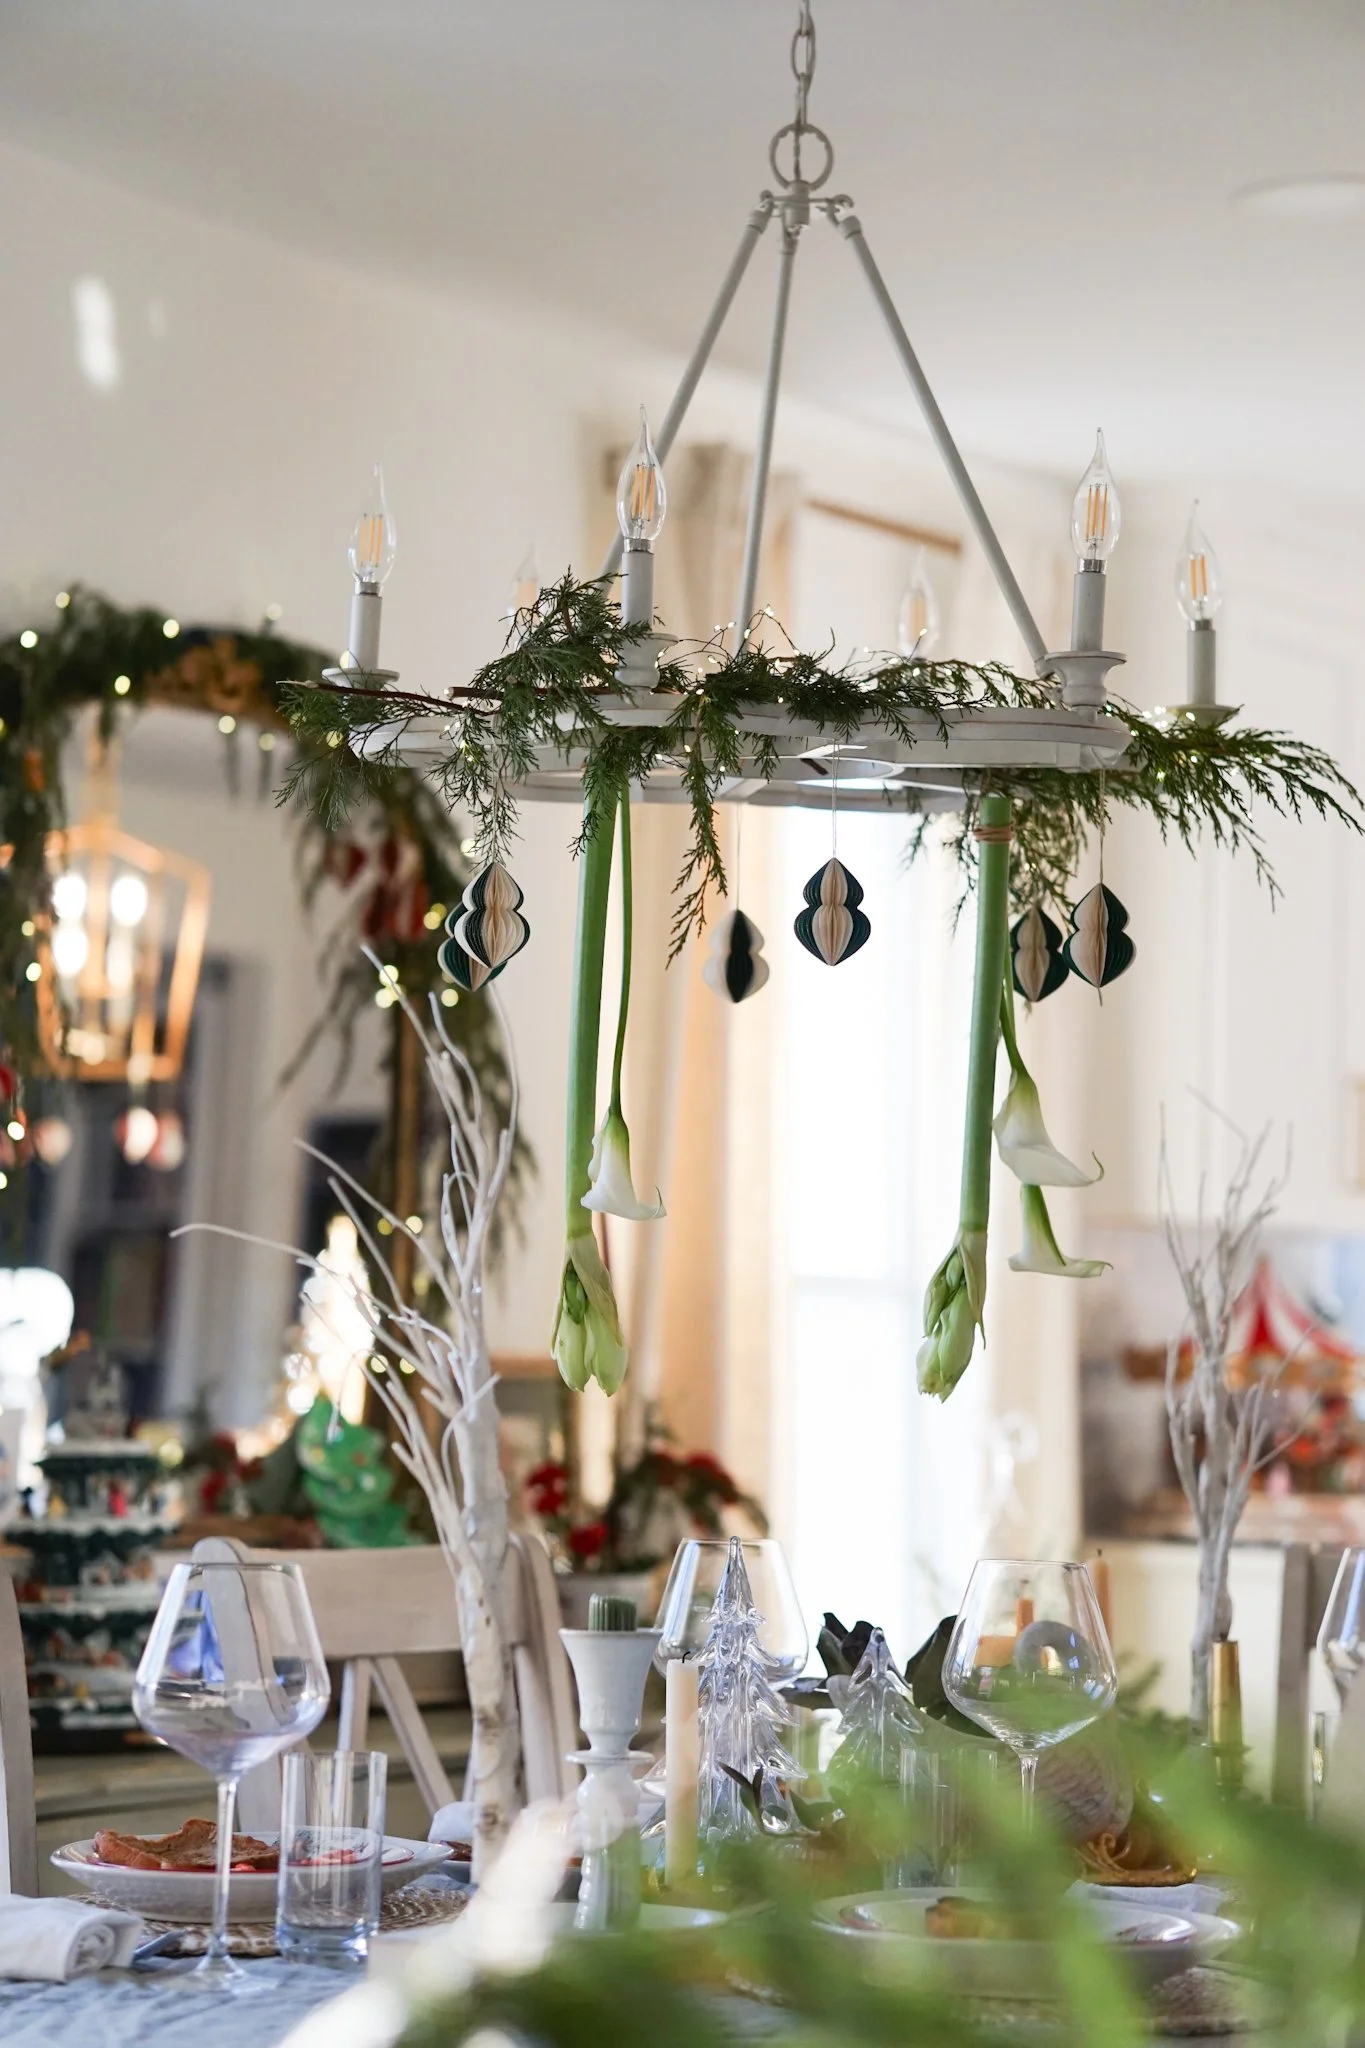
It’s the holiday season. Today is, in fact, Christmas Eve, and if you celebrate, your home is likely in its peak state of decoration. Christmas trees, wreaths, garlands on banisters, garlands over windows, string lights twinkling. You might be feeling like your home is full to burst with holiday cheer and festive decorations. We felt that way, but we made room for one more—actually, two—and wow, what they’ve added to our decor. When Maureen of Floral Notes and I chatted about what I was dreaming for this, I knew I wanted something Christmas-y but elevated, and something that we could all create at home learning simple techniques as we grow our knowledge. Maureen absolutely delivered and somehow found a surface in our home that was not yet covered in greens or decor: our chandeliers. This design can be placed on pendant lights or chandeliers.
We hang little ornaments from some of our pendants, and of course you may have mistletoe hanging. But I hadn’t thought about greenery on chandeliers, let alone greenery with twinkling lights and cascading flowers. Read on below for instructions on how to create this in your own home. It doesn’t take long to make (truly!), was a lot of fun to put together, and is something you could probably pull off this evening or on Christmas Day just in time for a special Christmas meal. Or, create it for your New Years festivities.
Don’t hesitate to reach out with any questions on how to execute this. We’d love to see your own creations. Now let’s make something full of magic and beauty!
Note: we created and photographed two versions of this in our own home, and Maureen created a version as well, taking photographs along the way to teach us. I’ll include photos from both homes and try to note whose is whose :)
Please enjoy the spaceship our elf Marvin was flying on a few mornings ago
Equipment
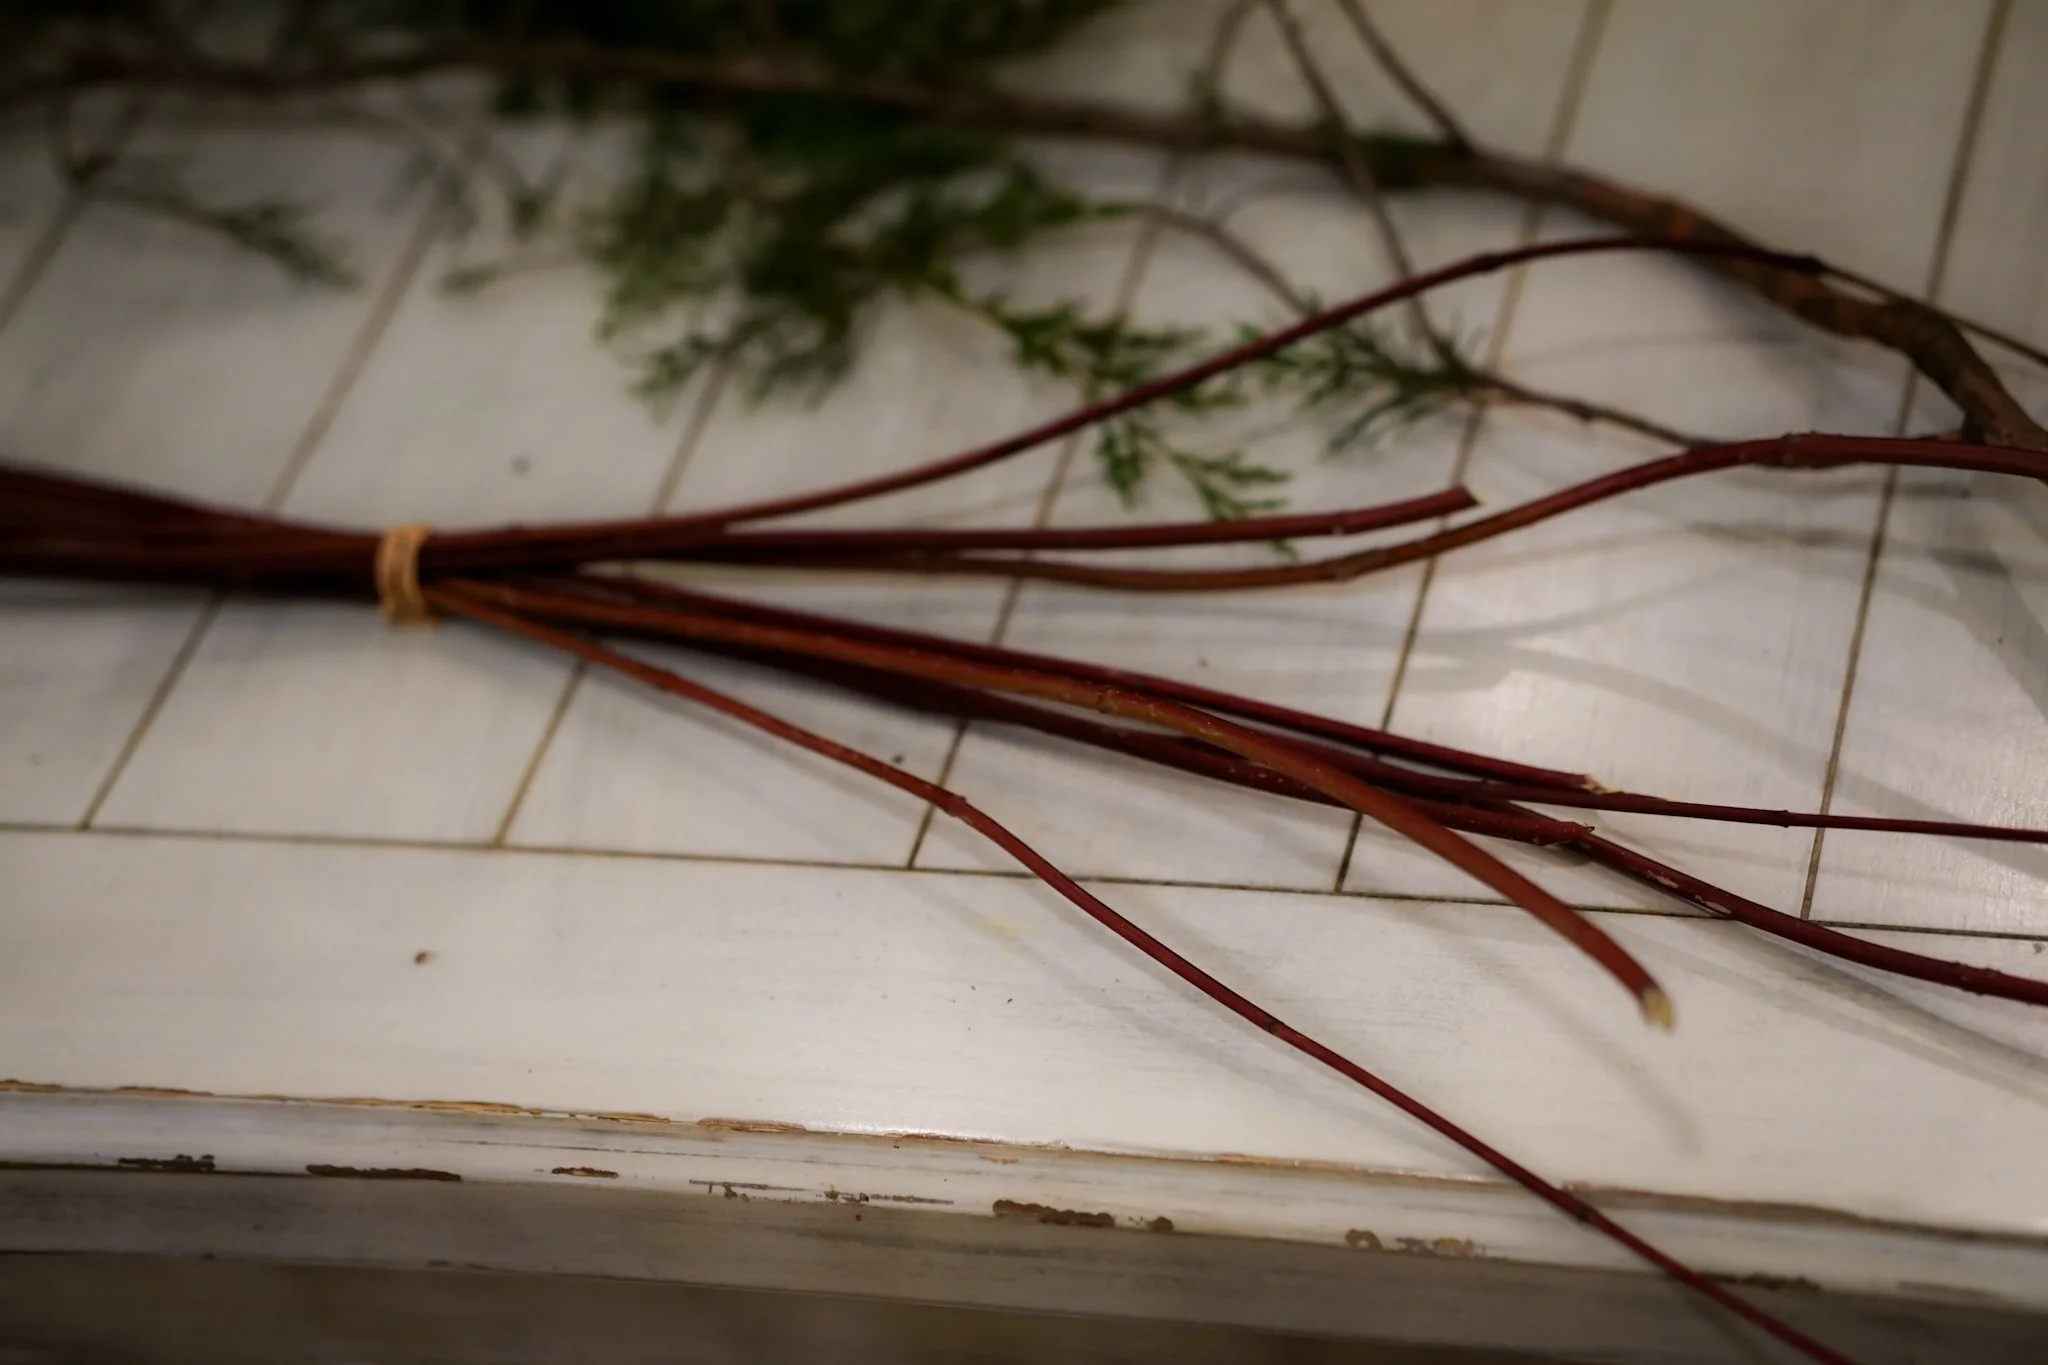
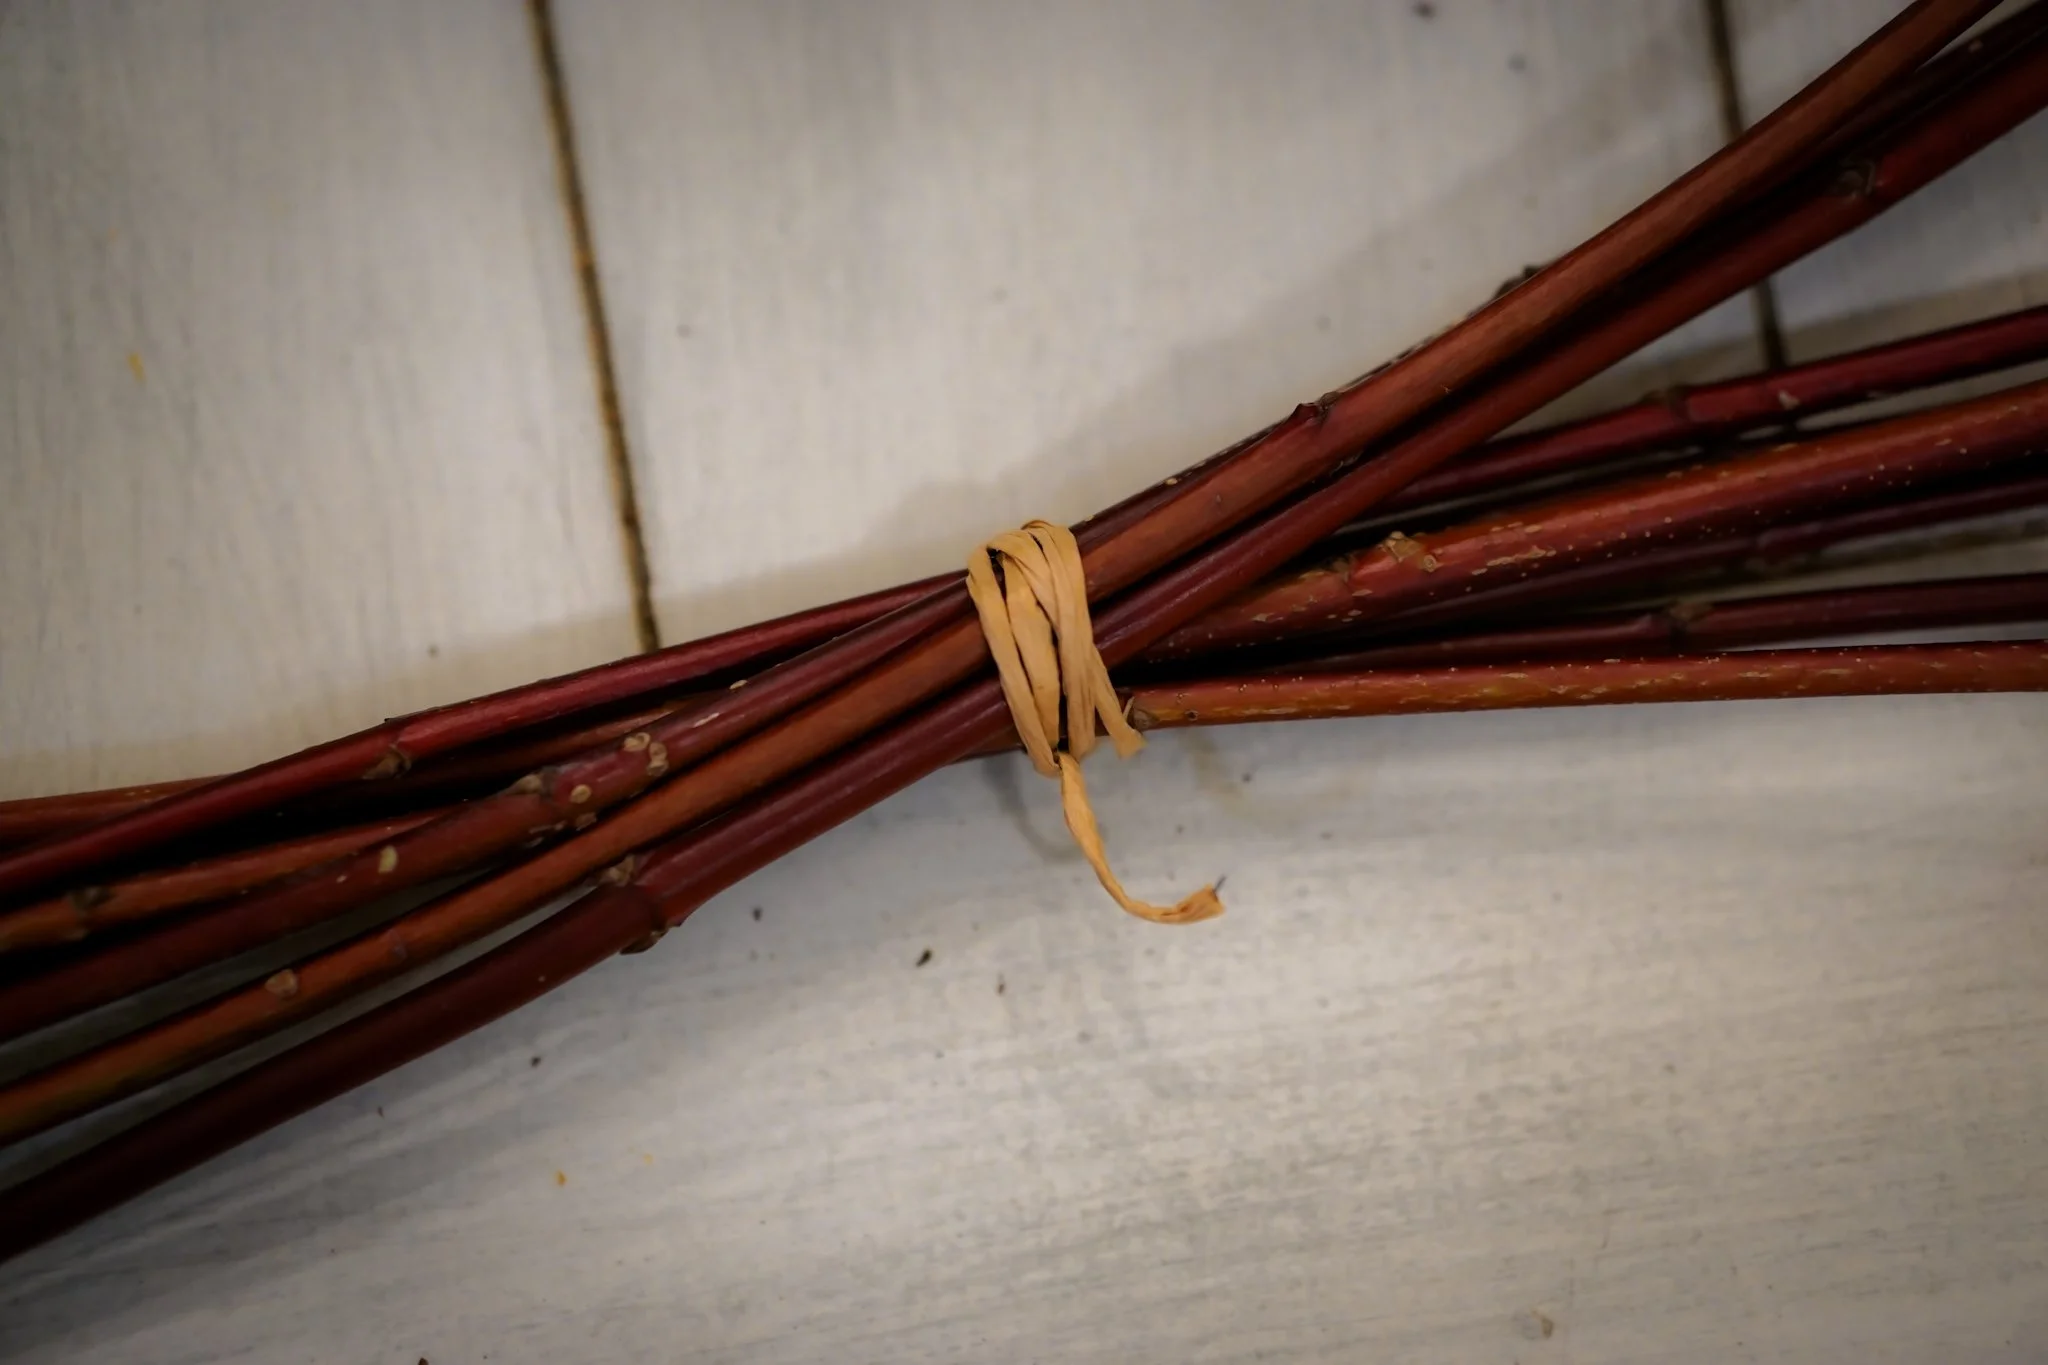
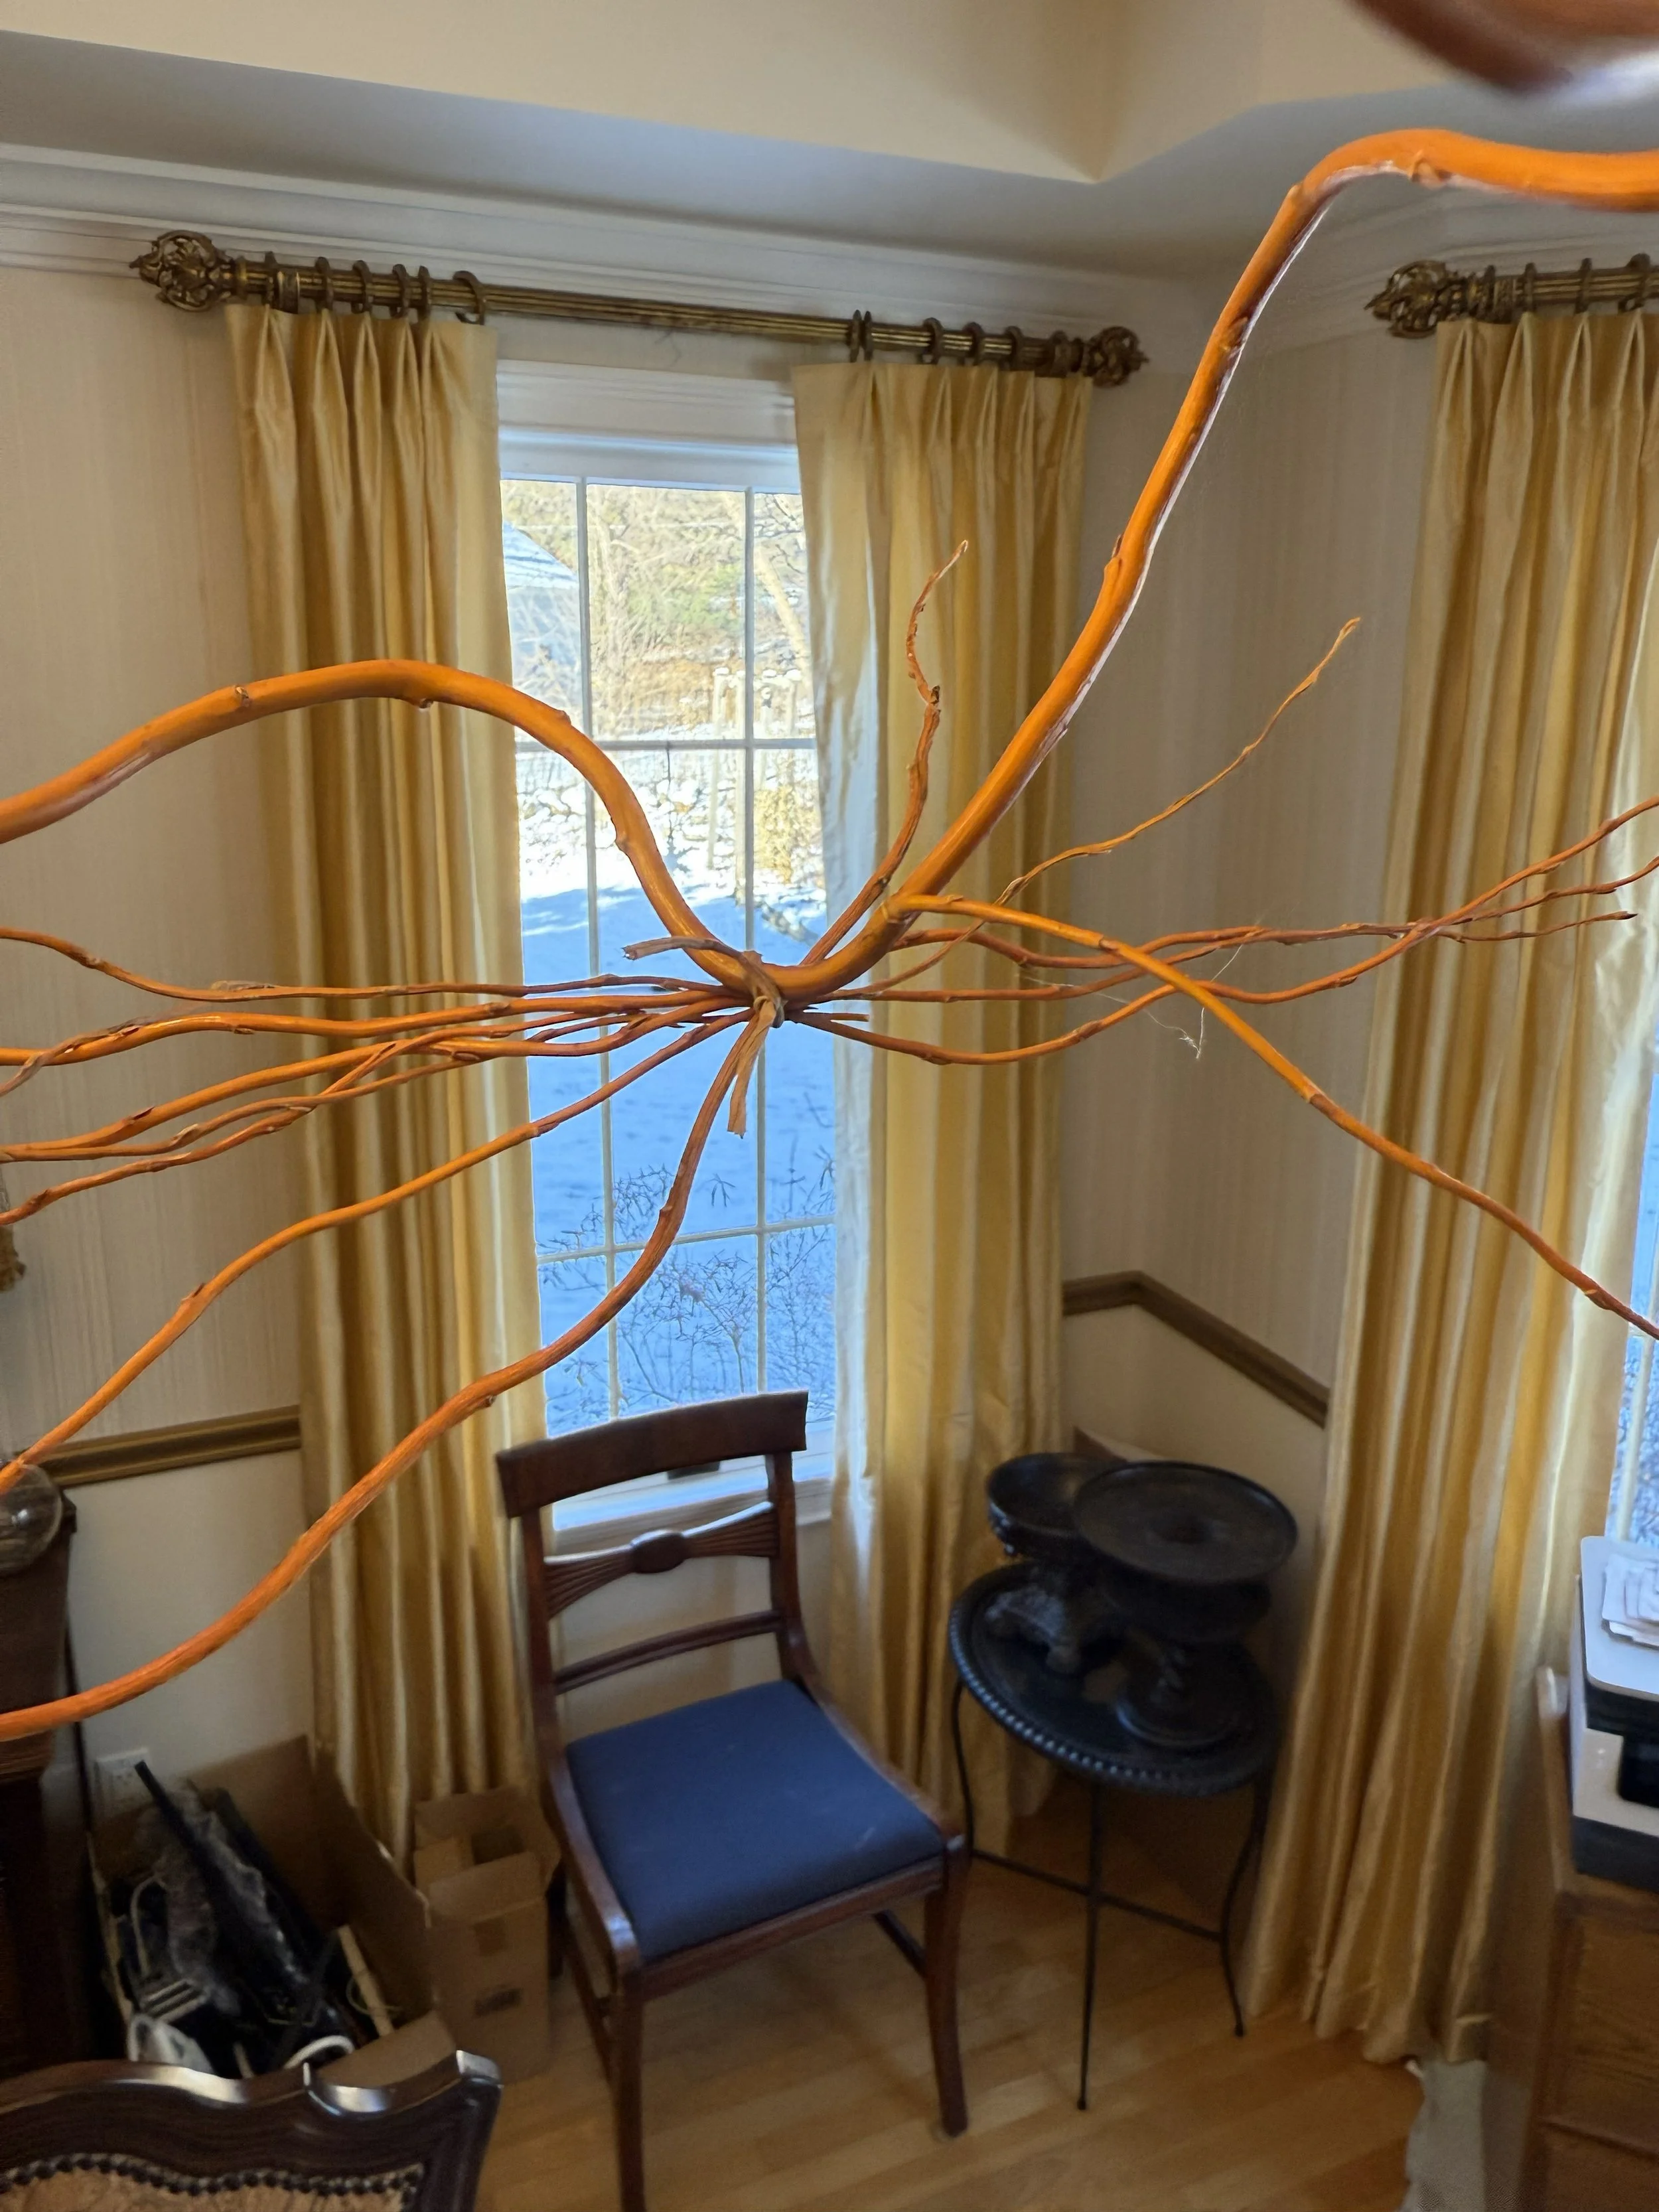
Curly willow or other long, slim branches. We used long, thin bendable branches harvested from a currently leafless tall bush in our backyard, and they worked great! Maureen used curly willow. You can also substitute any long thin sticks / branches you can find in your backyard
Bind wire (paper covered wire) by Smithers-Oasis. Maureen confirmed that jute, wool or string can also work
Branches of greenery (Maureen used Carolina Sapphire greens and highly recommends, we used something evergreen—who knows), harvested from your backyard or bought from a store. We used a big armful for ours to create two chandelier pieces.
Toothpicks
Battery pack string lights
Flowers—a few stems of the following flower(s). The quantity depends on the look you’re going for! Could be as simple as 3 stems, or more for a more maximalist look
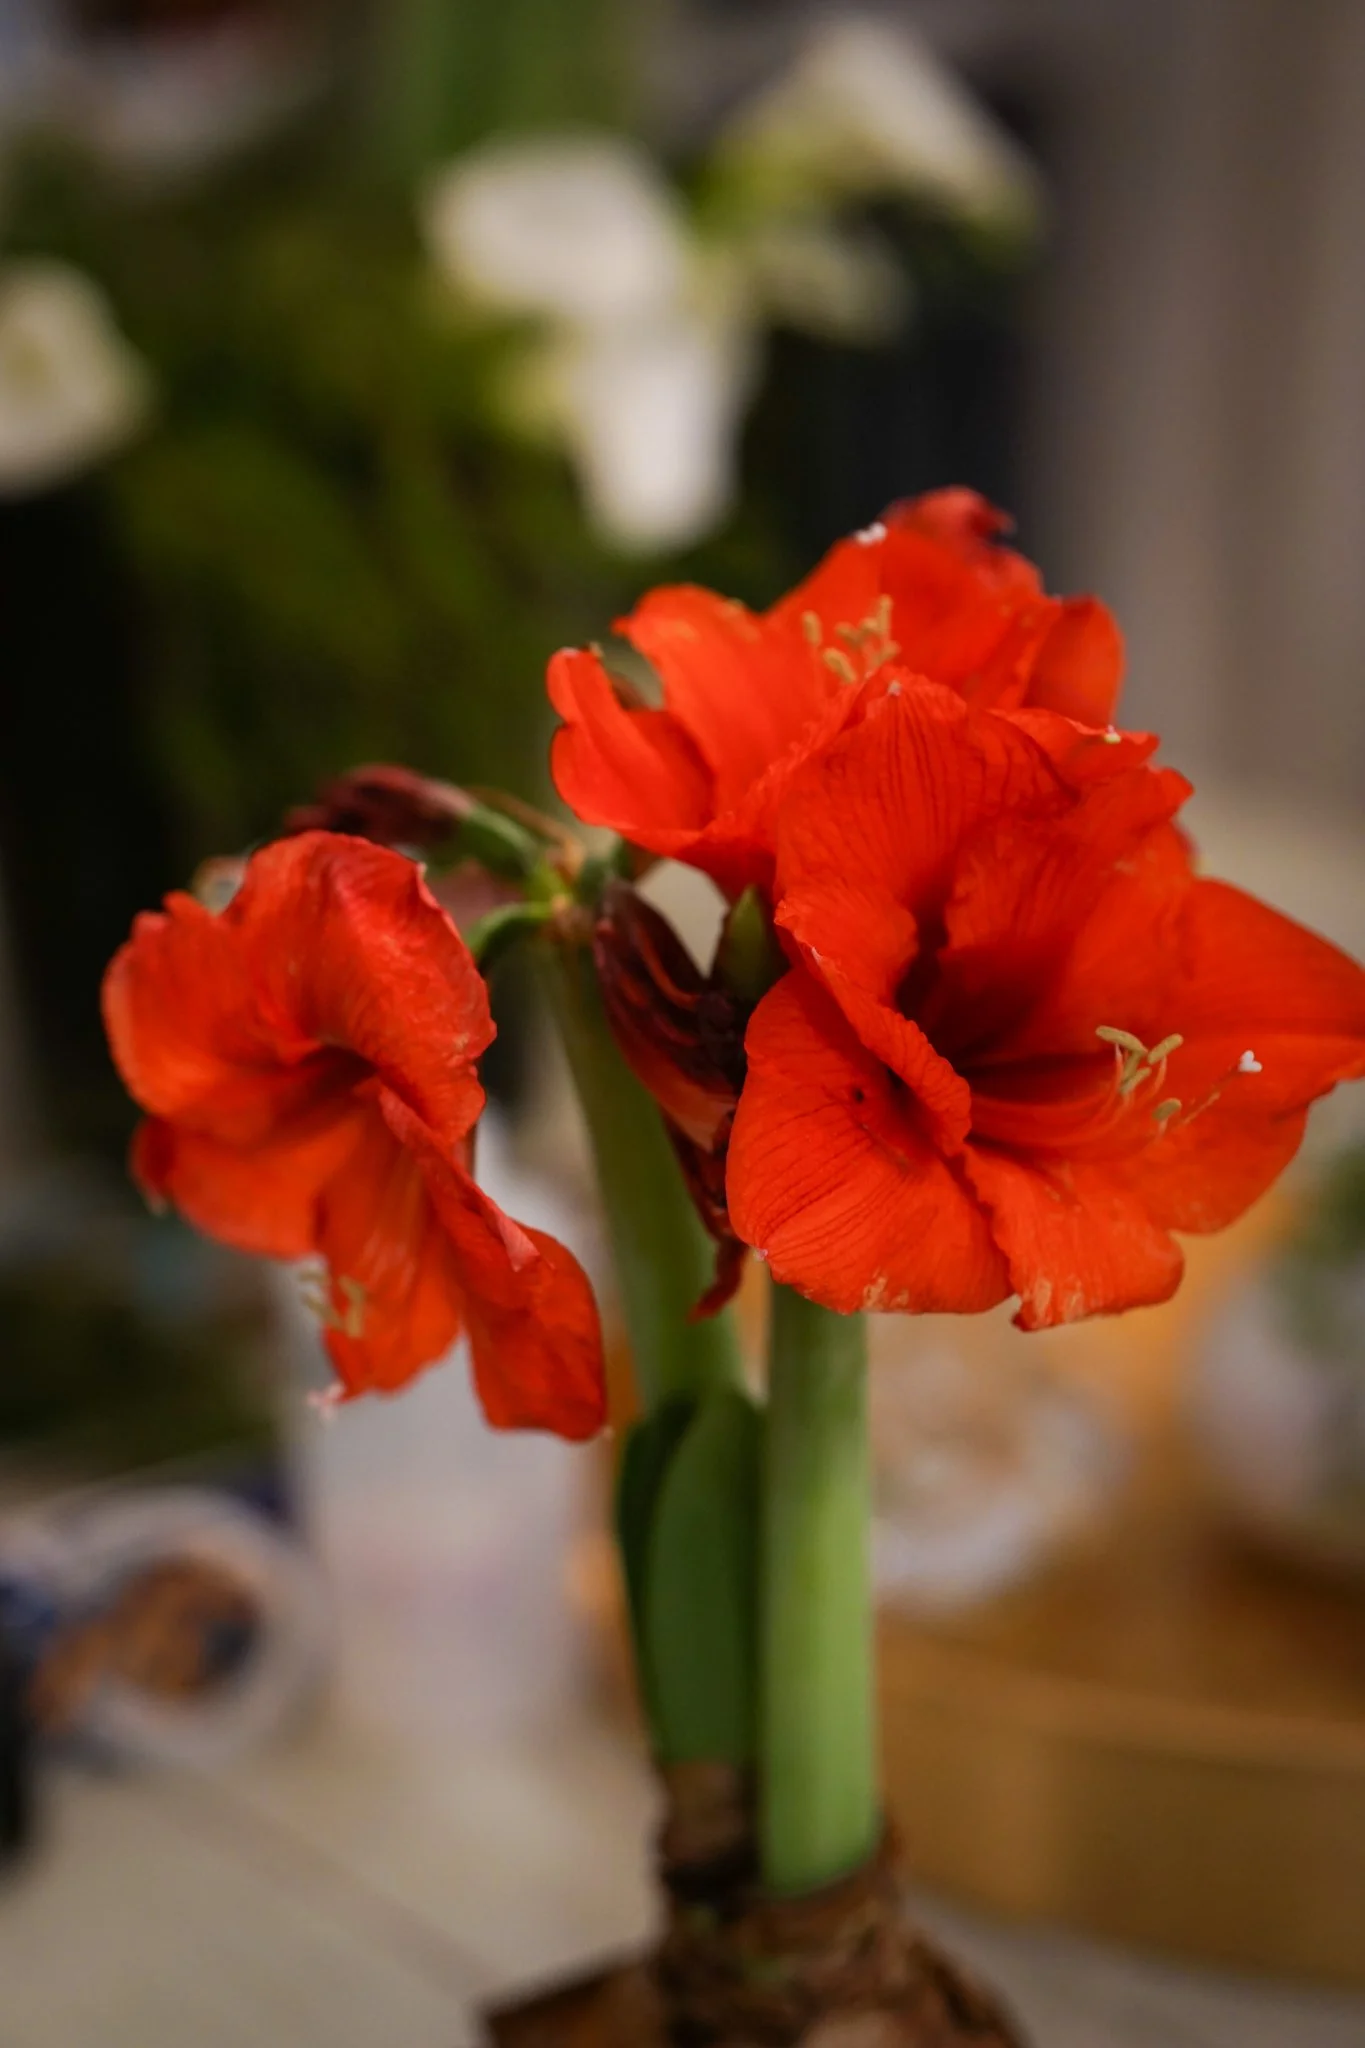
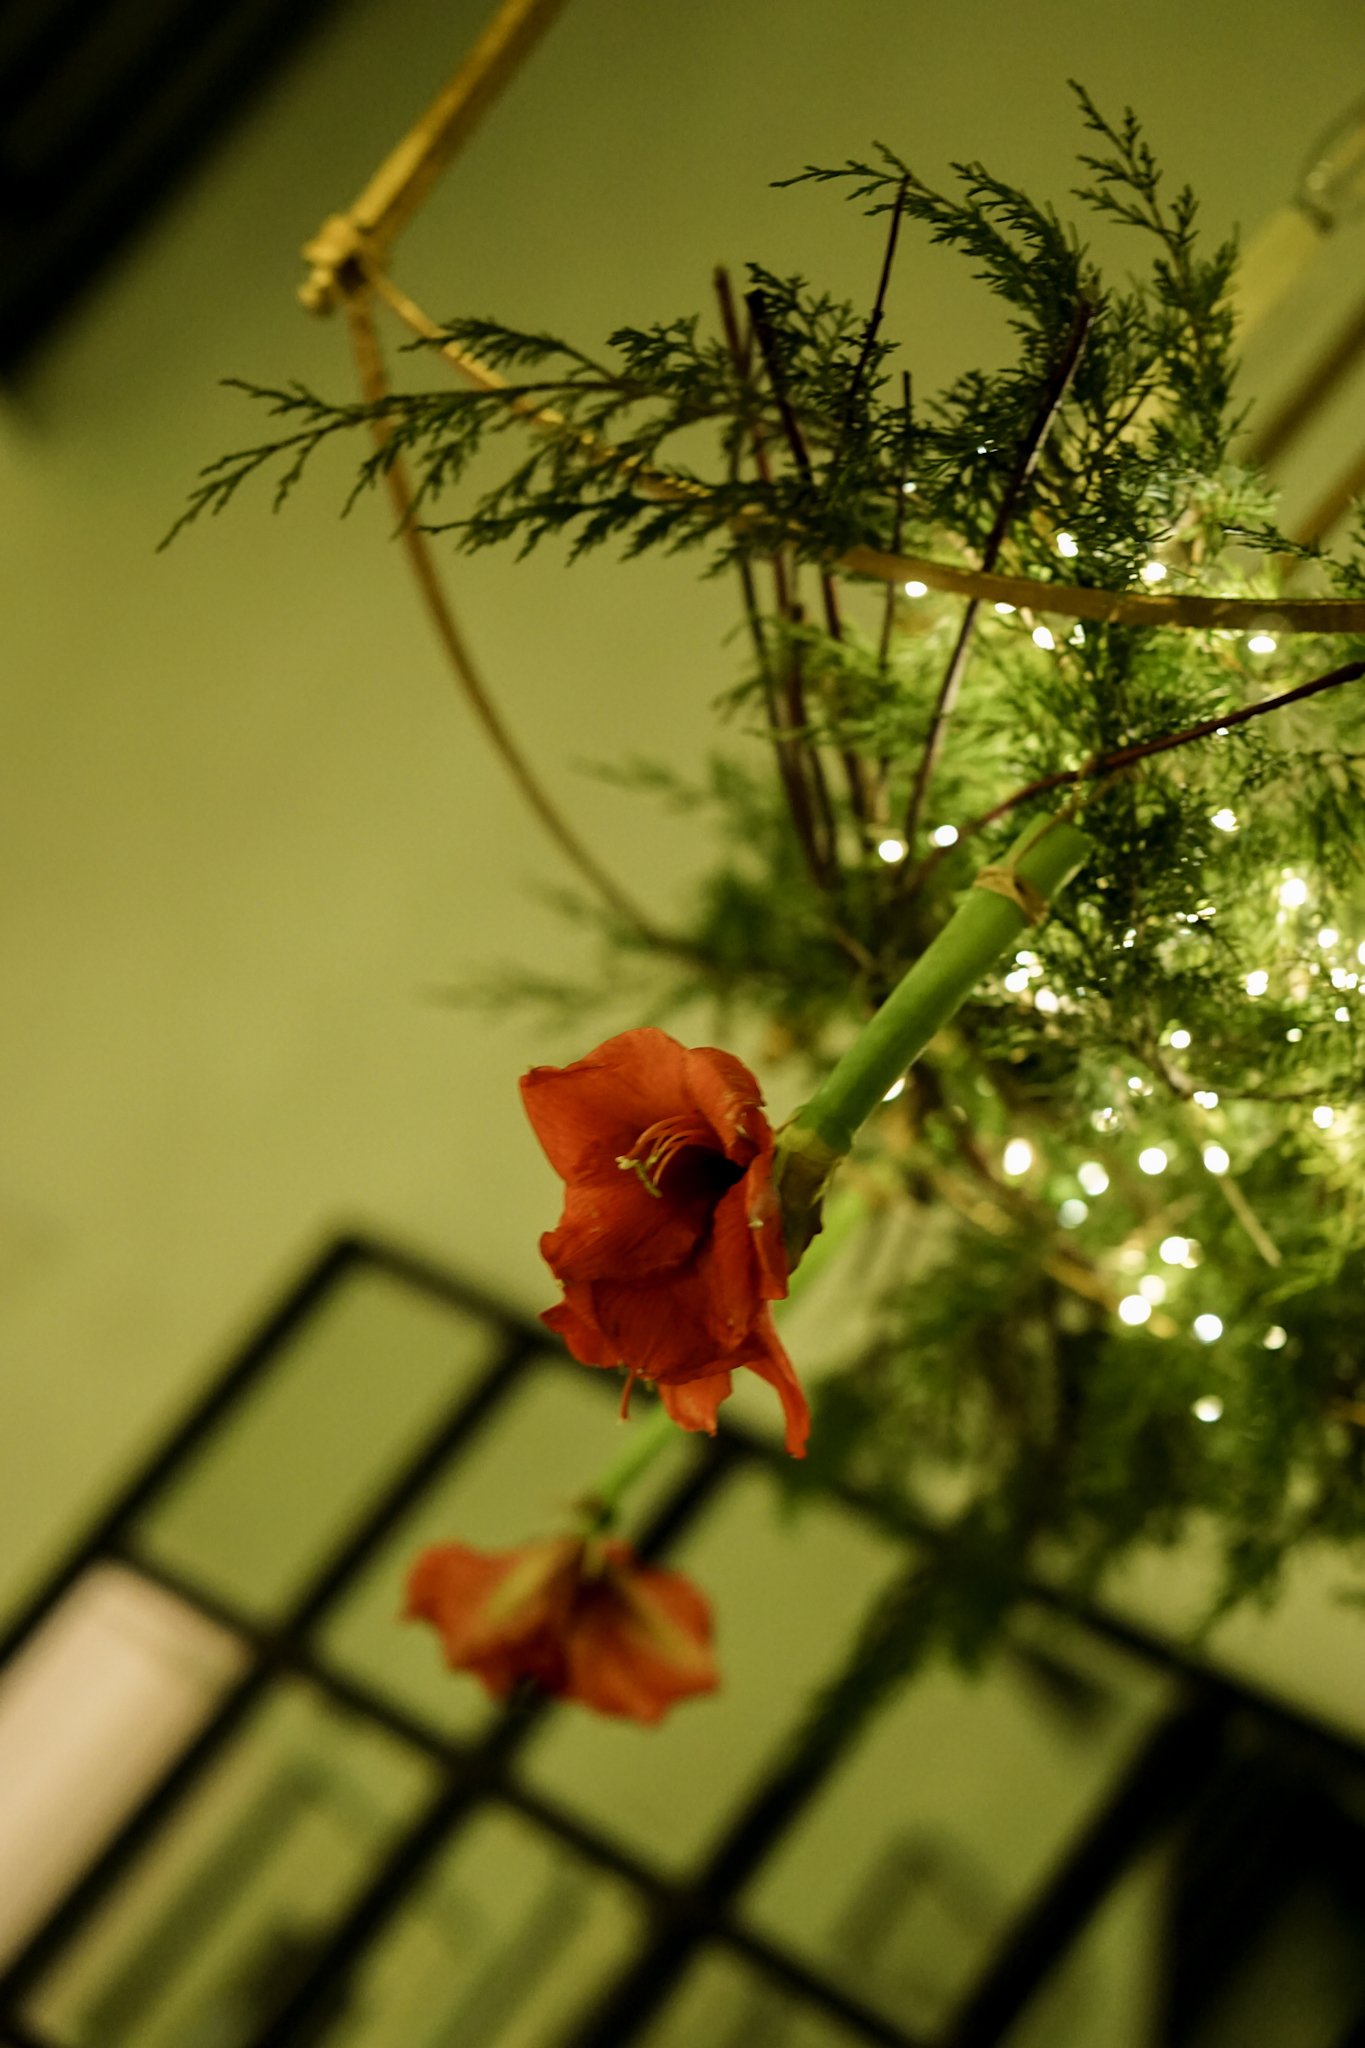
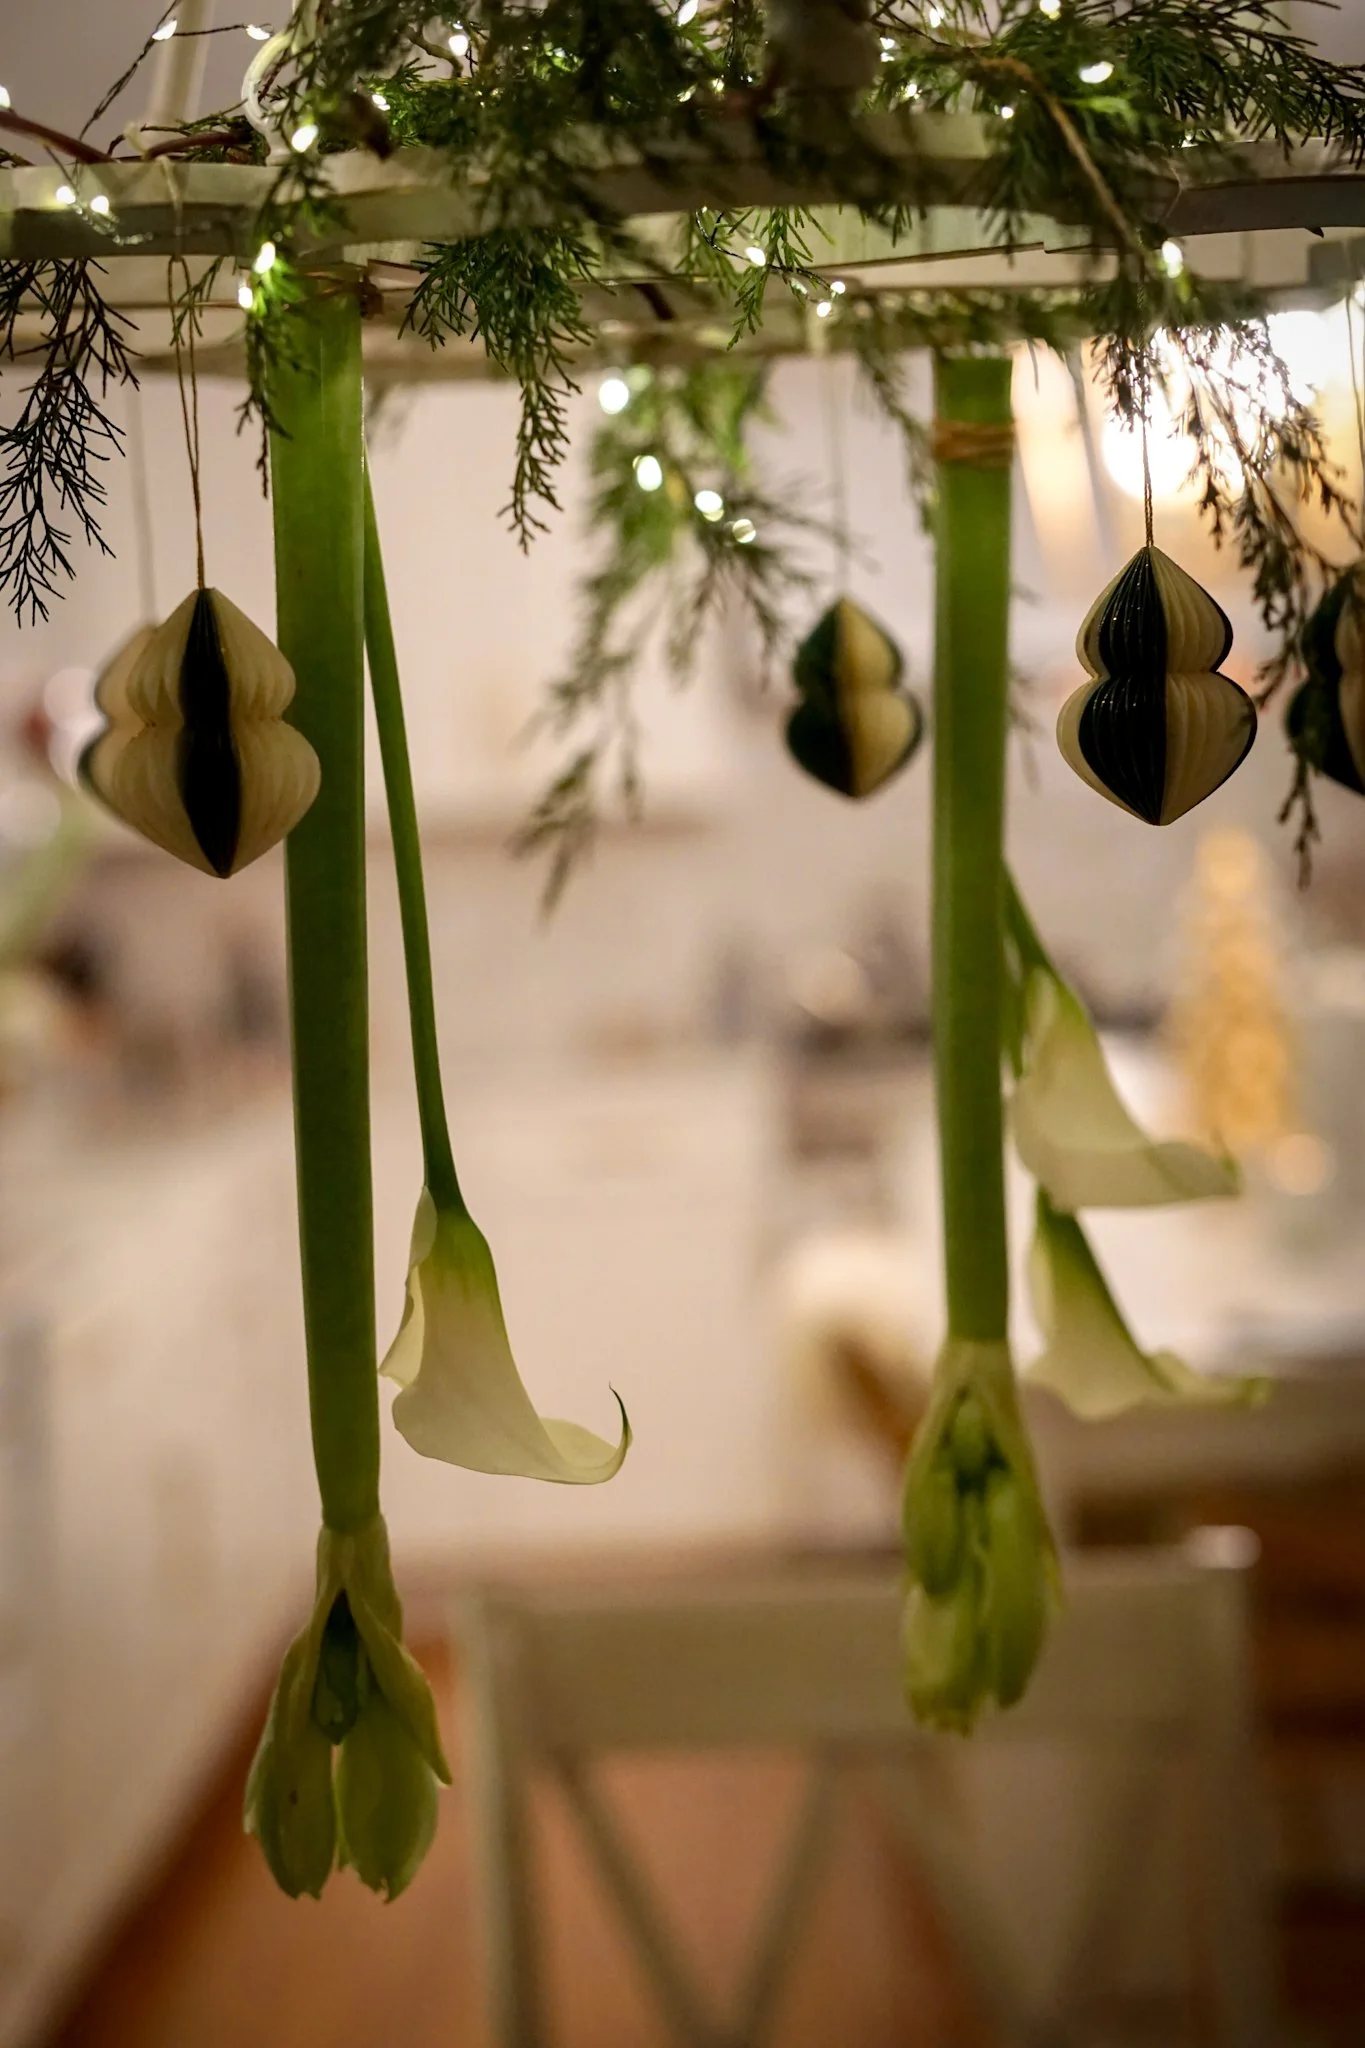
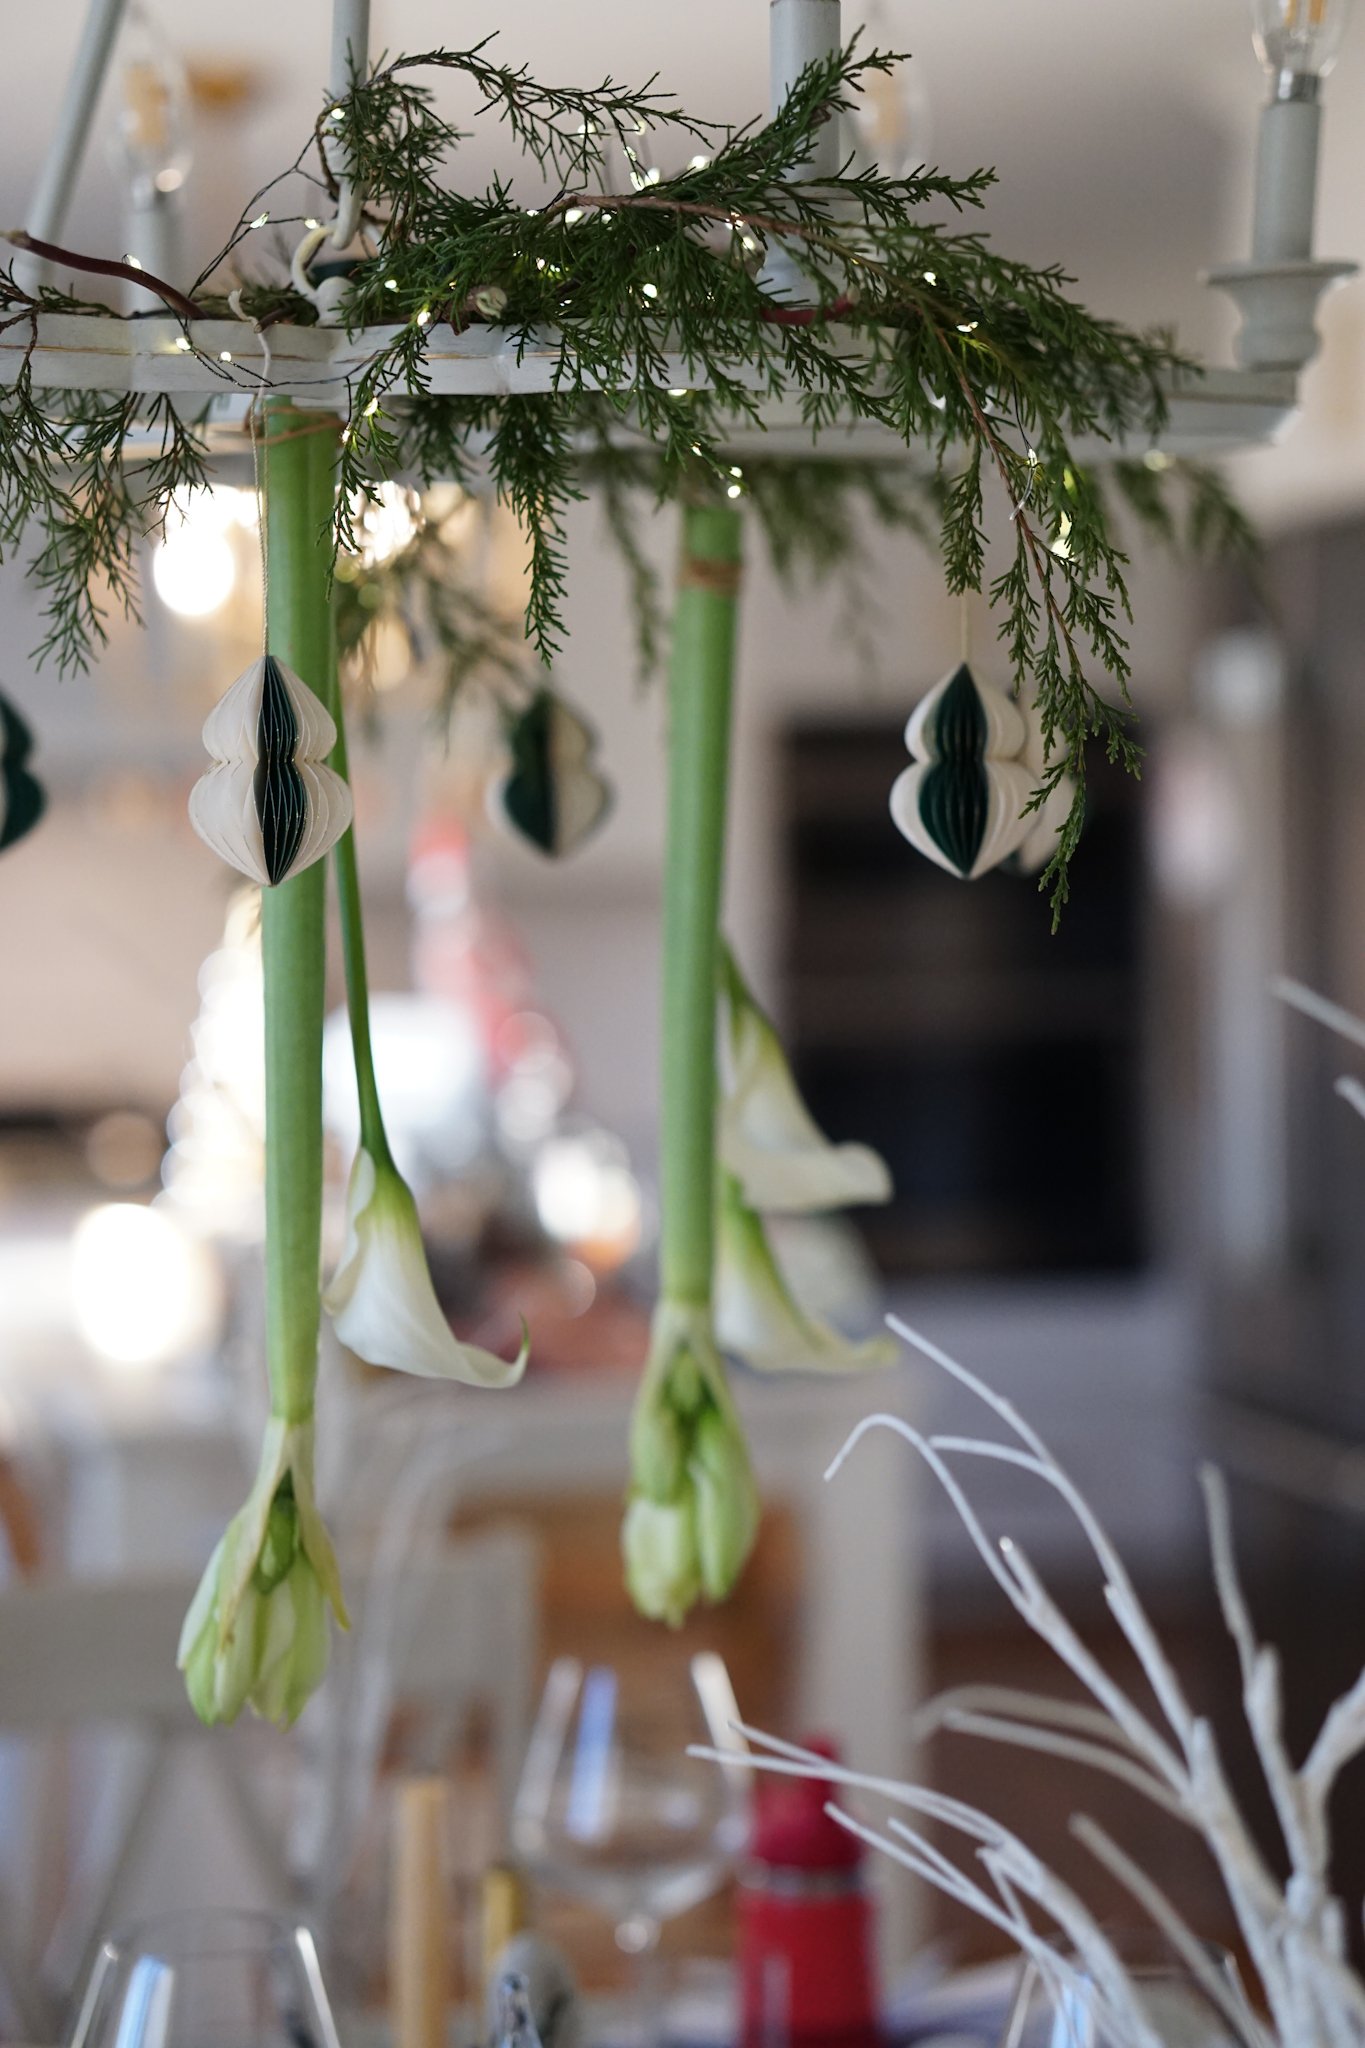
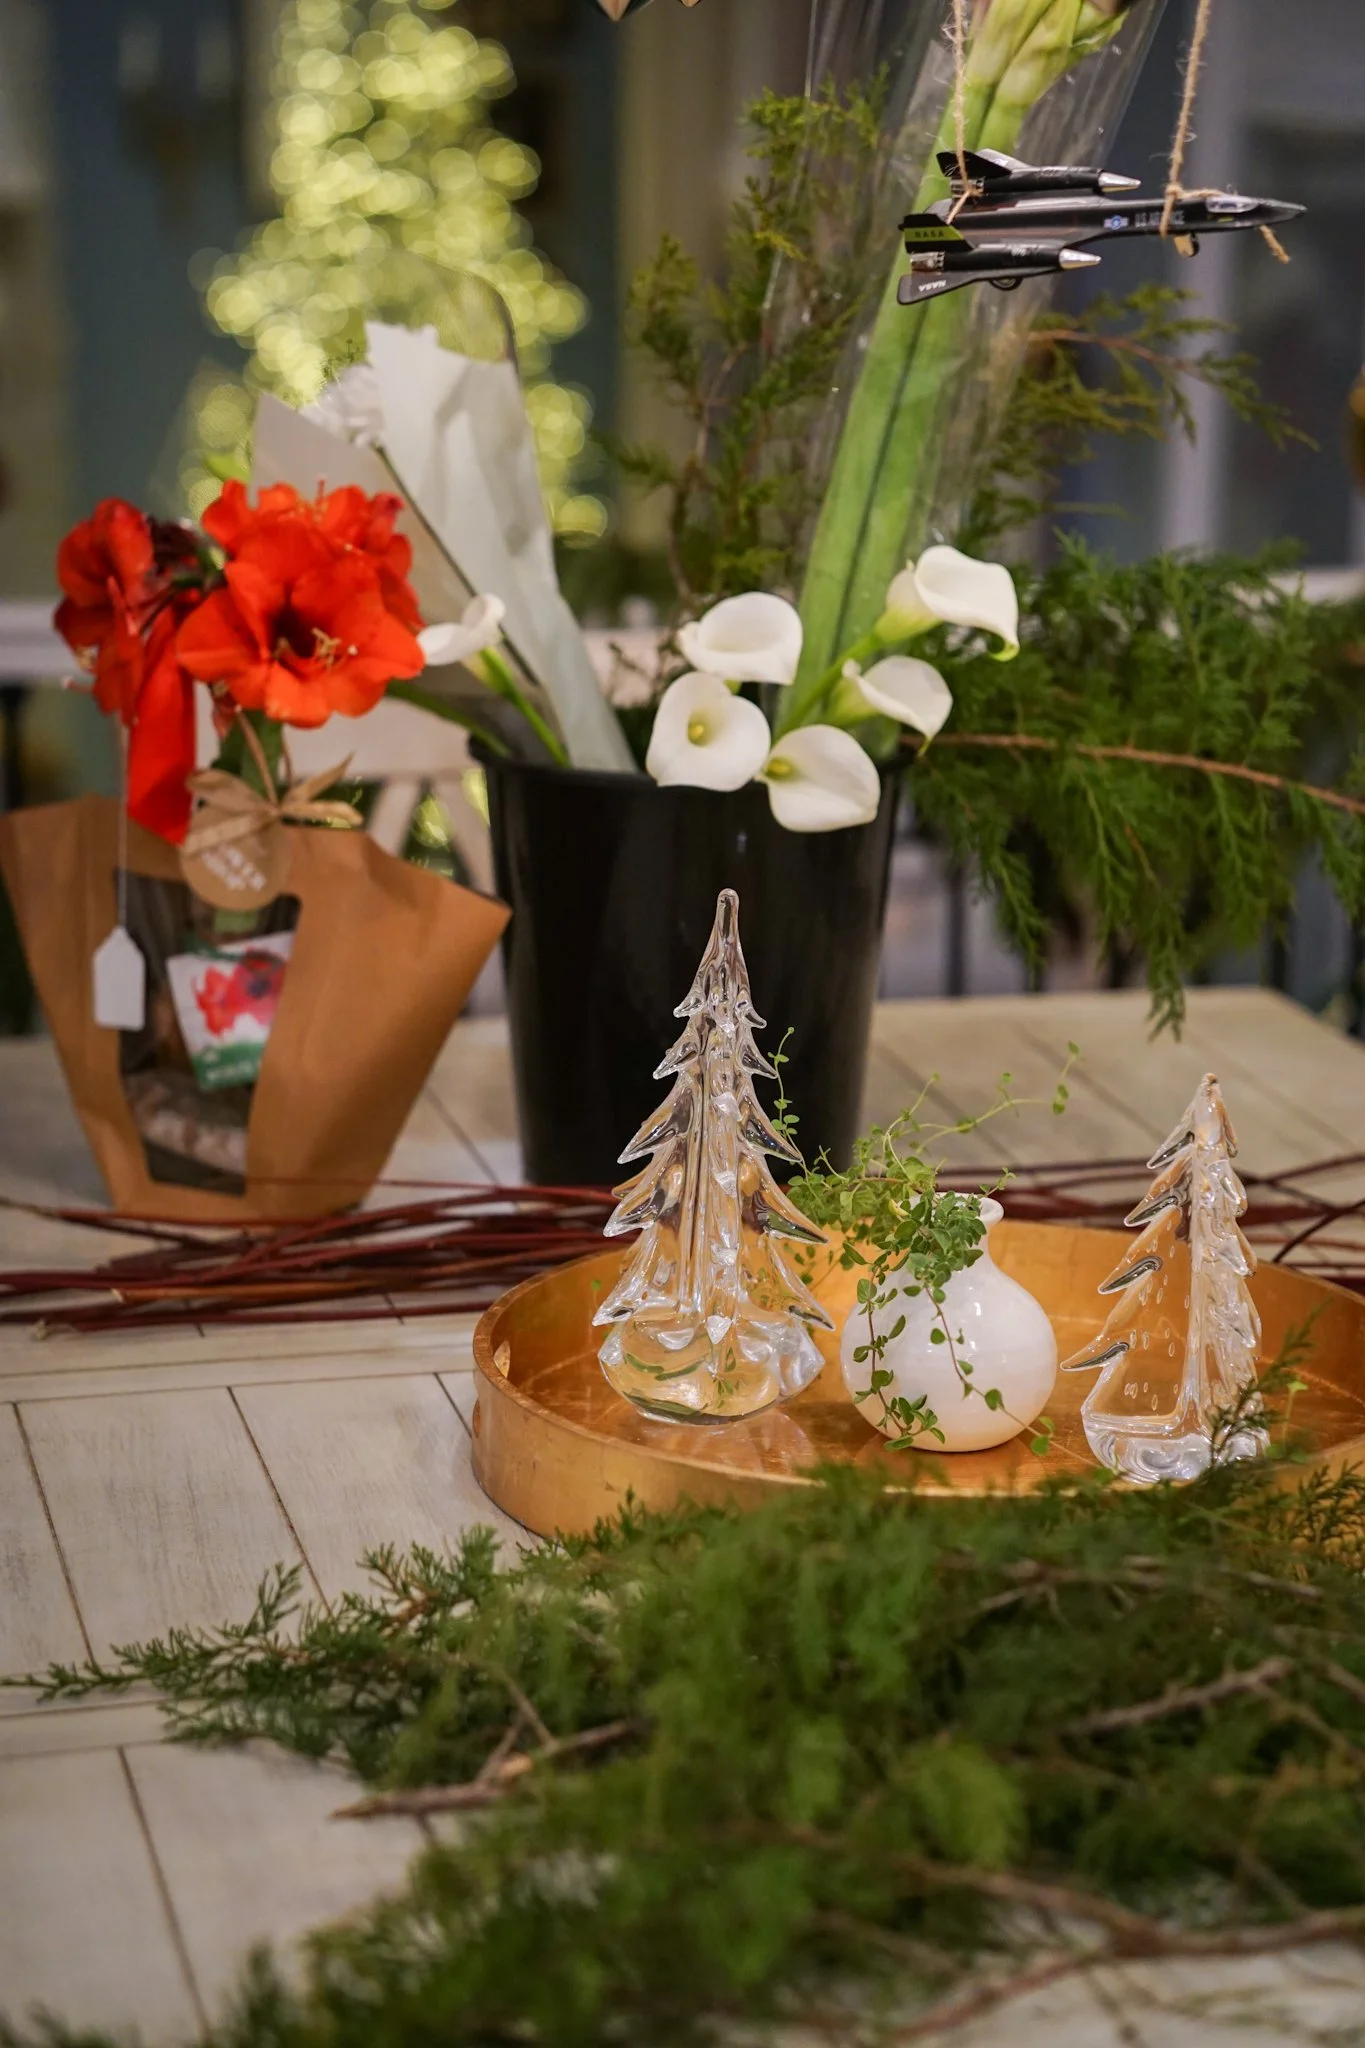
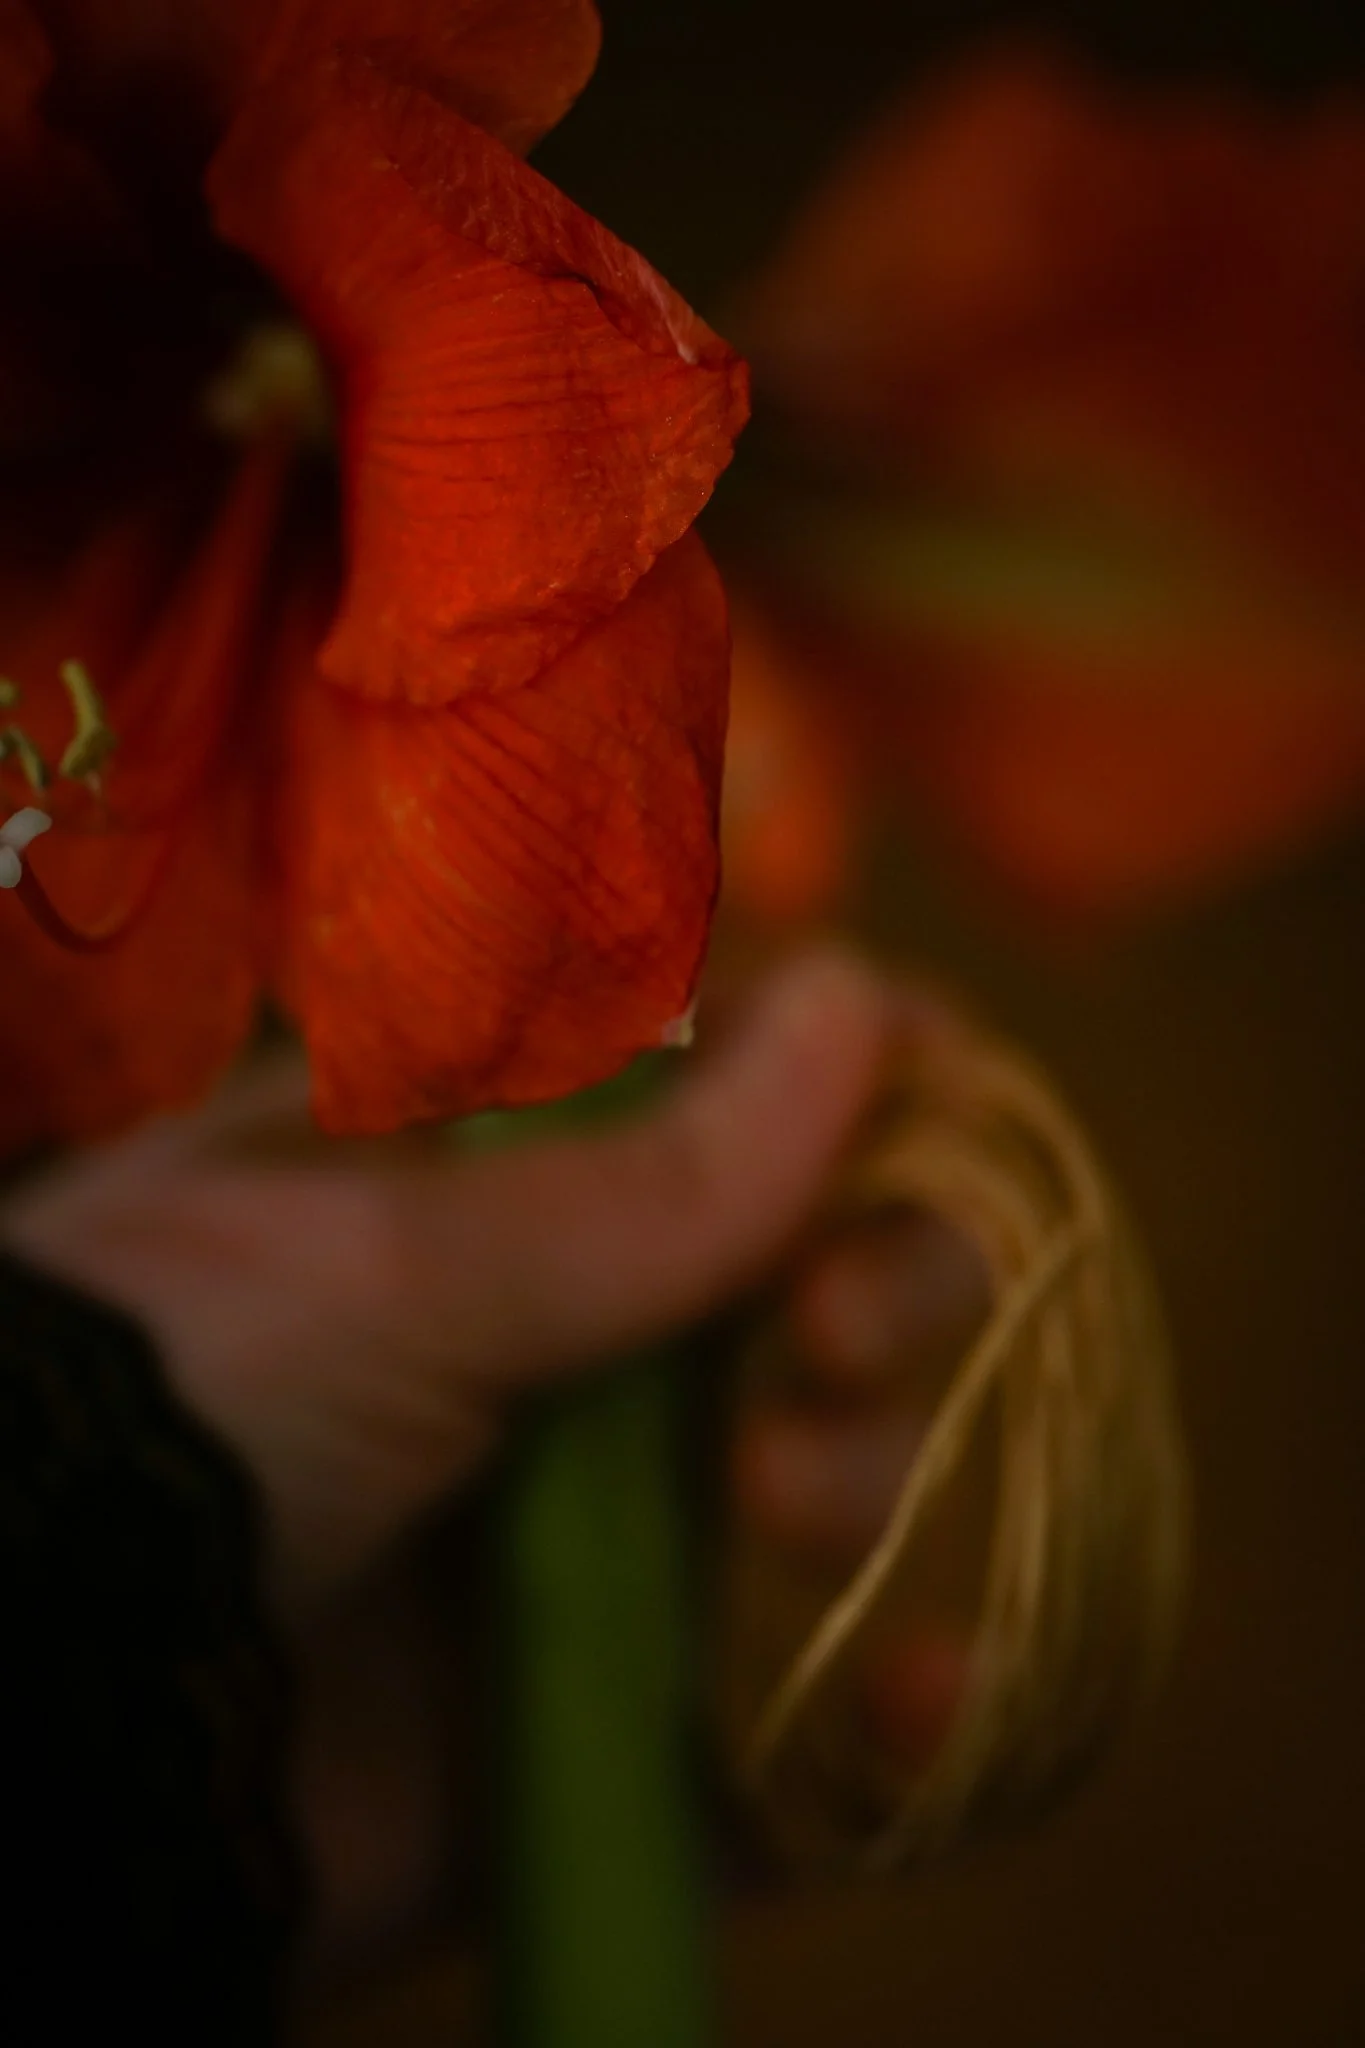
Amaryllis: these flowers have a long, hollow stem that make them perfect for this project. I found amaryllis in random grocery stores both in bulb form (I cut them right off of the bulb) and in long stem form.
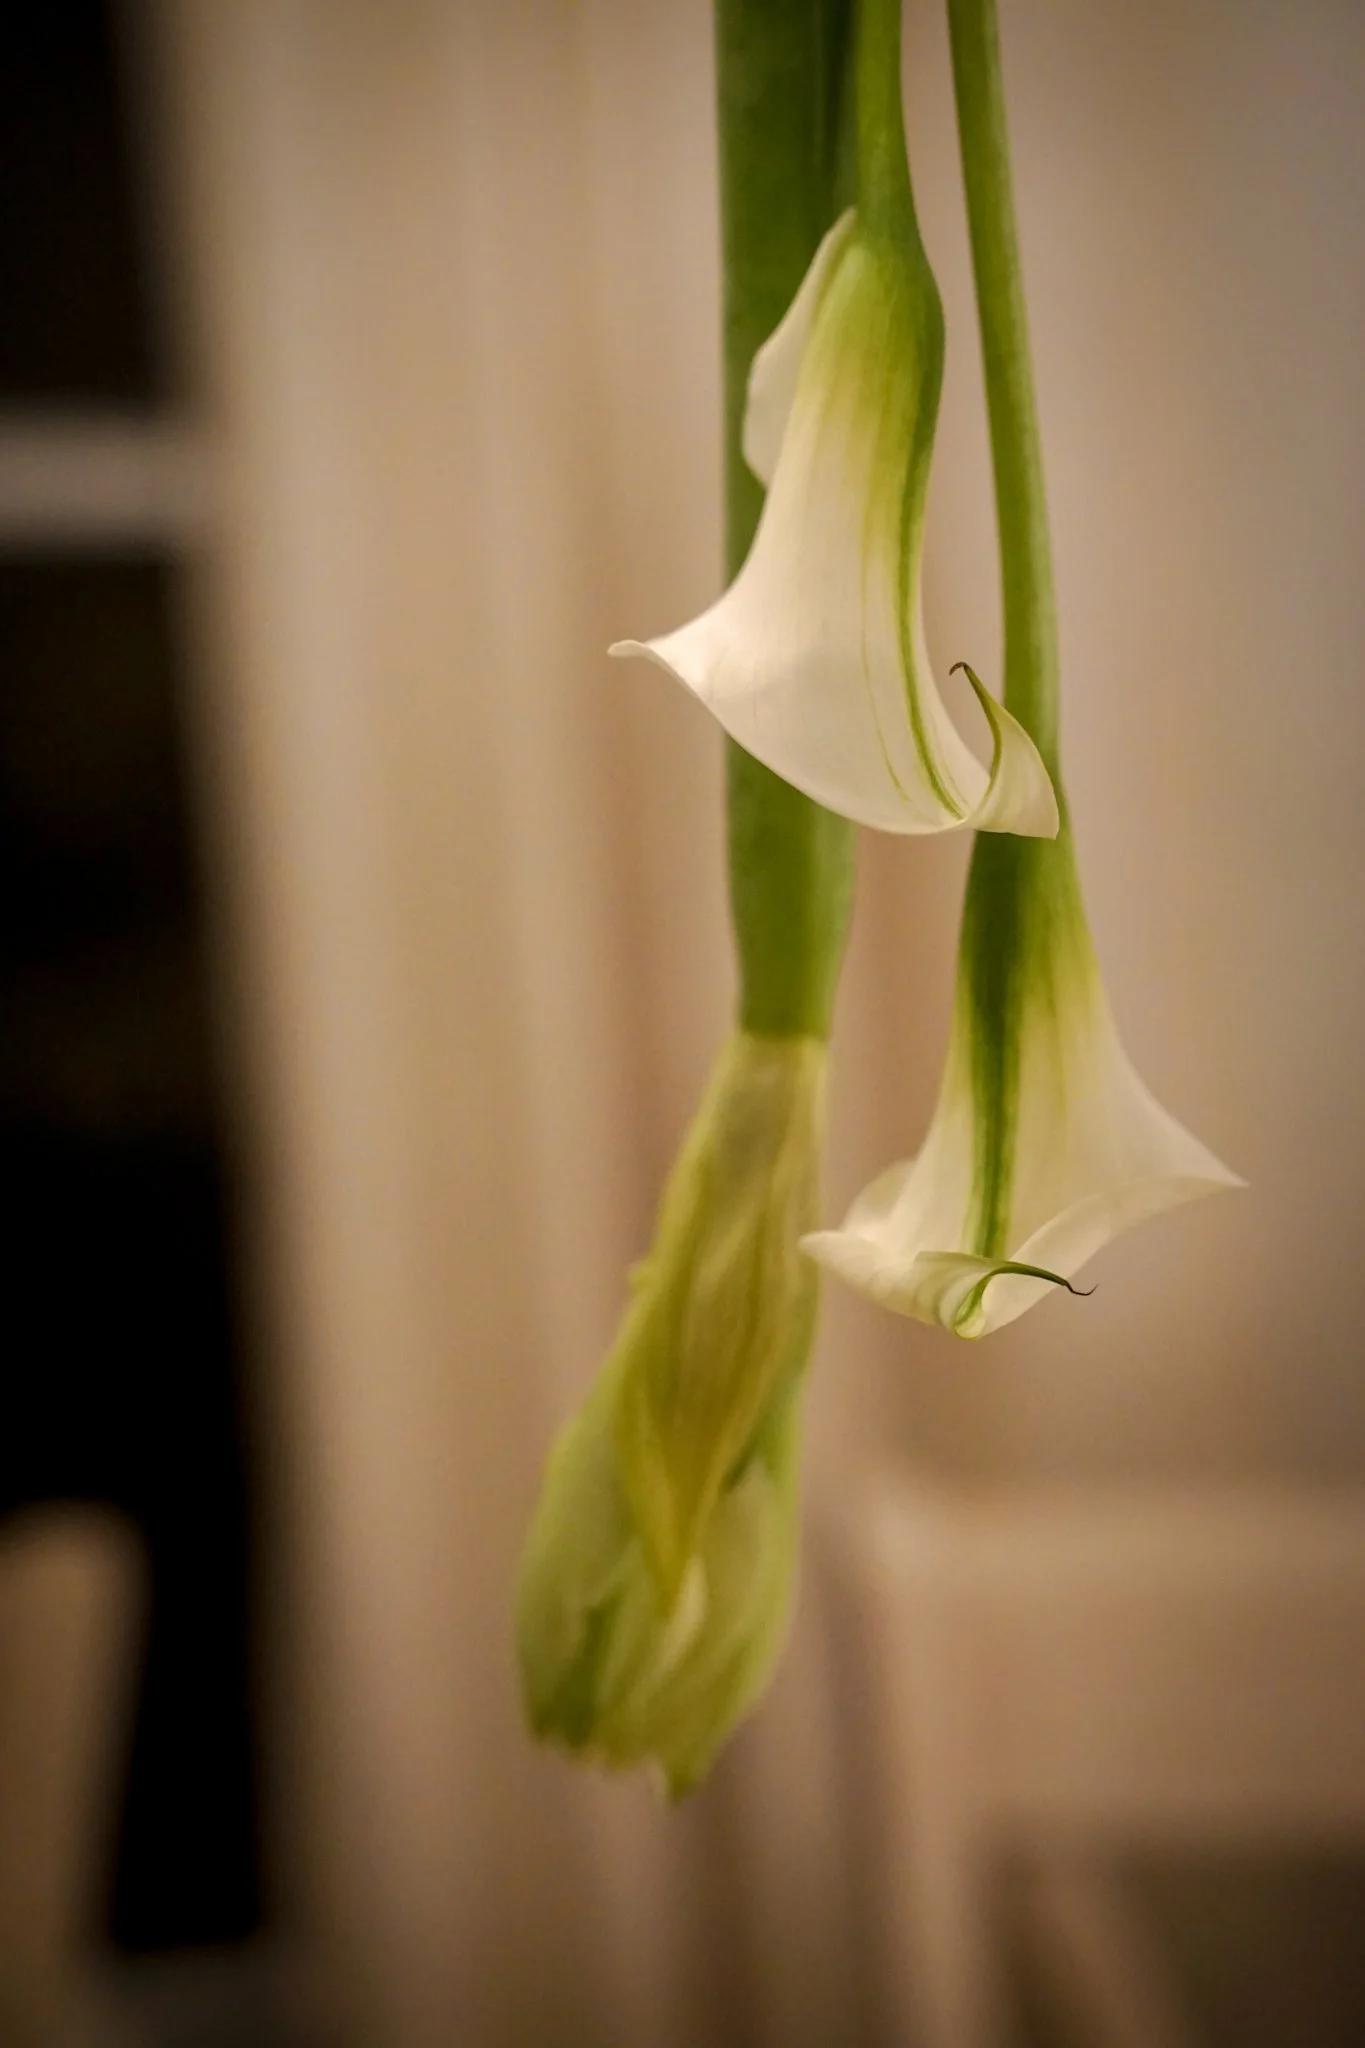
Other flowers that could work: tulips, calla lilies. I also tacked on a few other flowers that probably won’t last long, but I can easily untack them.
Flowers should last for a few days at least, and you can always change them out when they start to wilt.
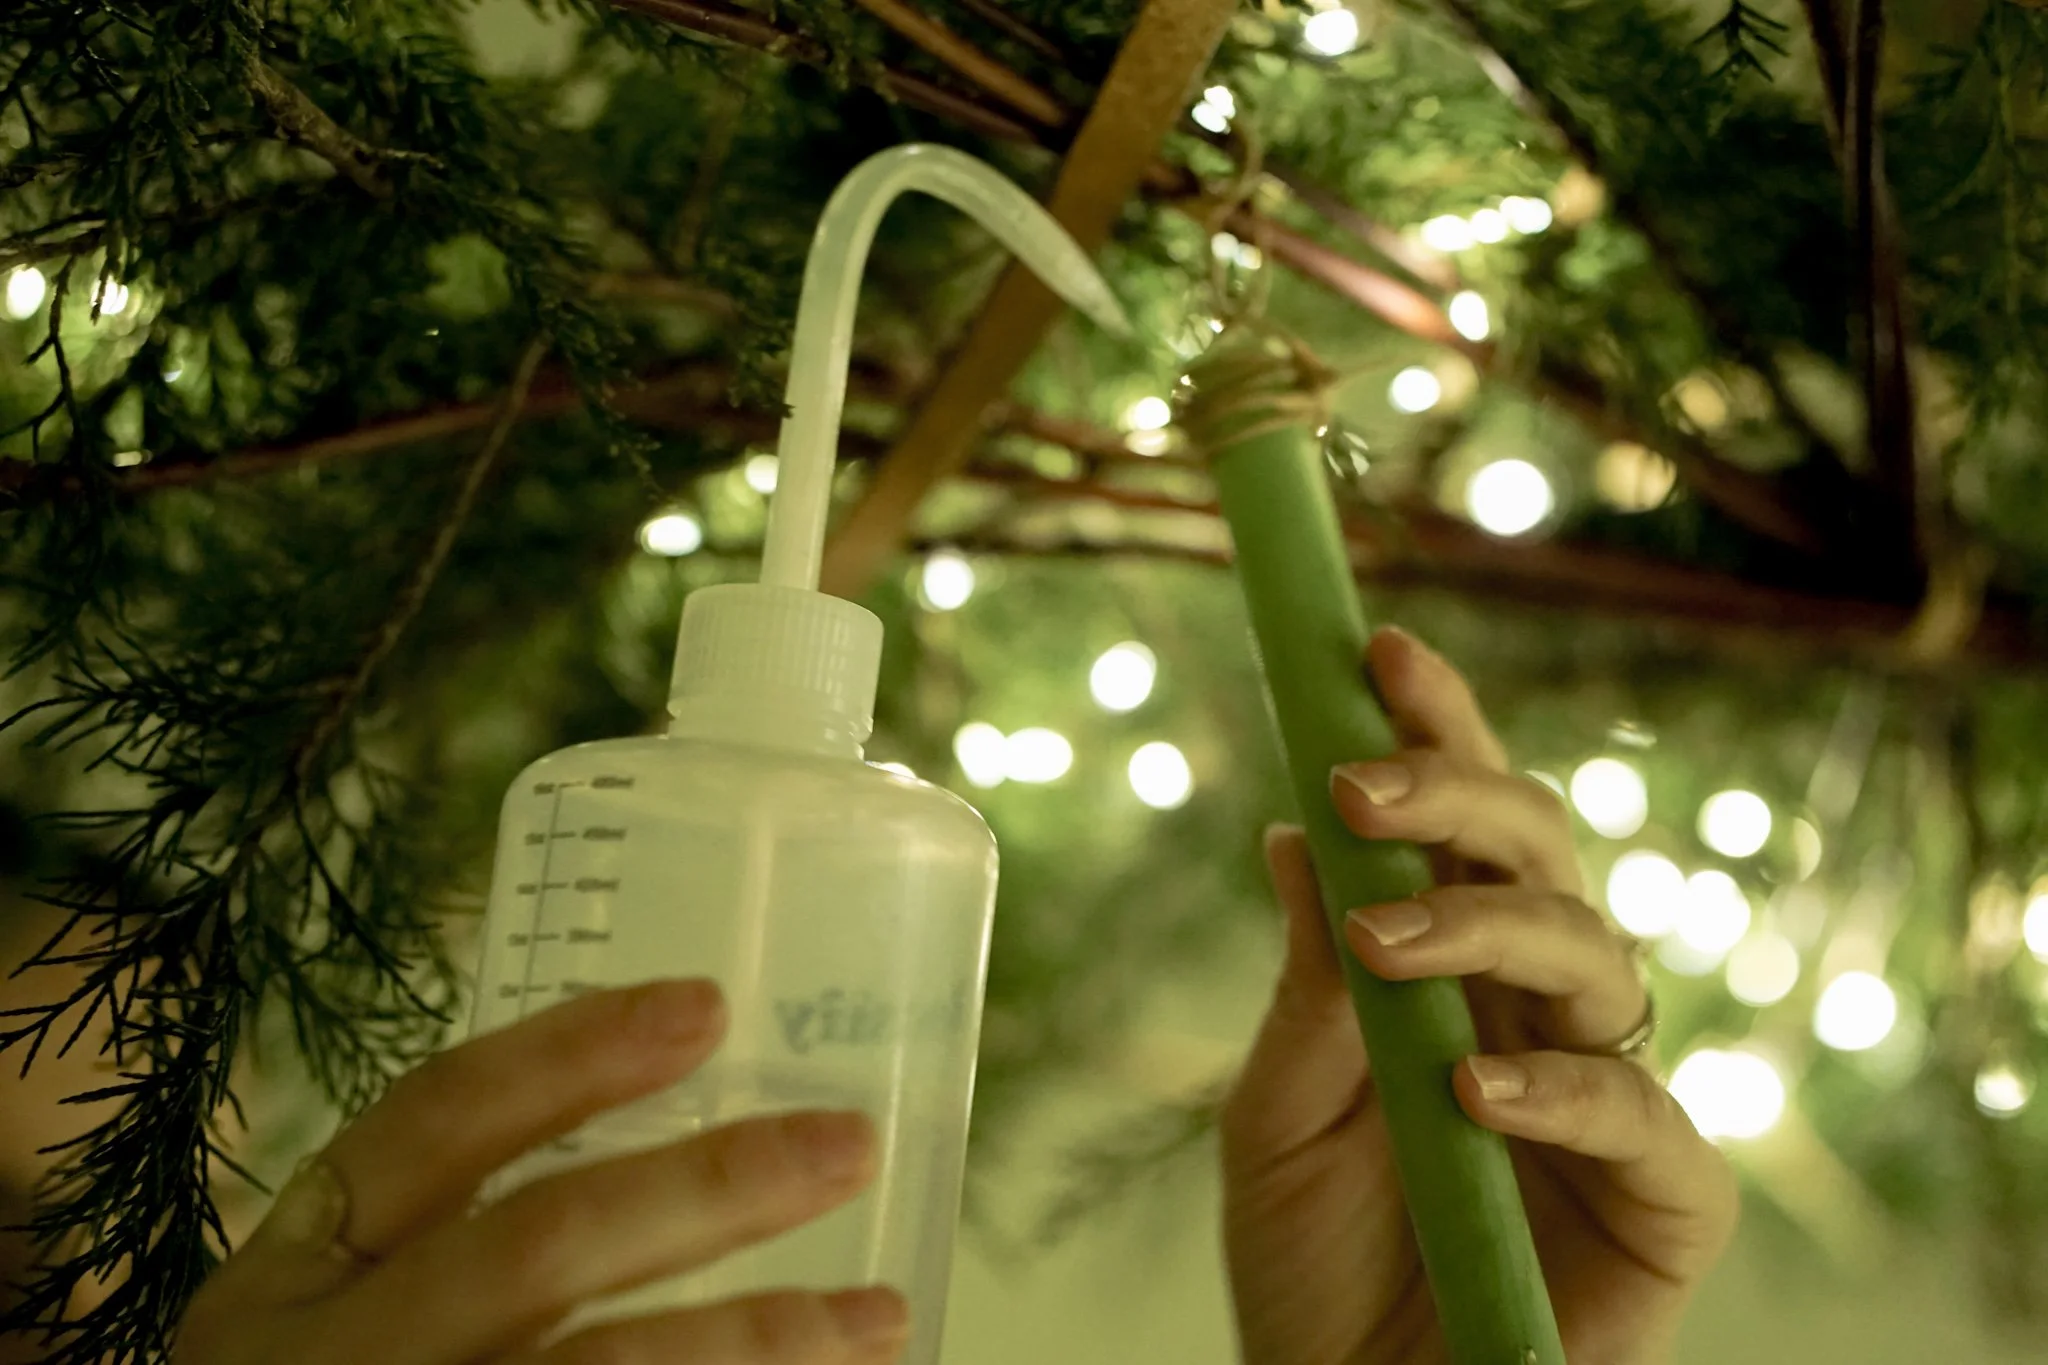
Squeeze Plant Water Bottle. When Maureen sent a picture of this, the first thing that came to my mind was my post-partum peri bottle and I truly pulled it out of storage to use. Luckily I found the correct bottle at a florist shop, but a peri bottle probably would have worked fine! Maureen said that a turkey baster works here, too. This is how you’ll get water into the hollow stems of your upside-down flowers hanging from your greenery.
Optional: if you can’t find flowers that will work, you can also use other things to decorate.
Wired ribbon is an example Maureen gave, you can have them curled and draping down from the greenery. You can even pair ribbon with the fresh flowers, too. Experiment!
Maureen added Harry Potter floating candles to her display and they’re magical! How fun for kids (and grown-ups) to use the wand to turn these on and off on Christmas. If we have time to find and do this with ours, we might too. Lots of room with this to get creative with things you could hang from this!
The first step depends on your chandelier. Our chandelier had a nice layer that we could lie the branches right on top, so we bundled our branches together, tying in the center with your bind wire (or twine / jute / wool). You want the branches to be splaying out at different angles rather than all sitting parallel to one another, to create an interesting shape when you place the greenery. Once we had created our bundle, we placed onto our chandelier and moved the branches around a bit to achieve an interesting shape.

Maureen’s chandelier was such that she couldn’t lie the branches flat, so instead, she placed the branches onto the chandelier first, and then tied the ends together with bind wire.

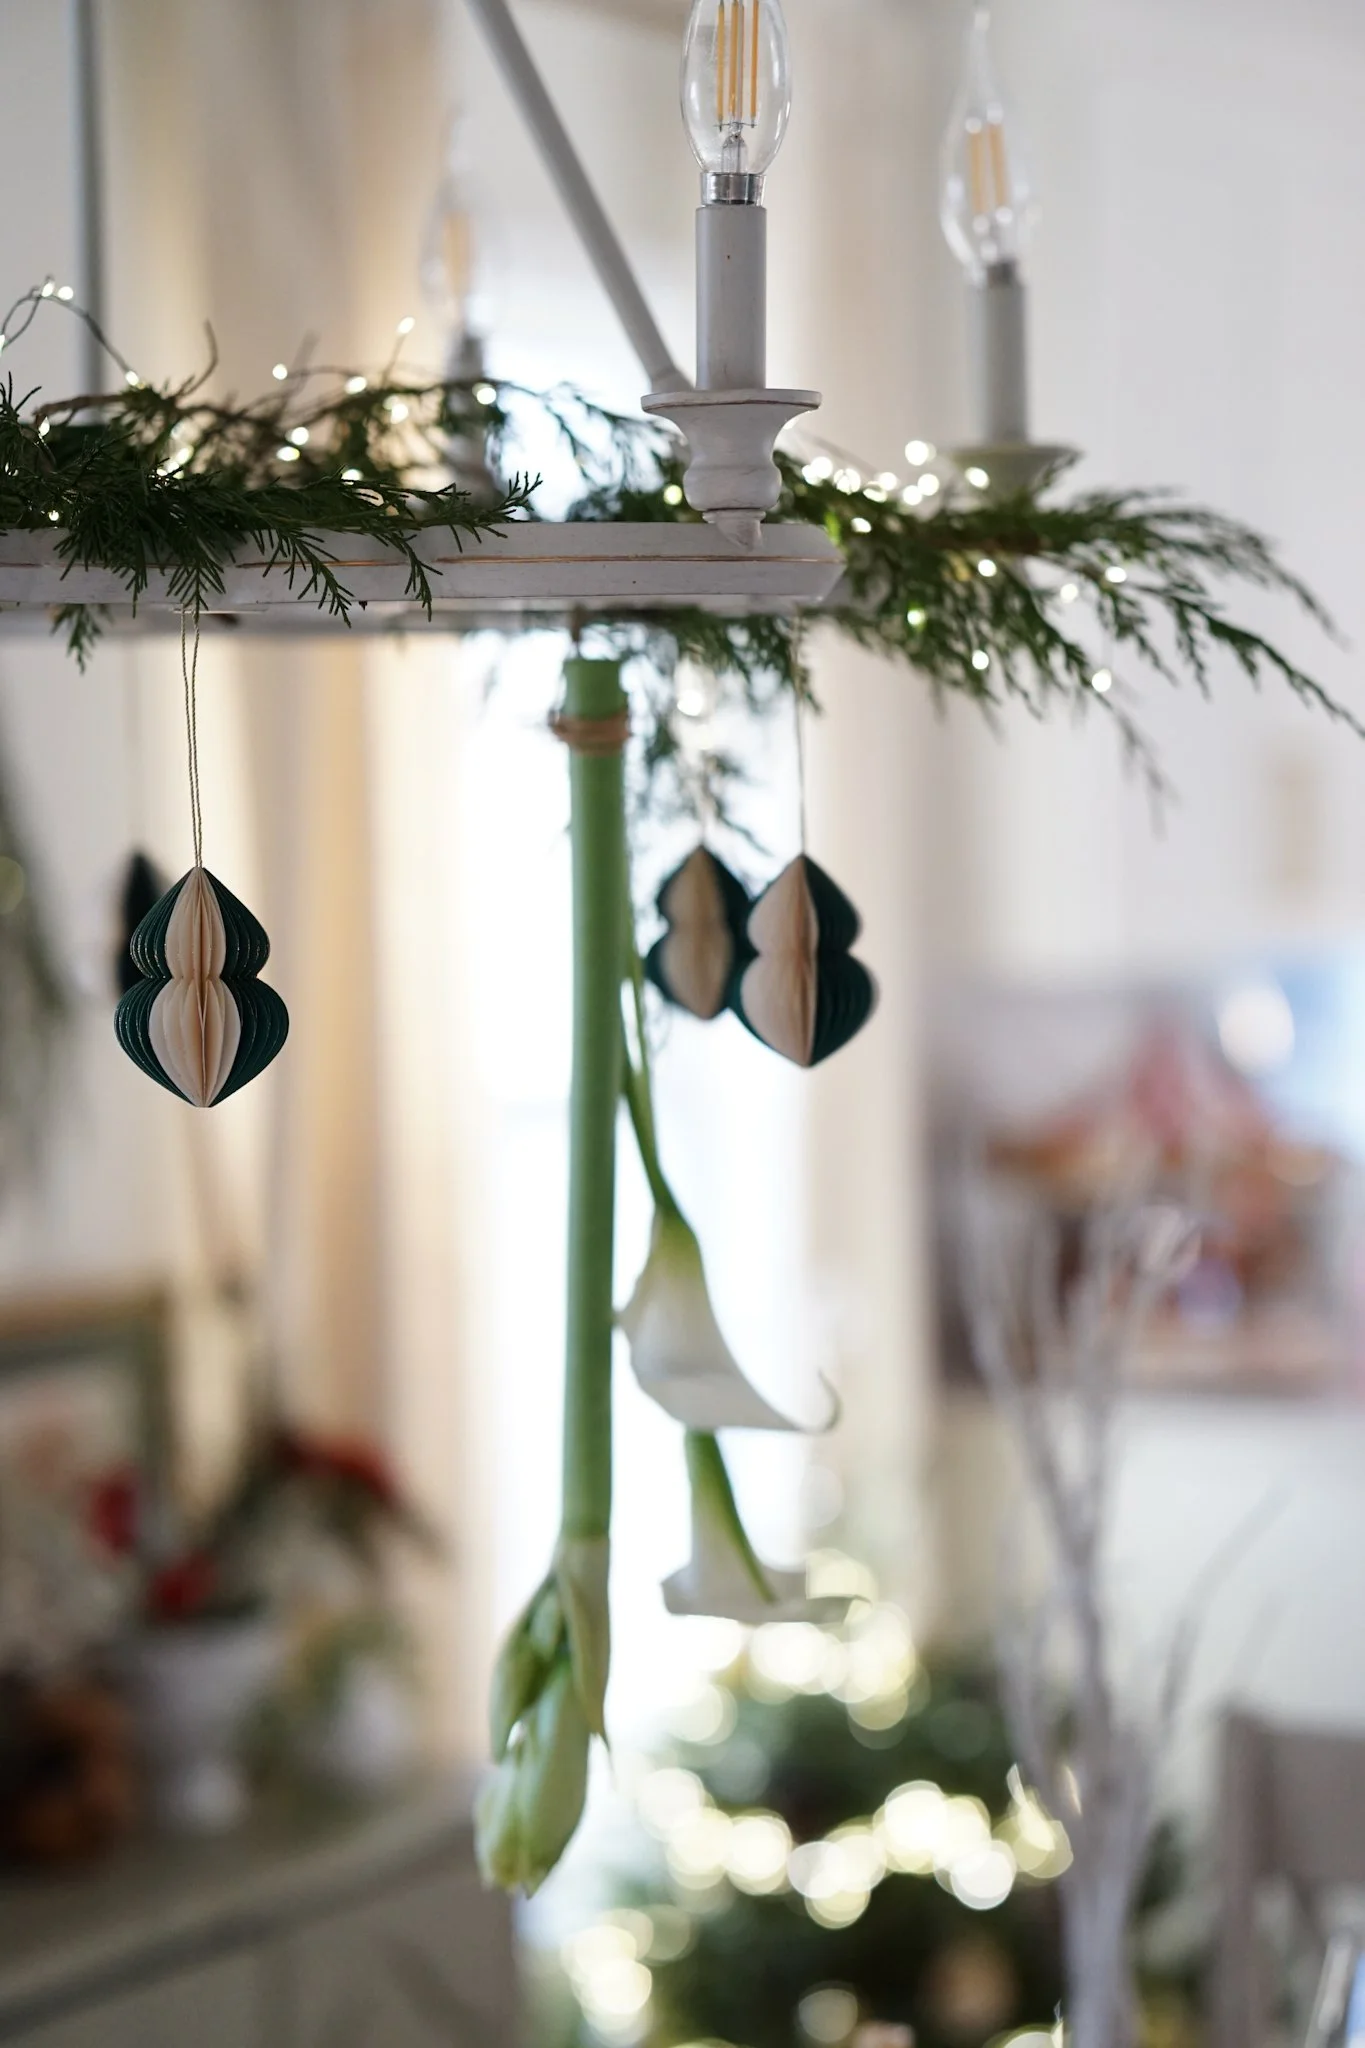
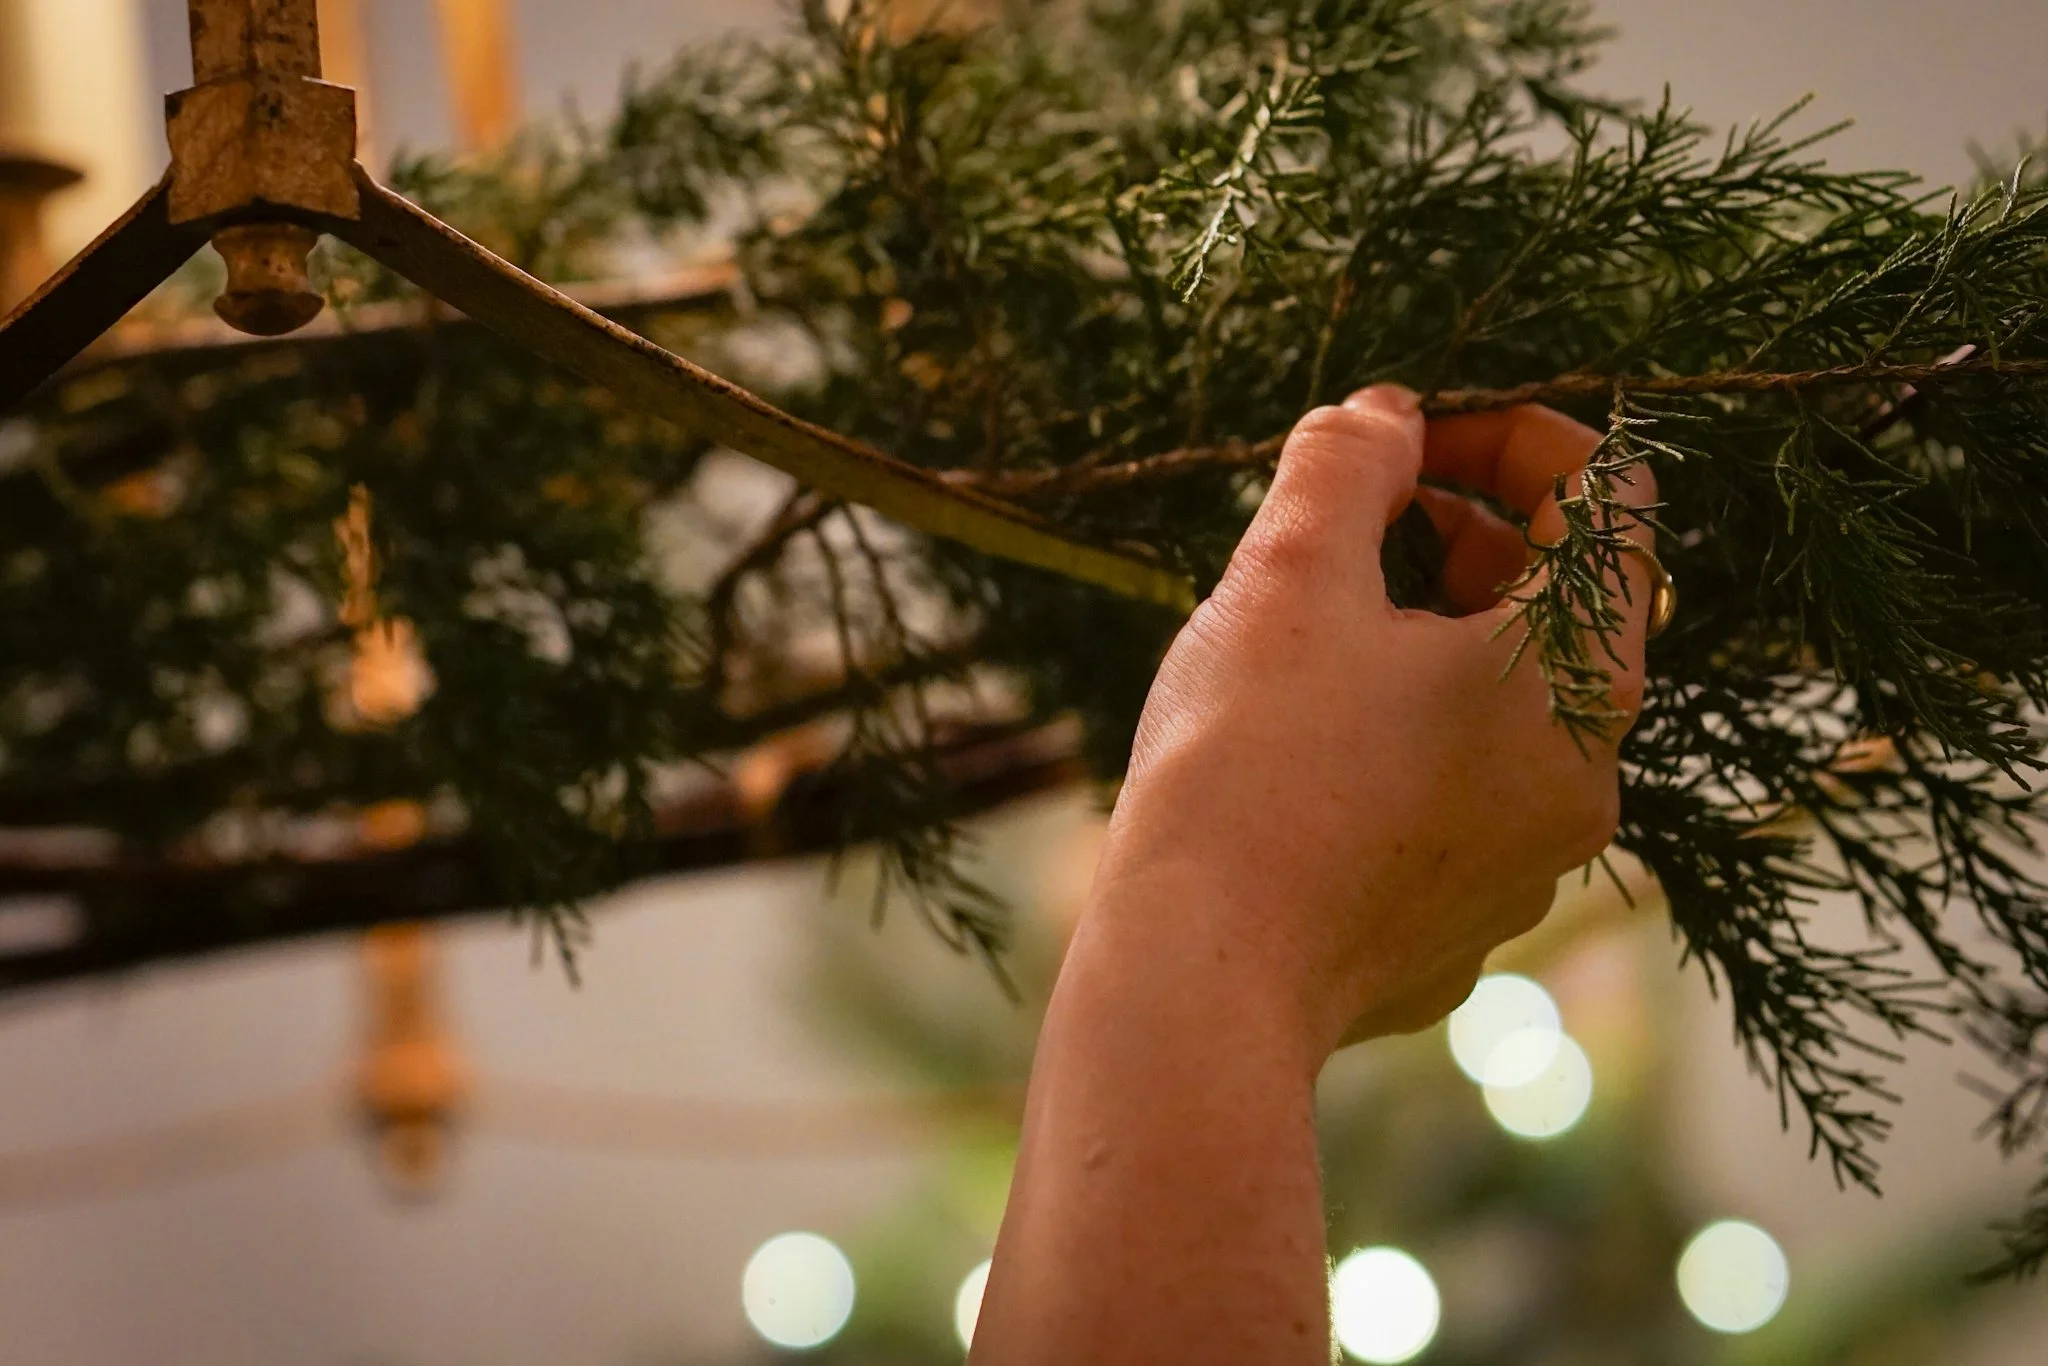
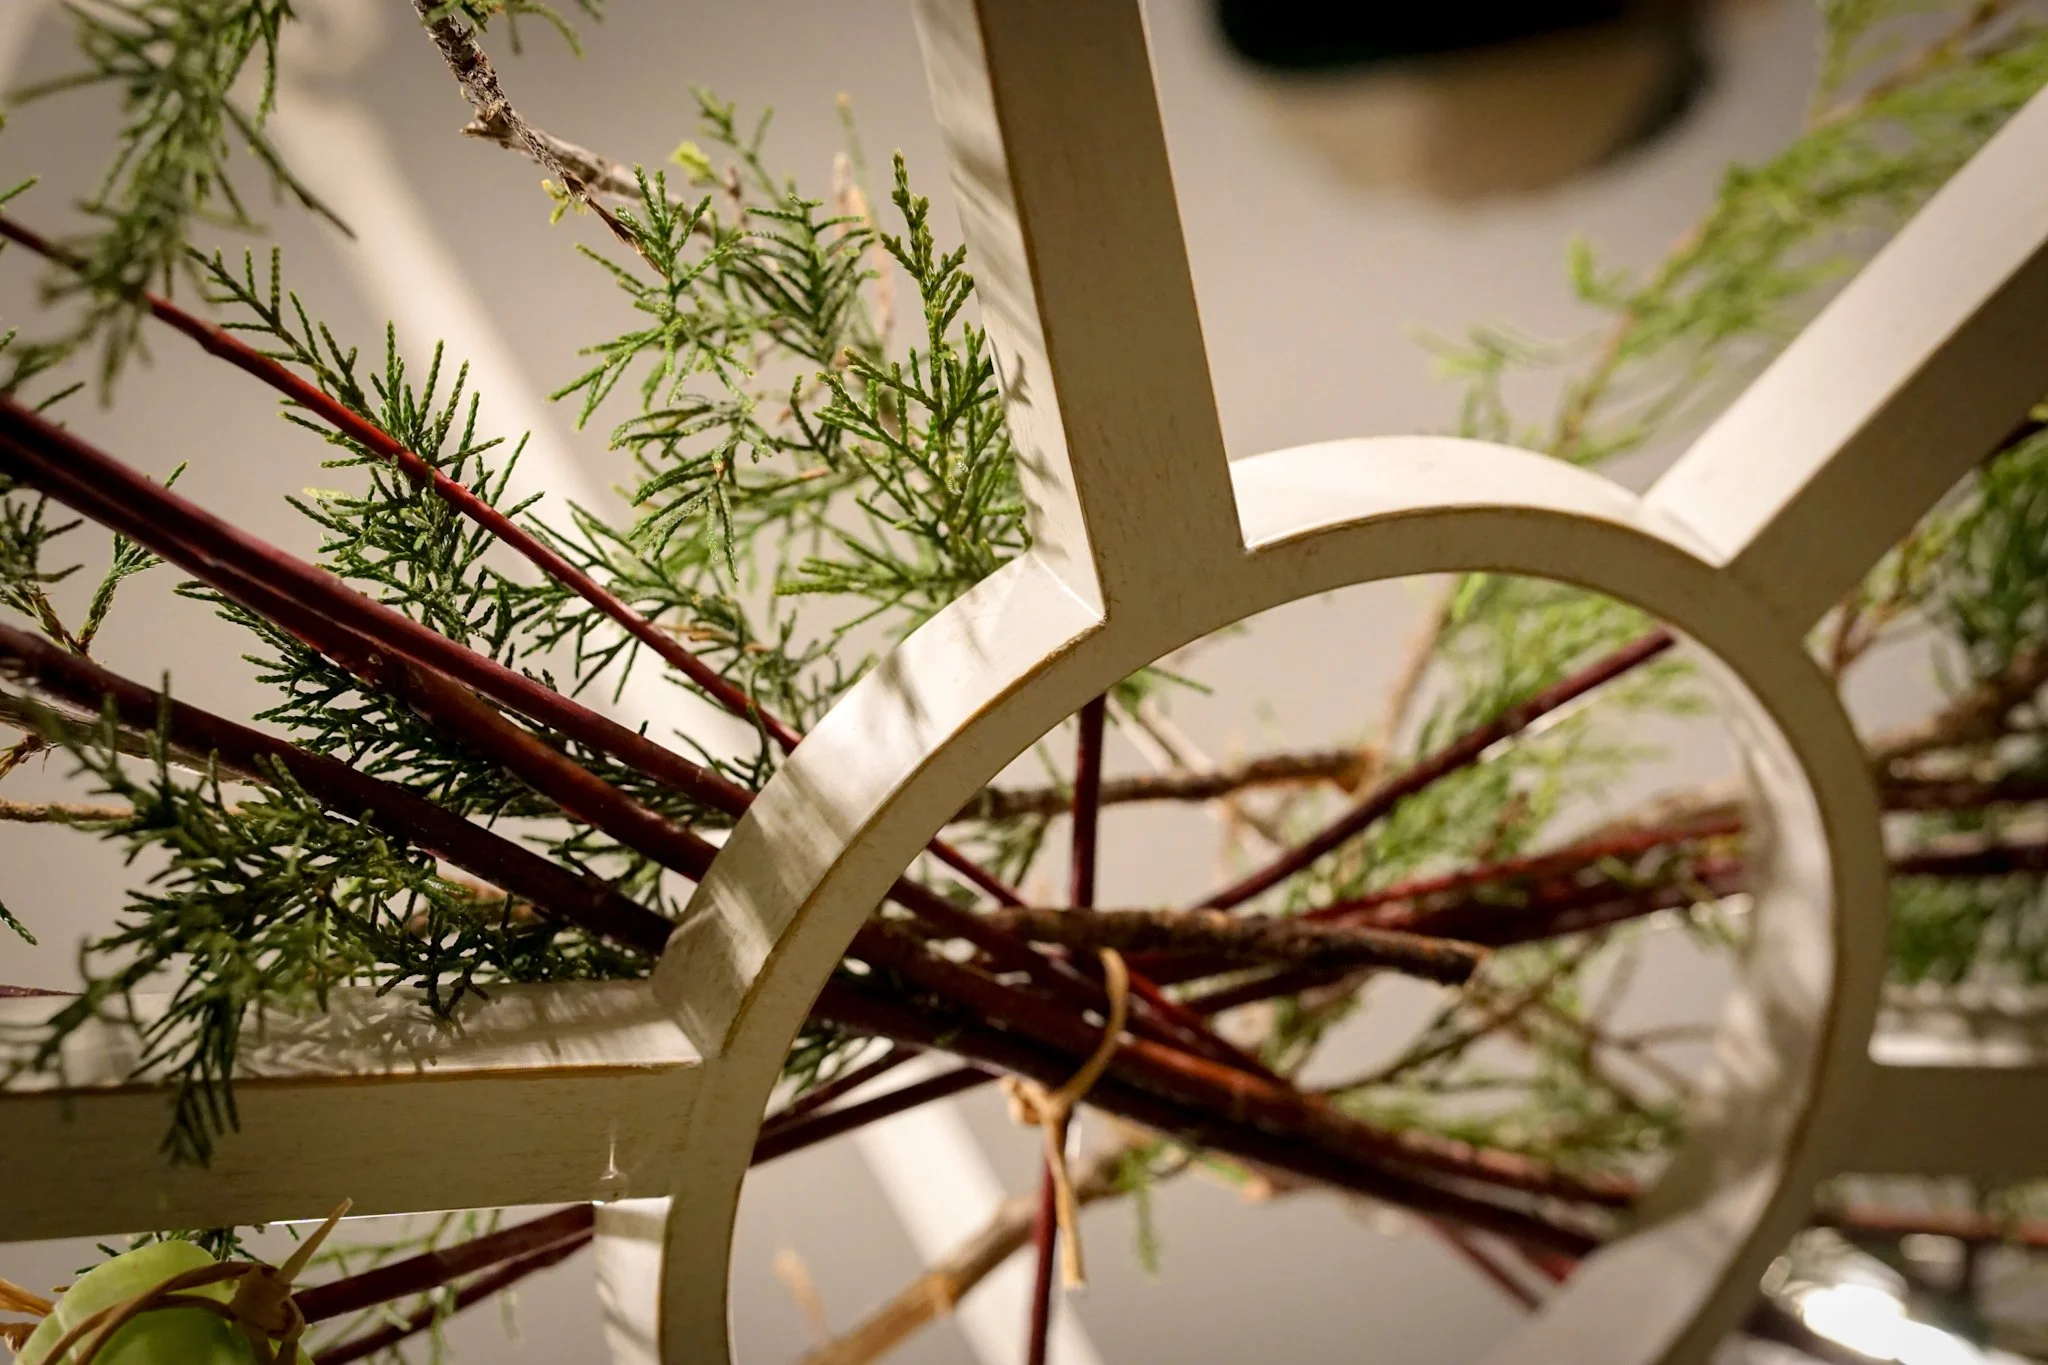
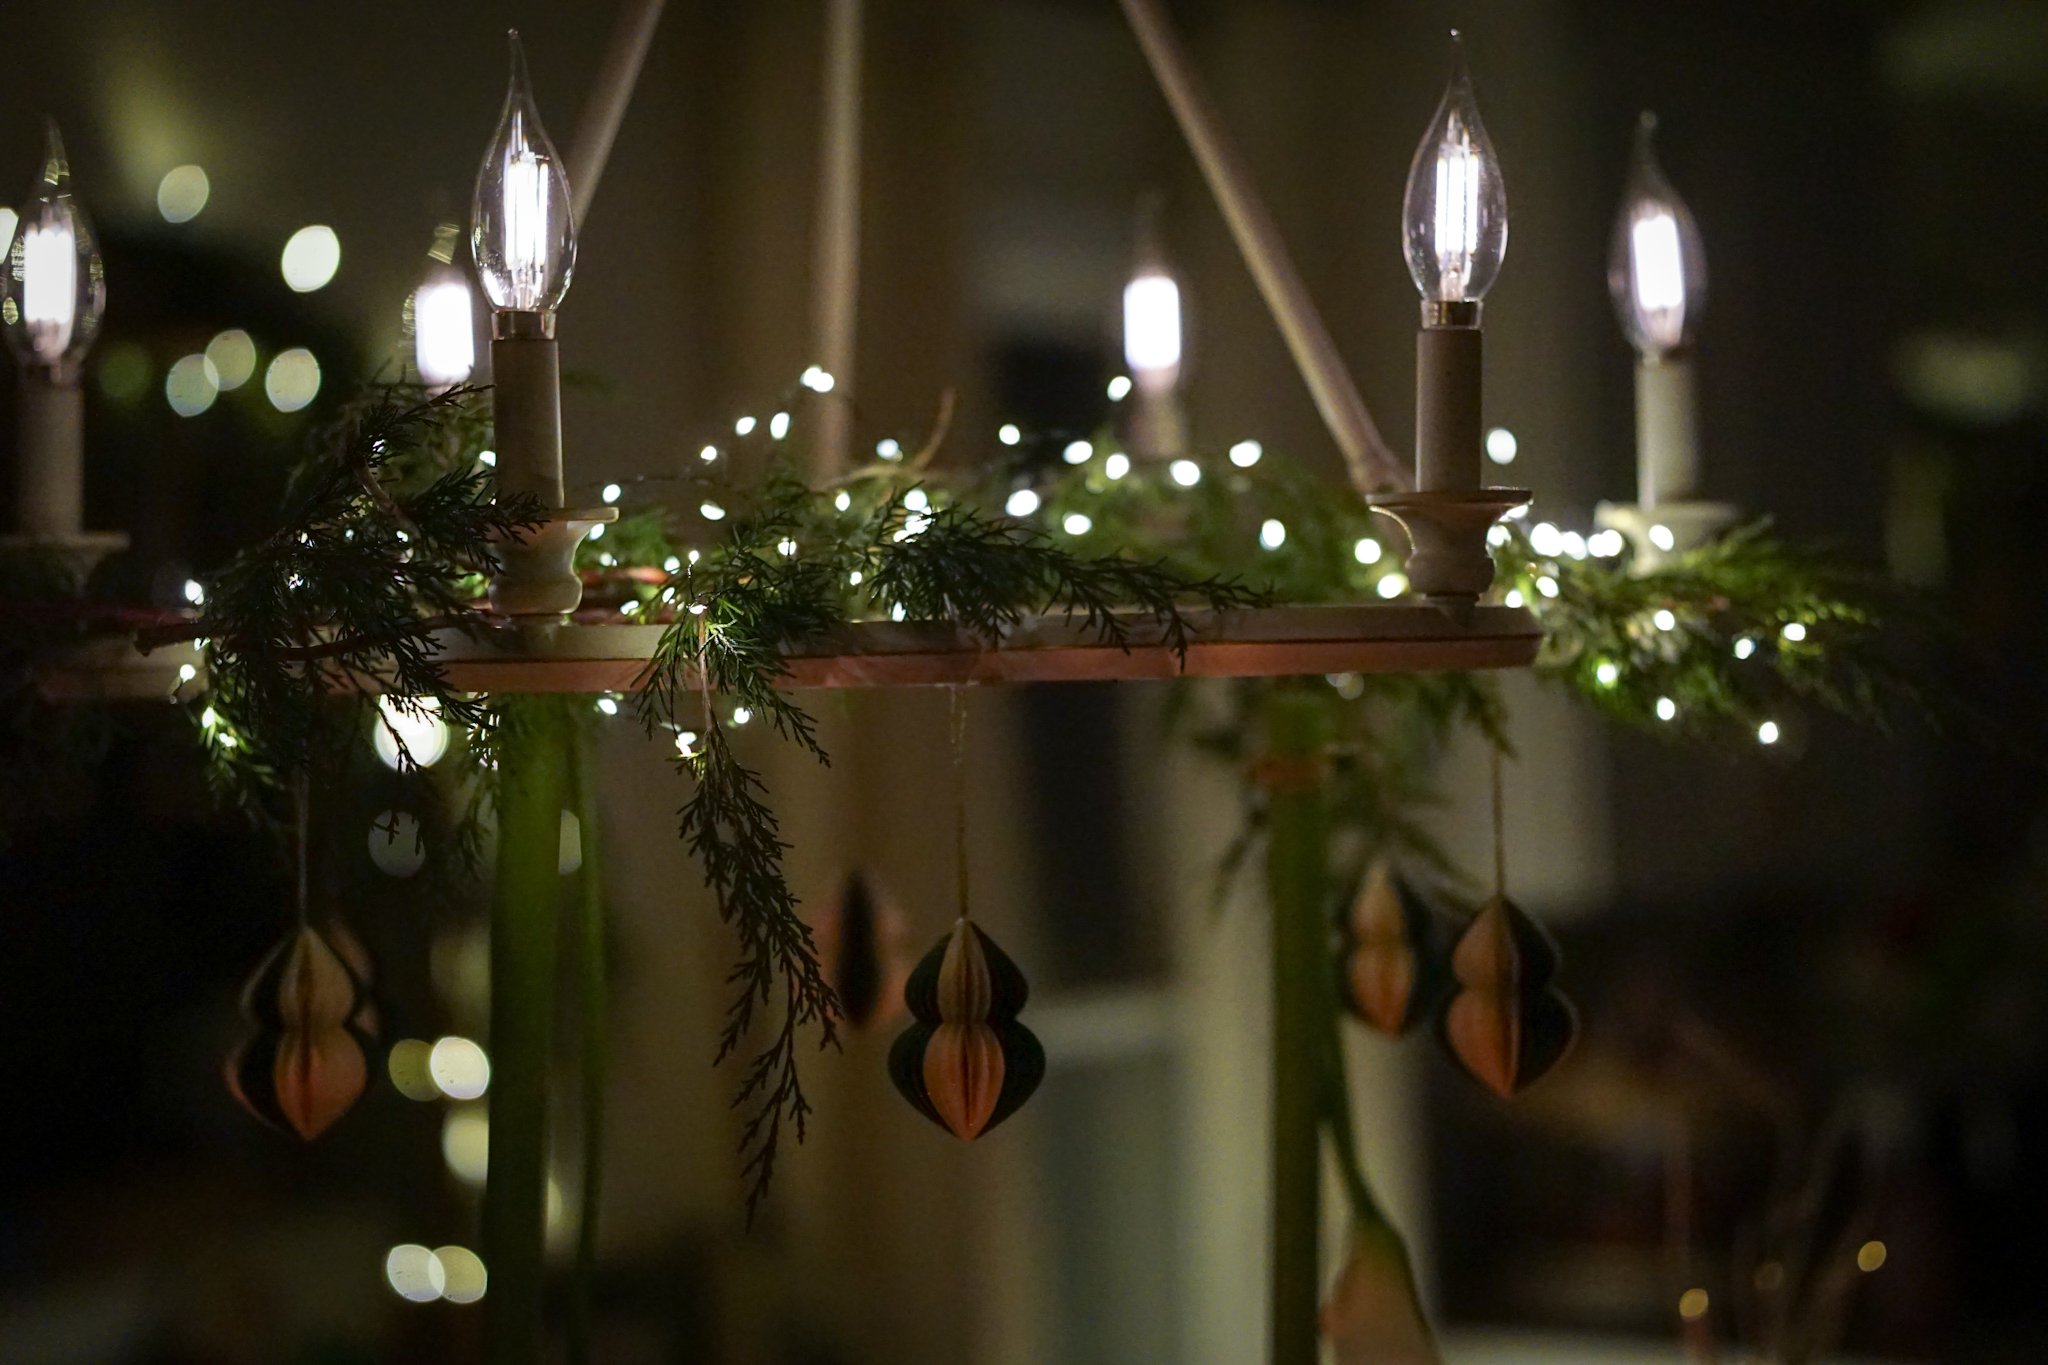
Nest or nestle your greenery on top of the branches. In our home, we rested the greenery right on top of the bundled branches. Maureen wove her greenery into the branches. You want to have enough greenery to mostly cover the branches. Arrange the greenery to your liking.

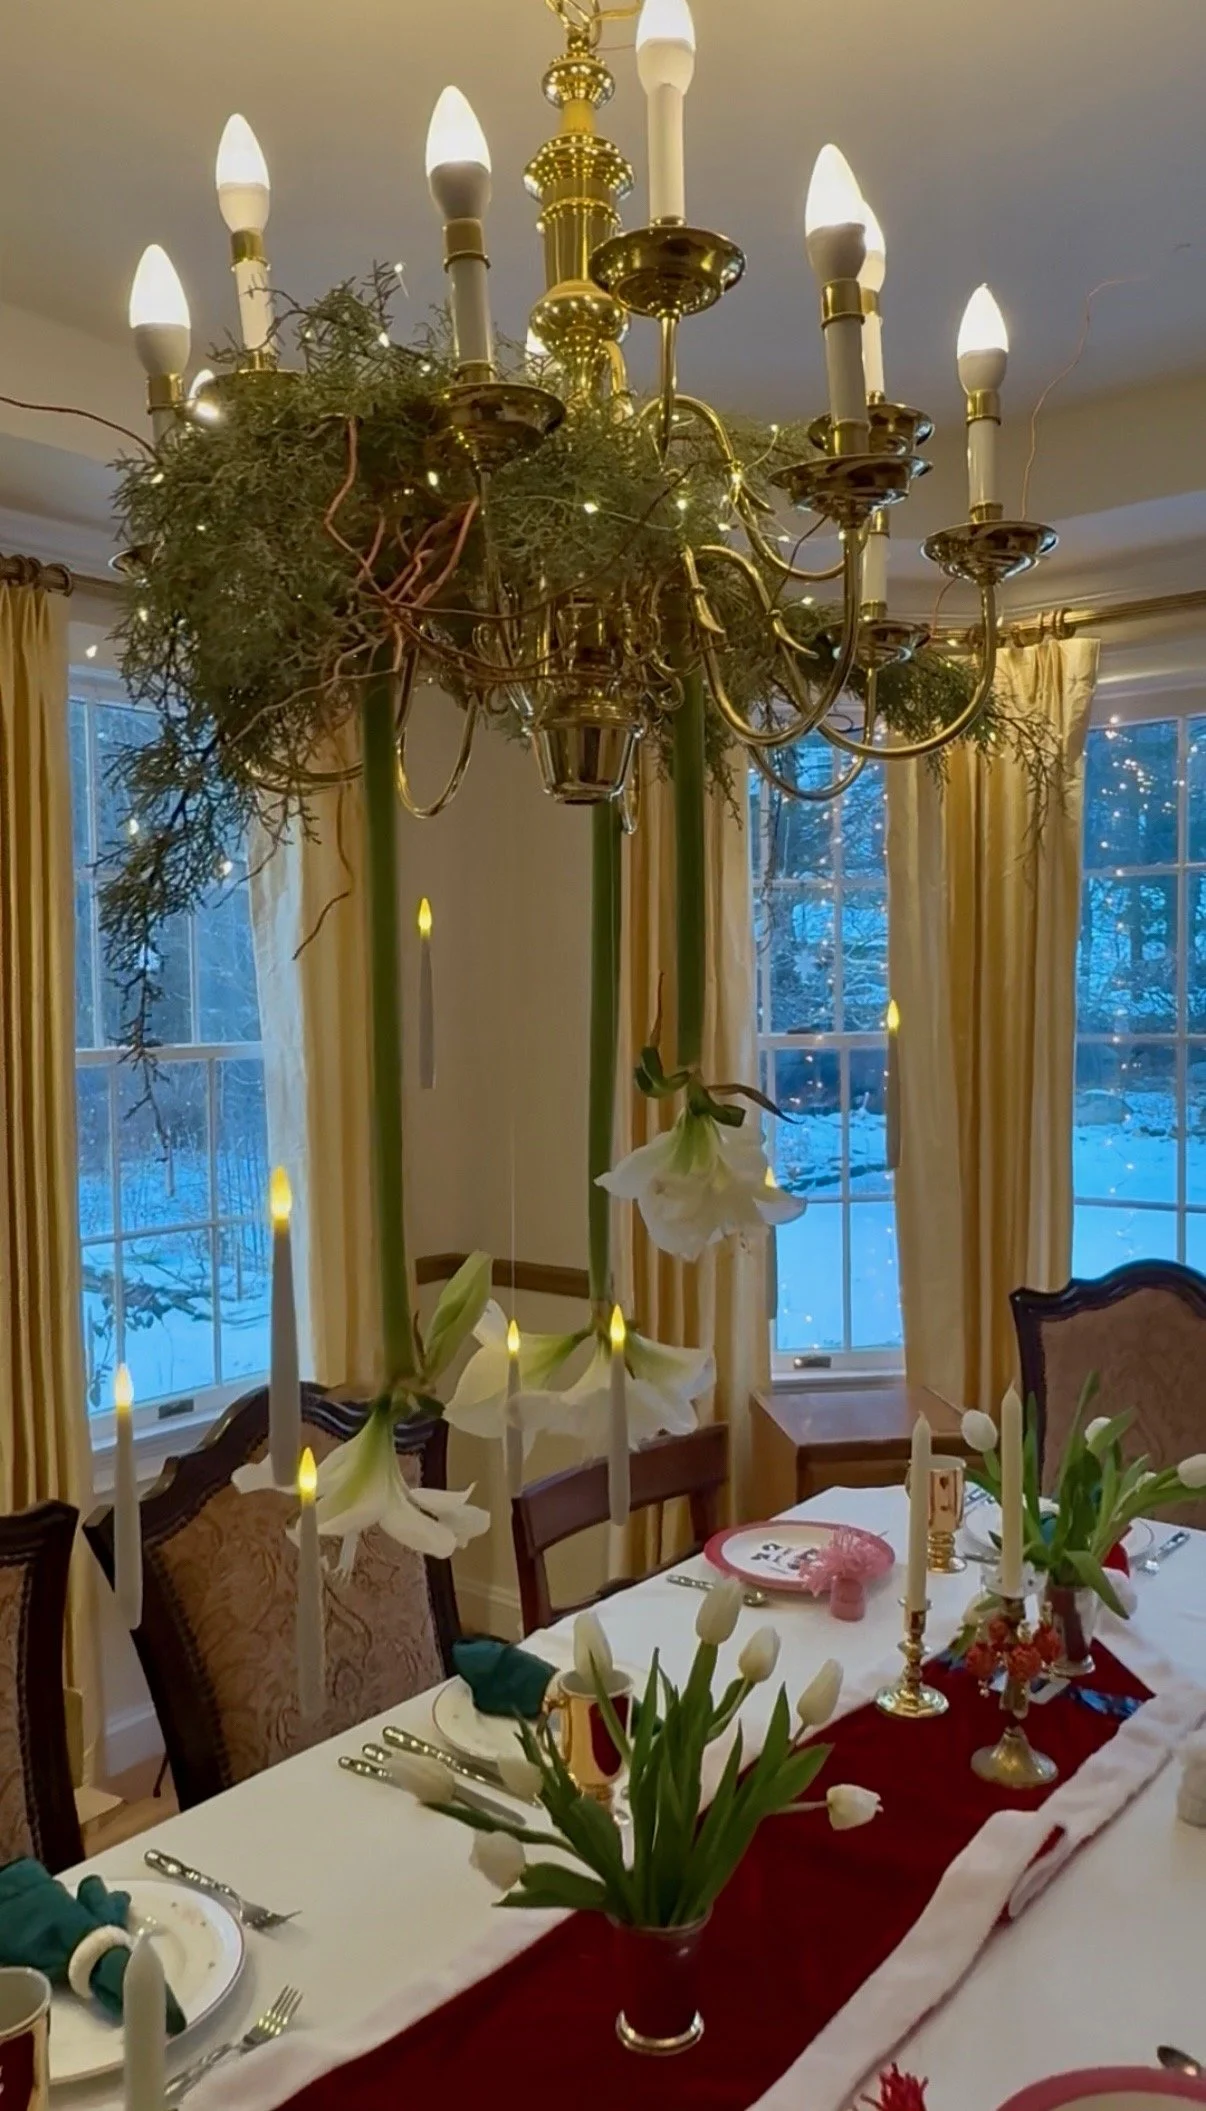
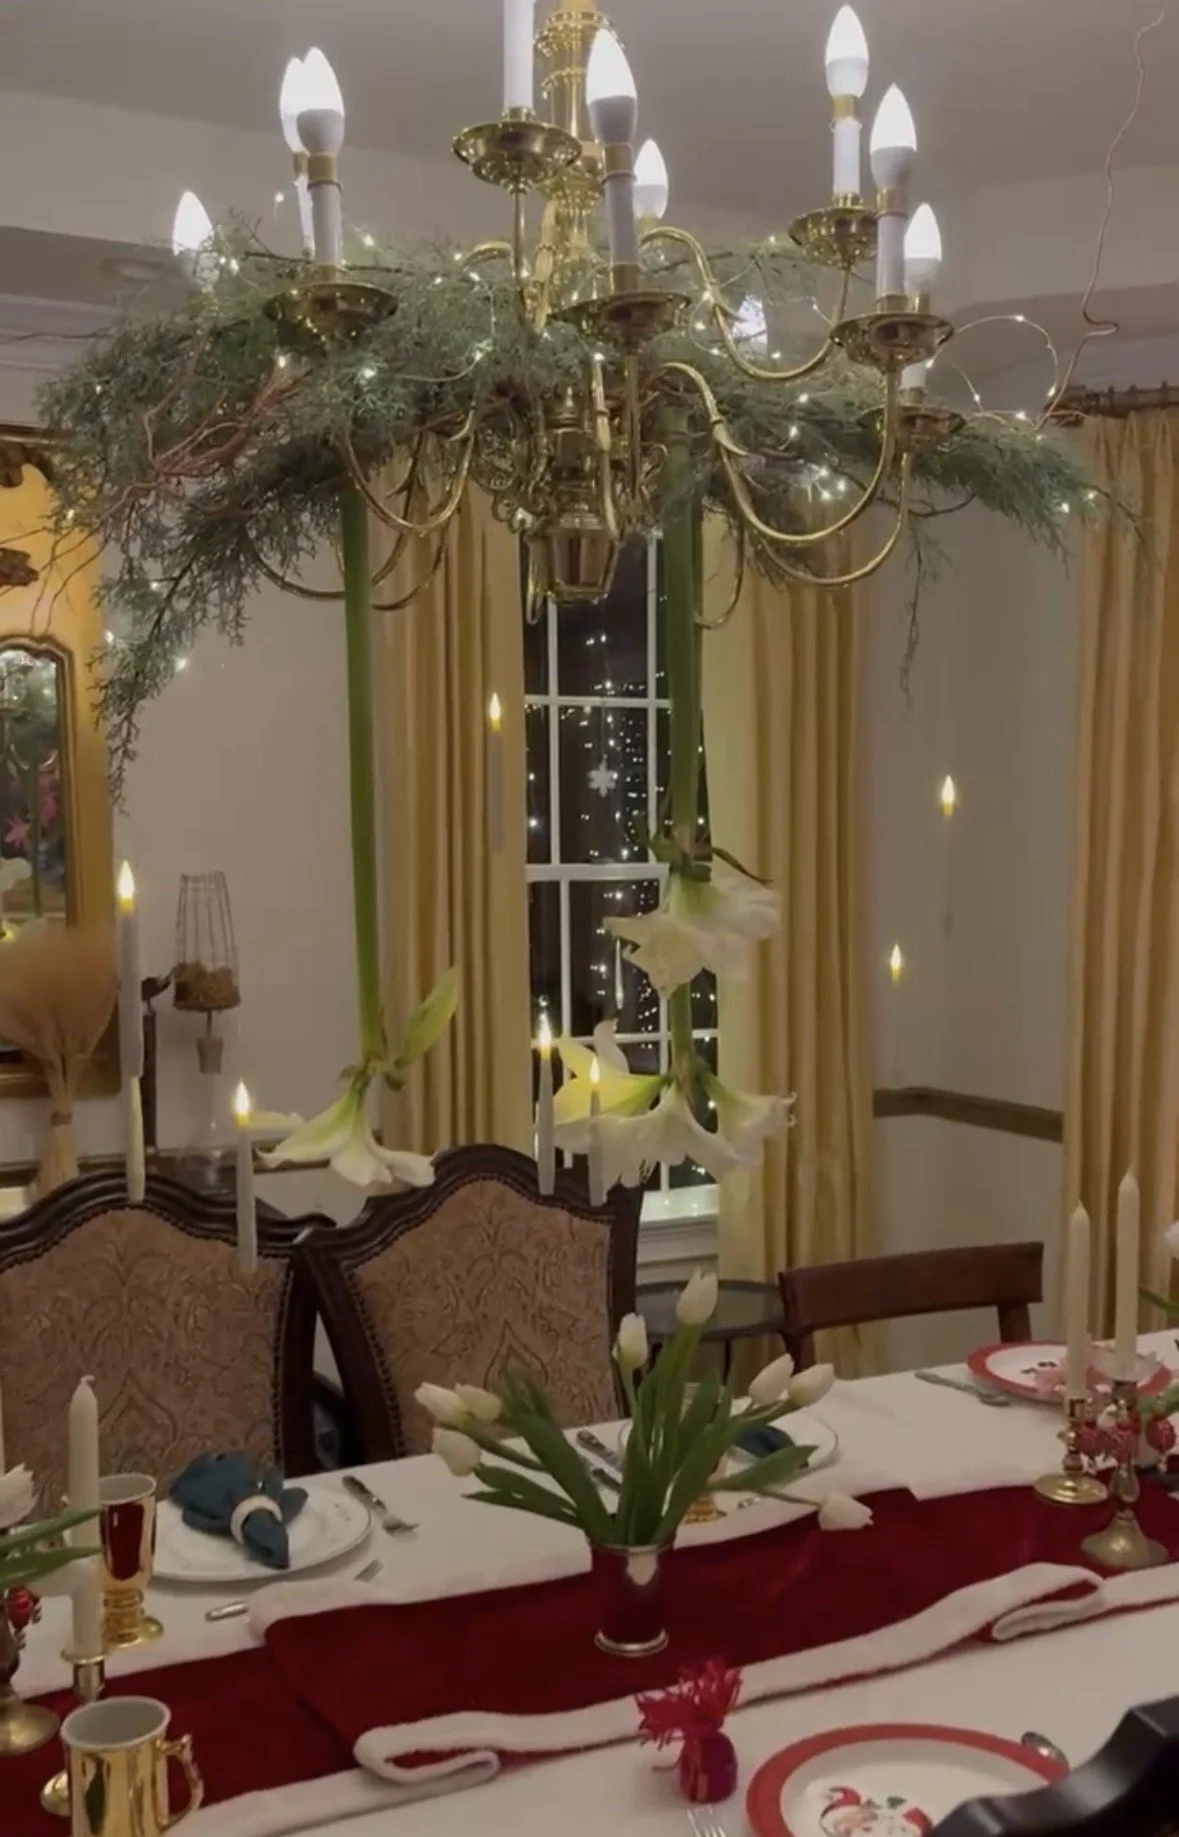
Maureen’s chandelier and gorgeous Carolina Sapphire greens
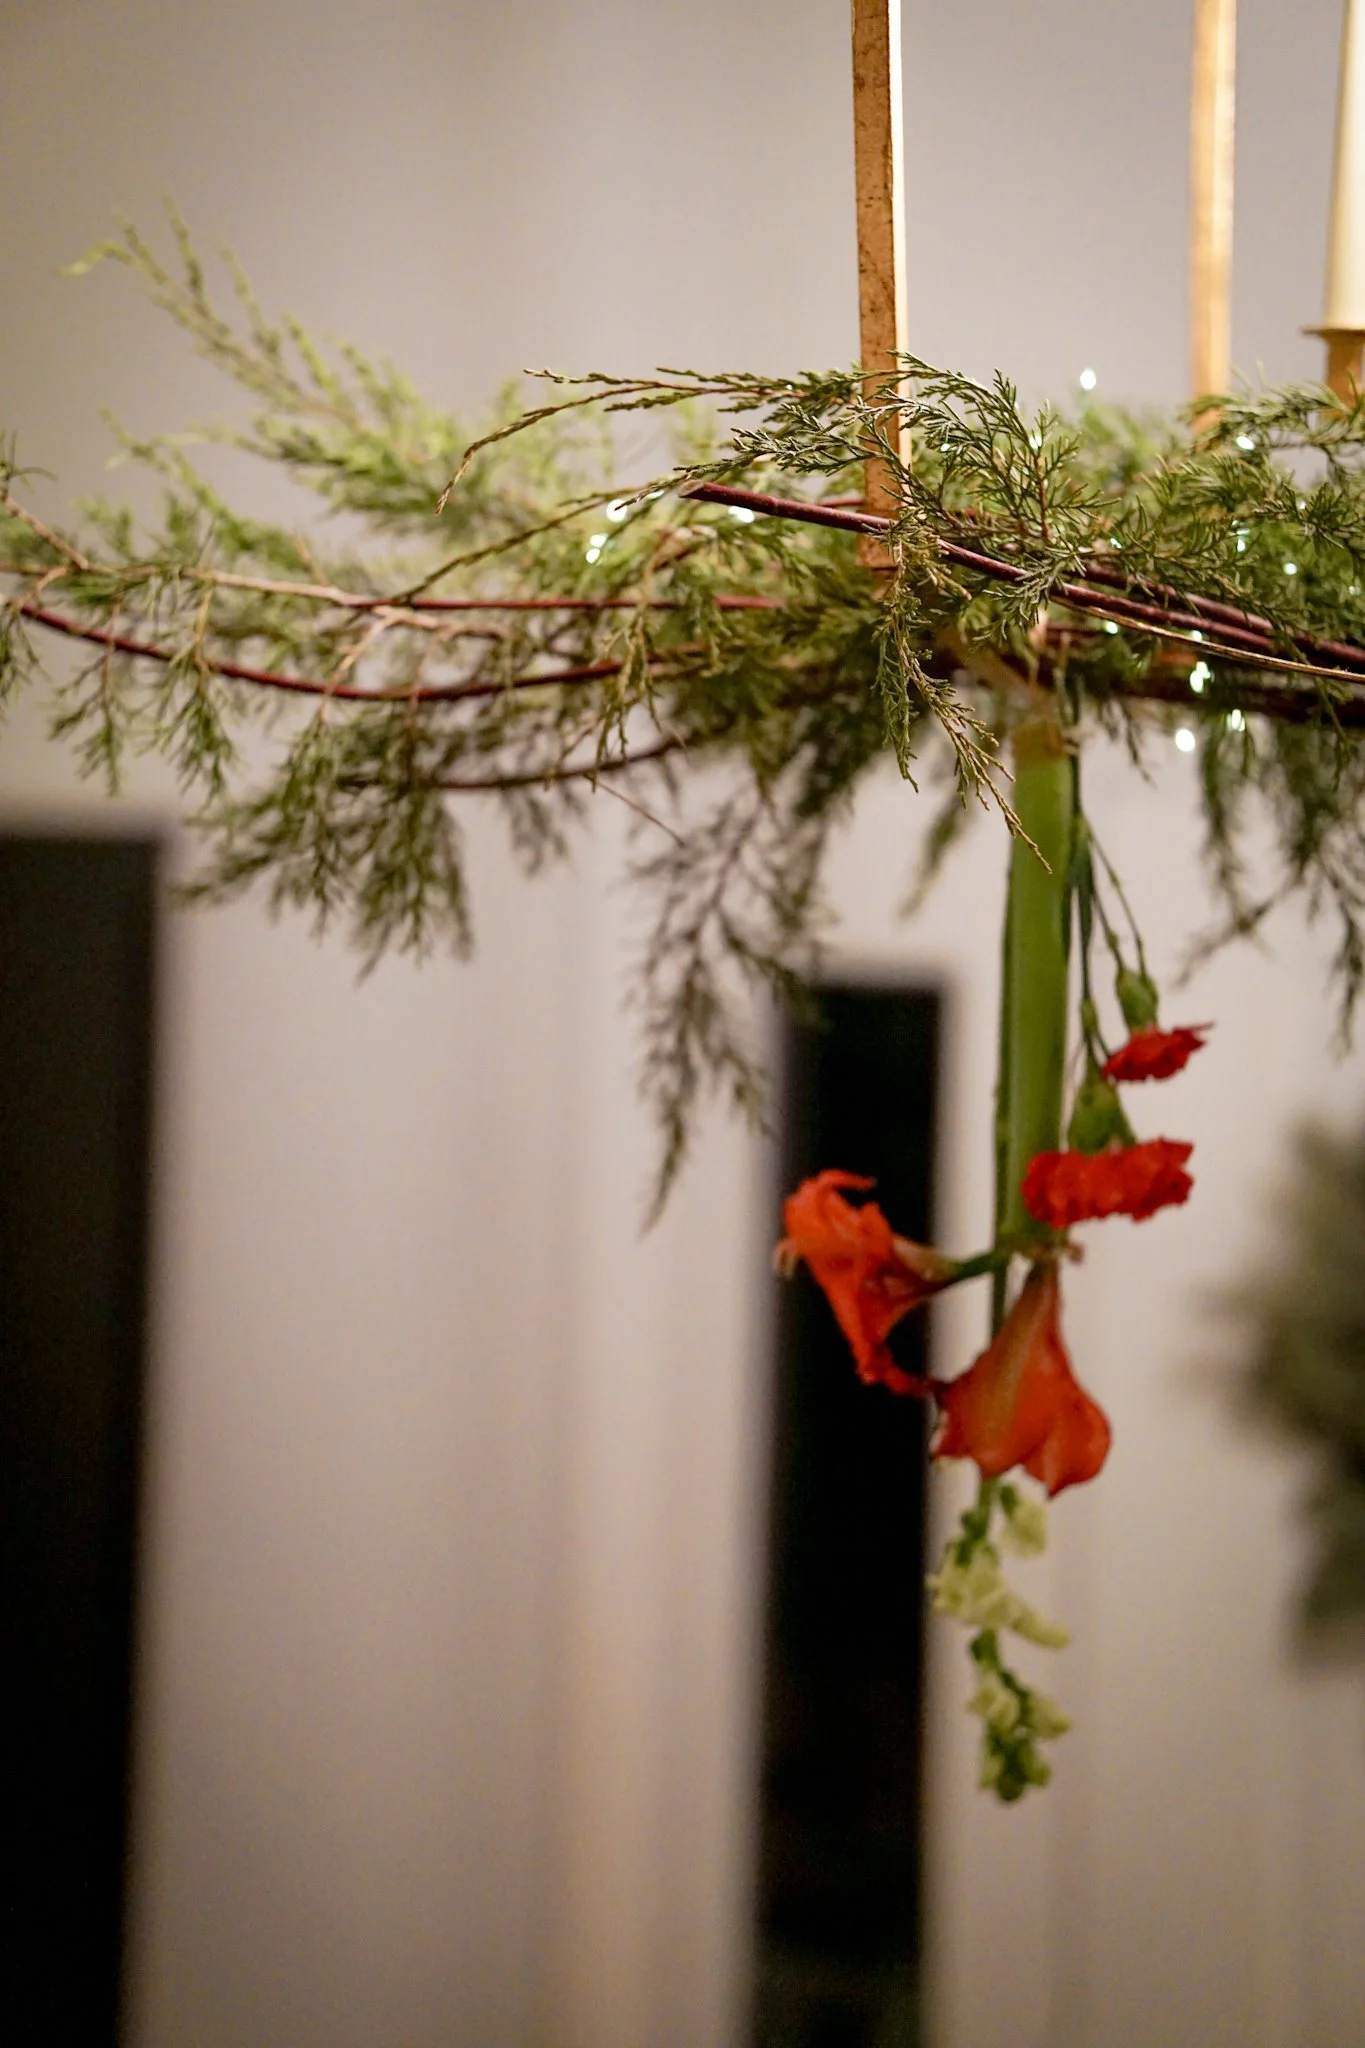
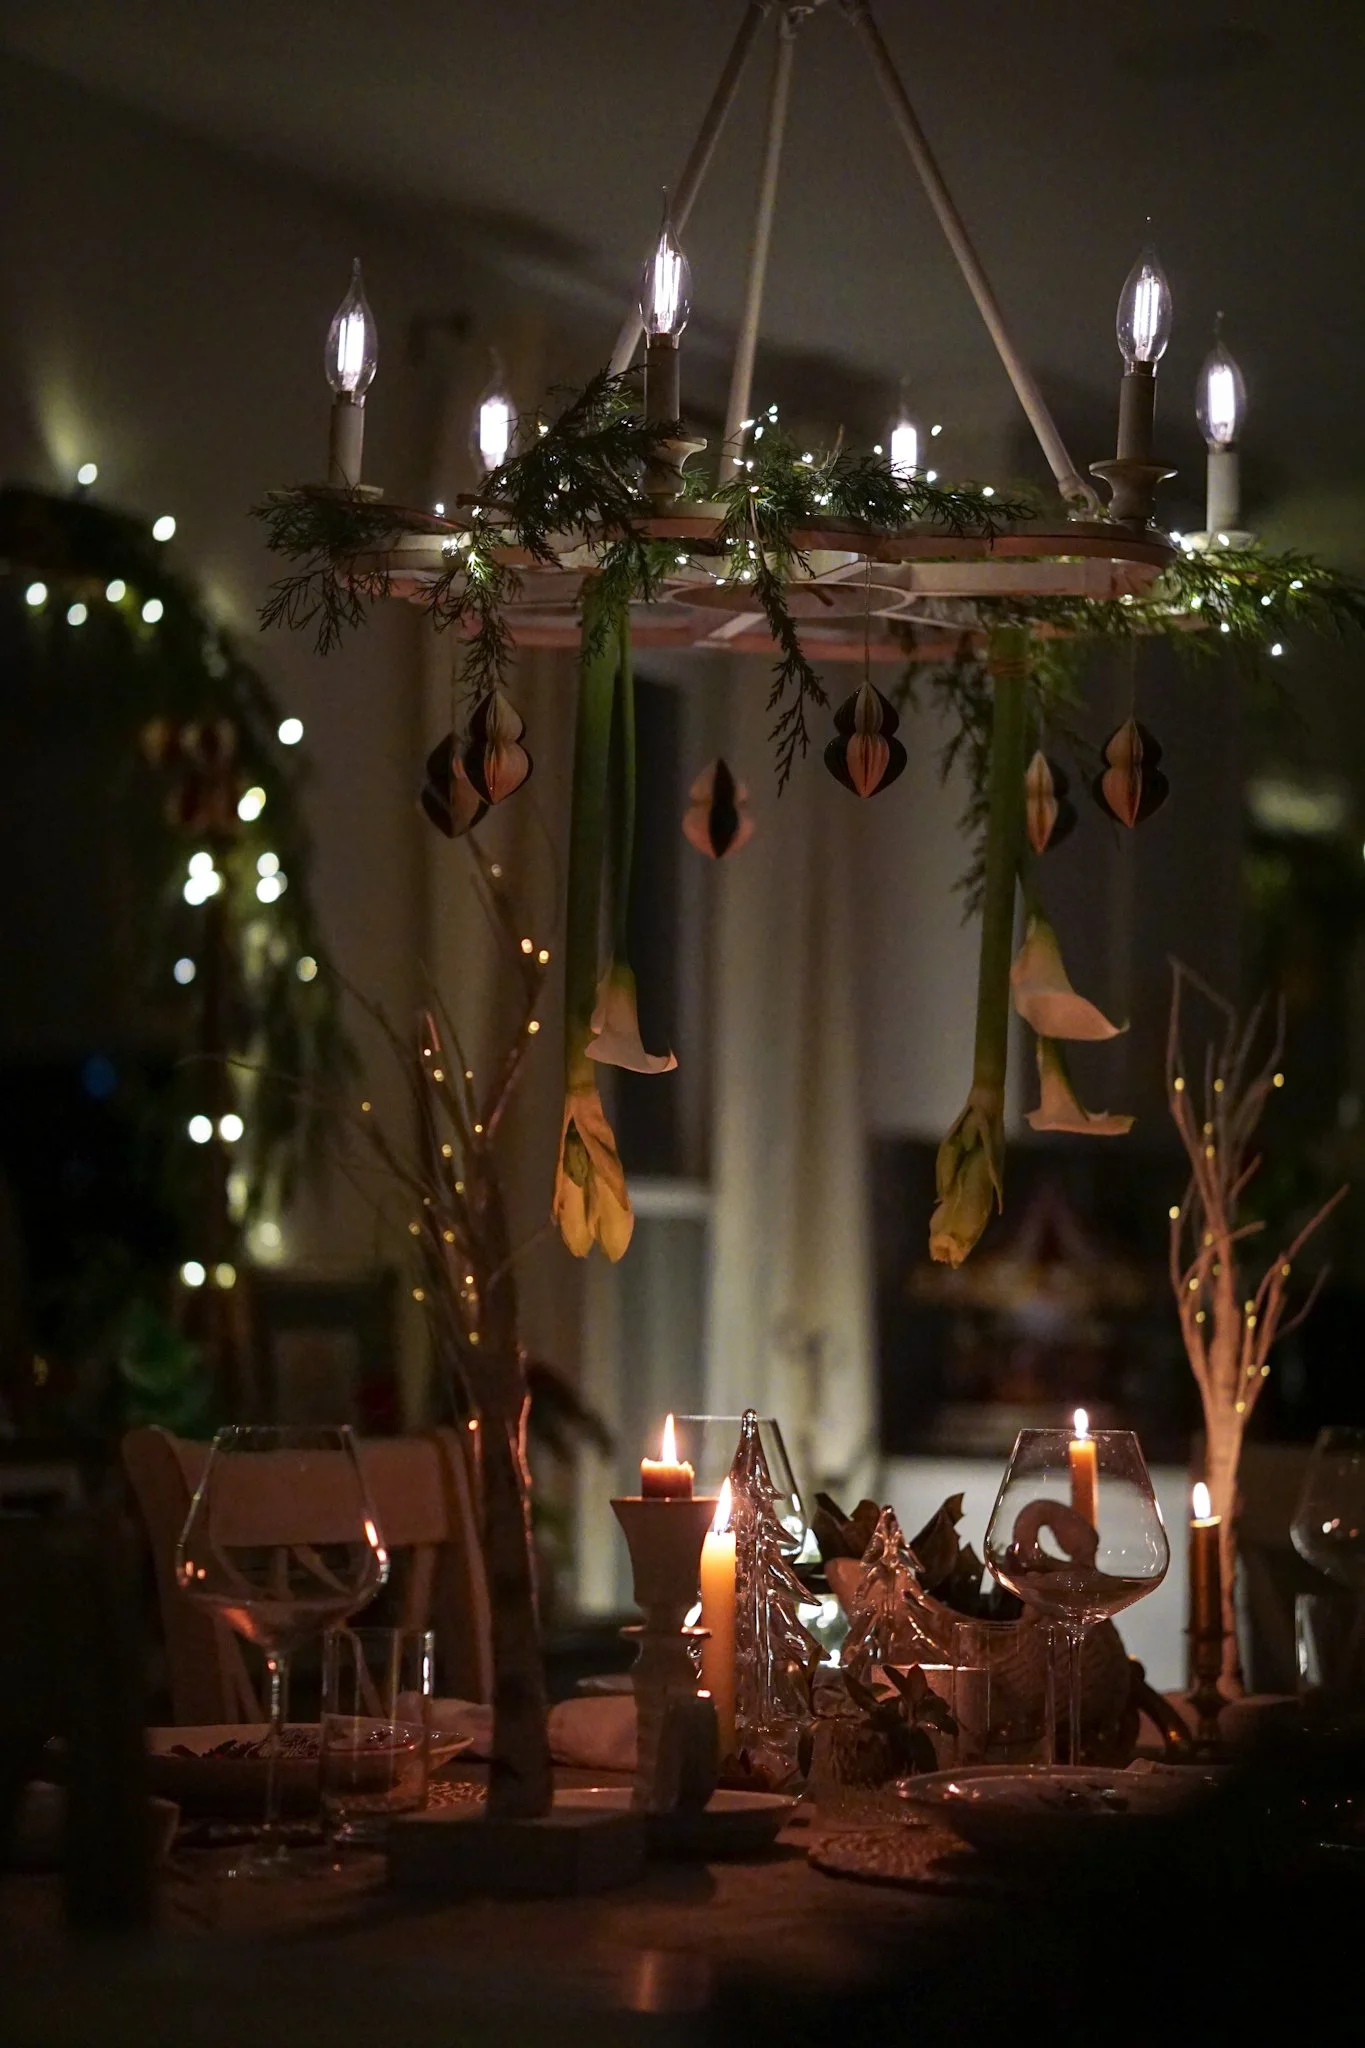
Trim your flowers as needed so that they can be cascading at the appropriate length. For the chandelier in our foyer, we made sure they wouldn’t be too in the way of people walking. Over a table, trim so they are a nice length but not touching the table. You can hold the flowers upside down before trimming to give yourself an idea of a length that looks good to you.
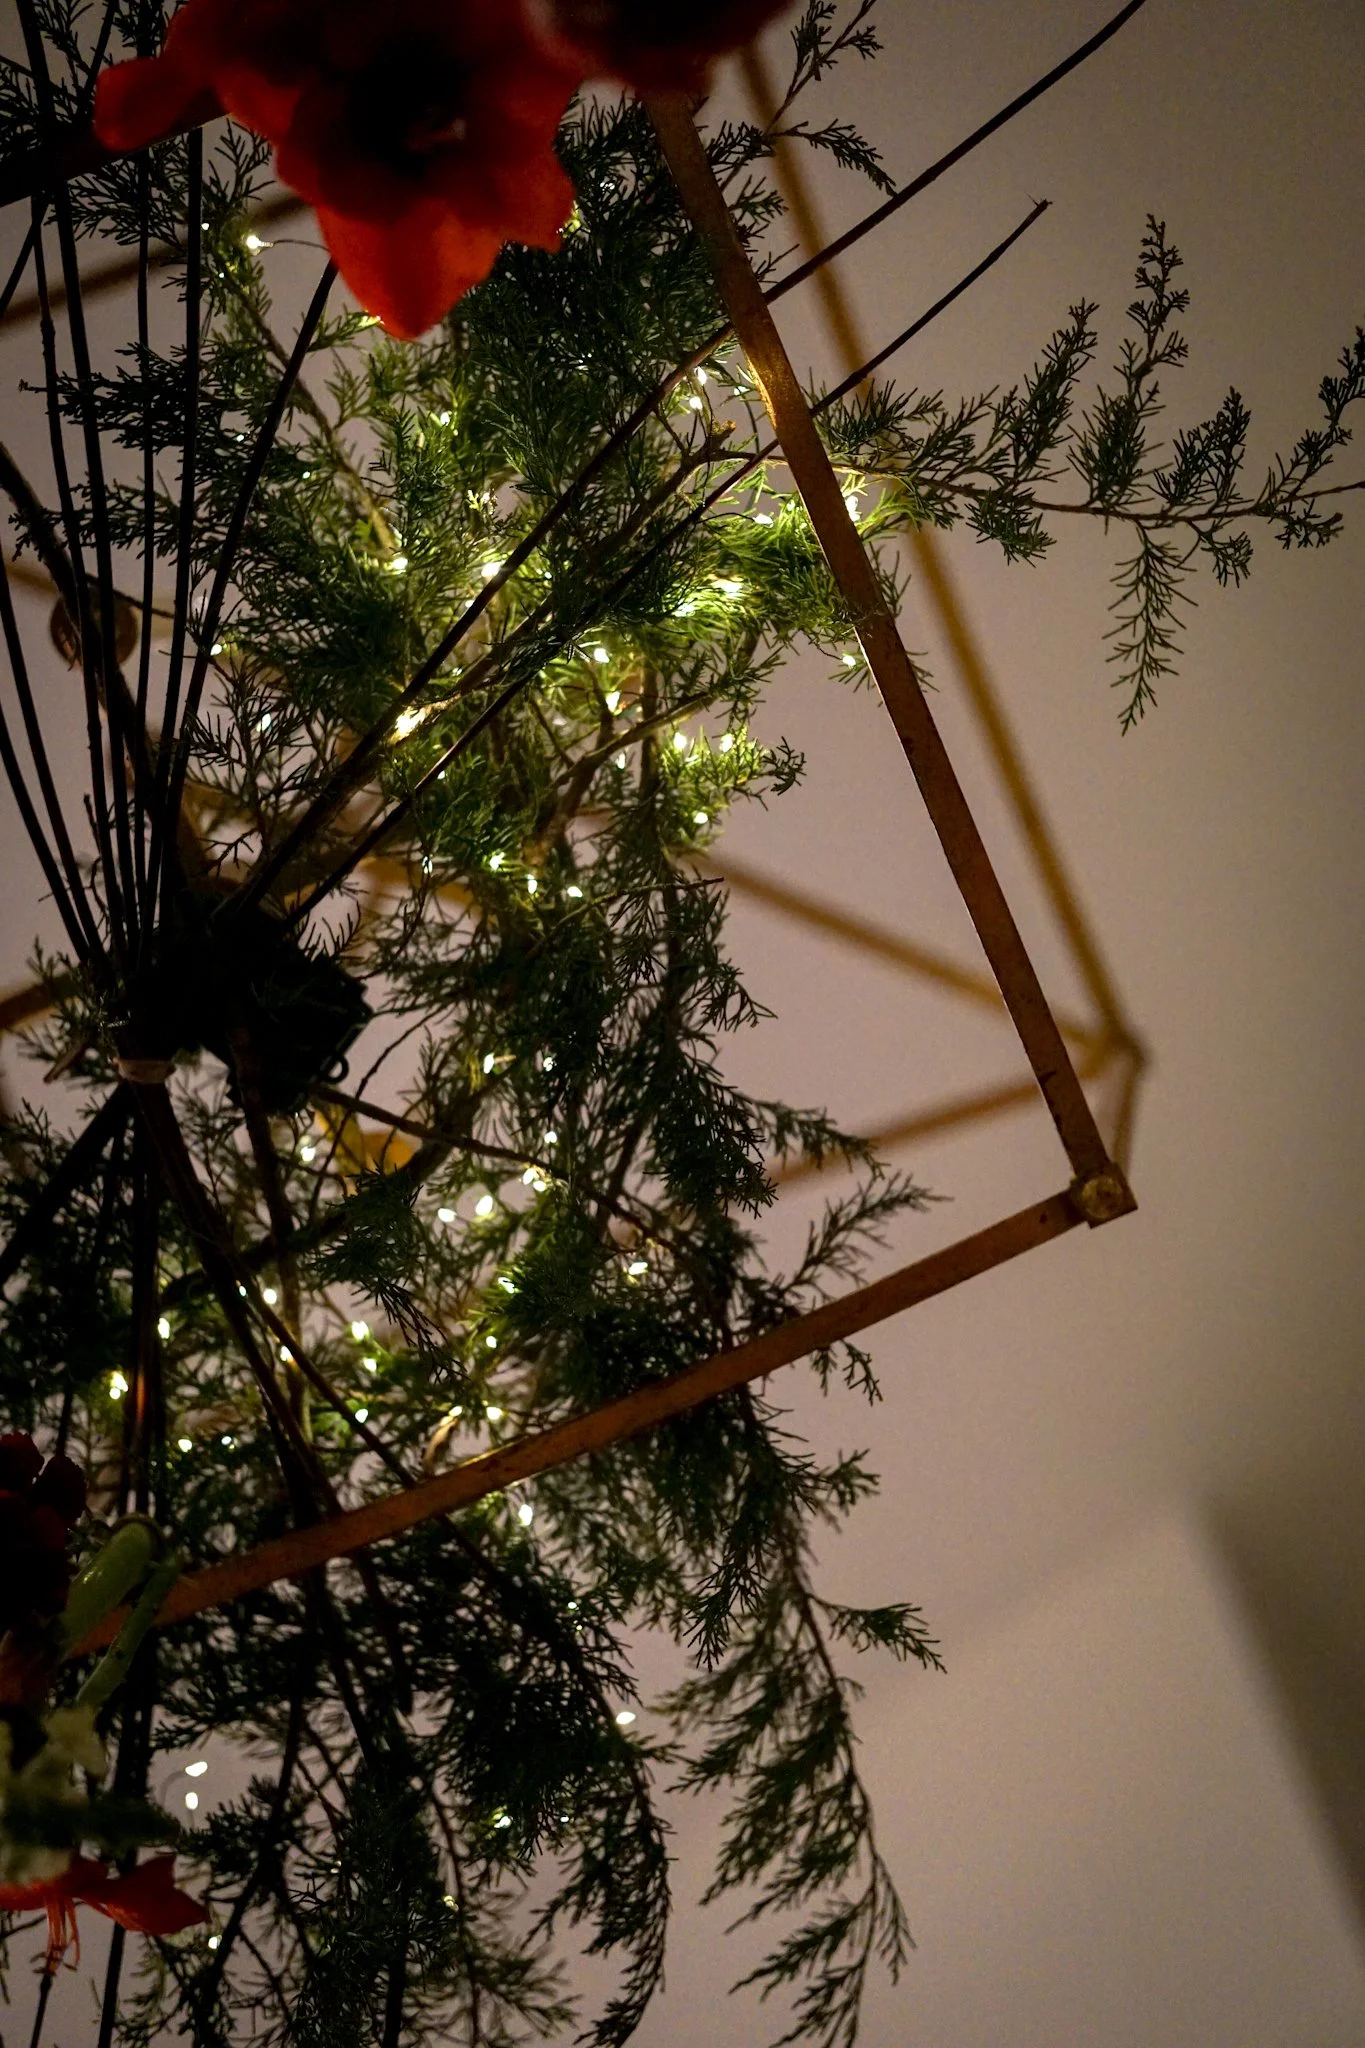
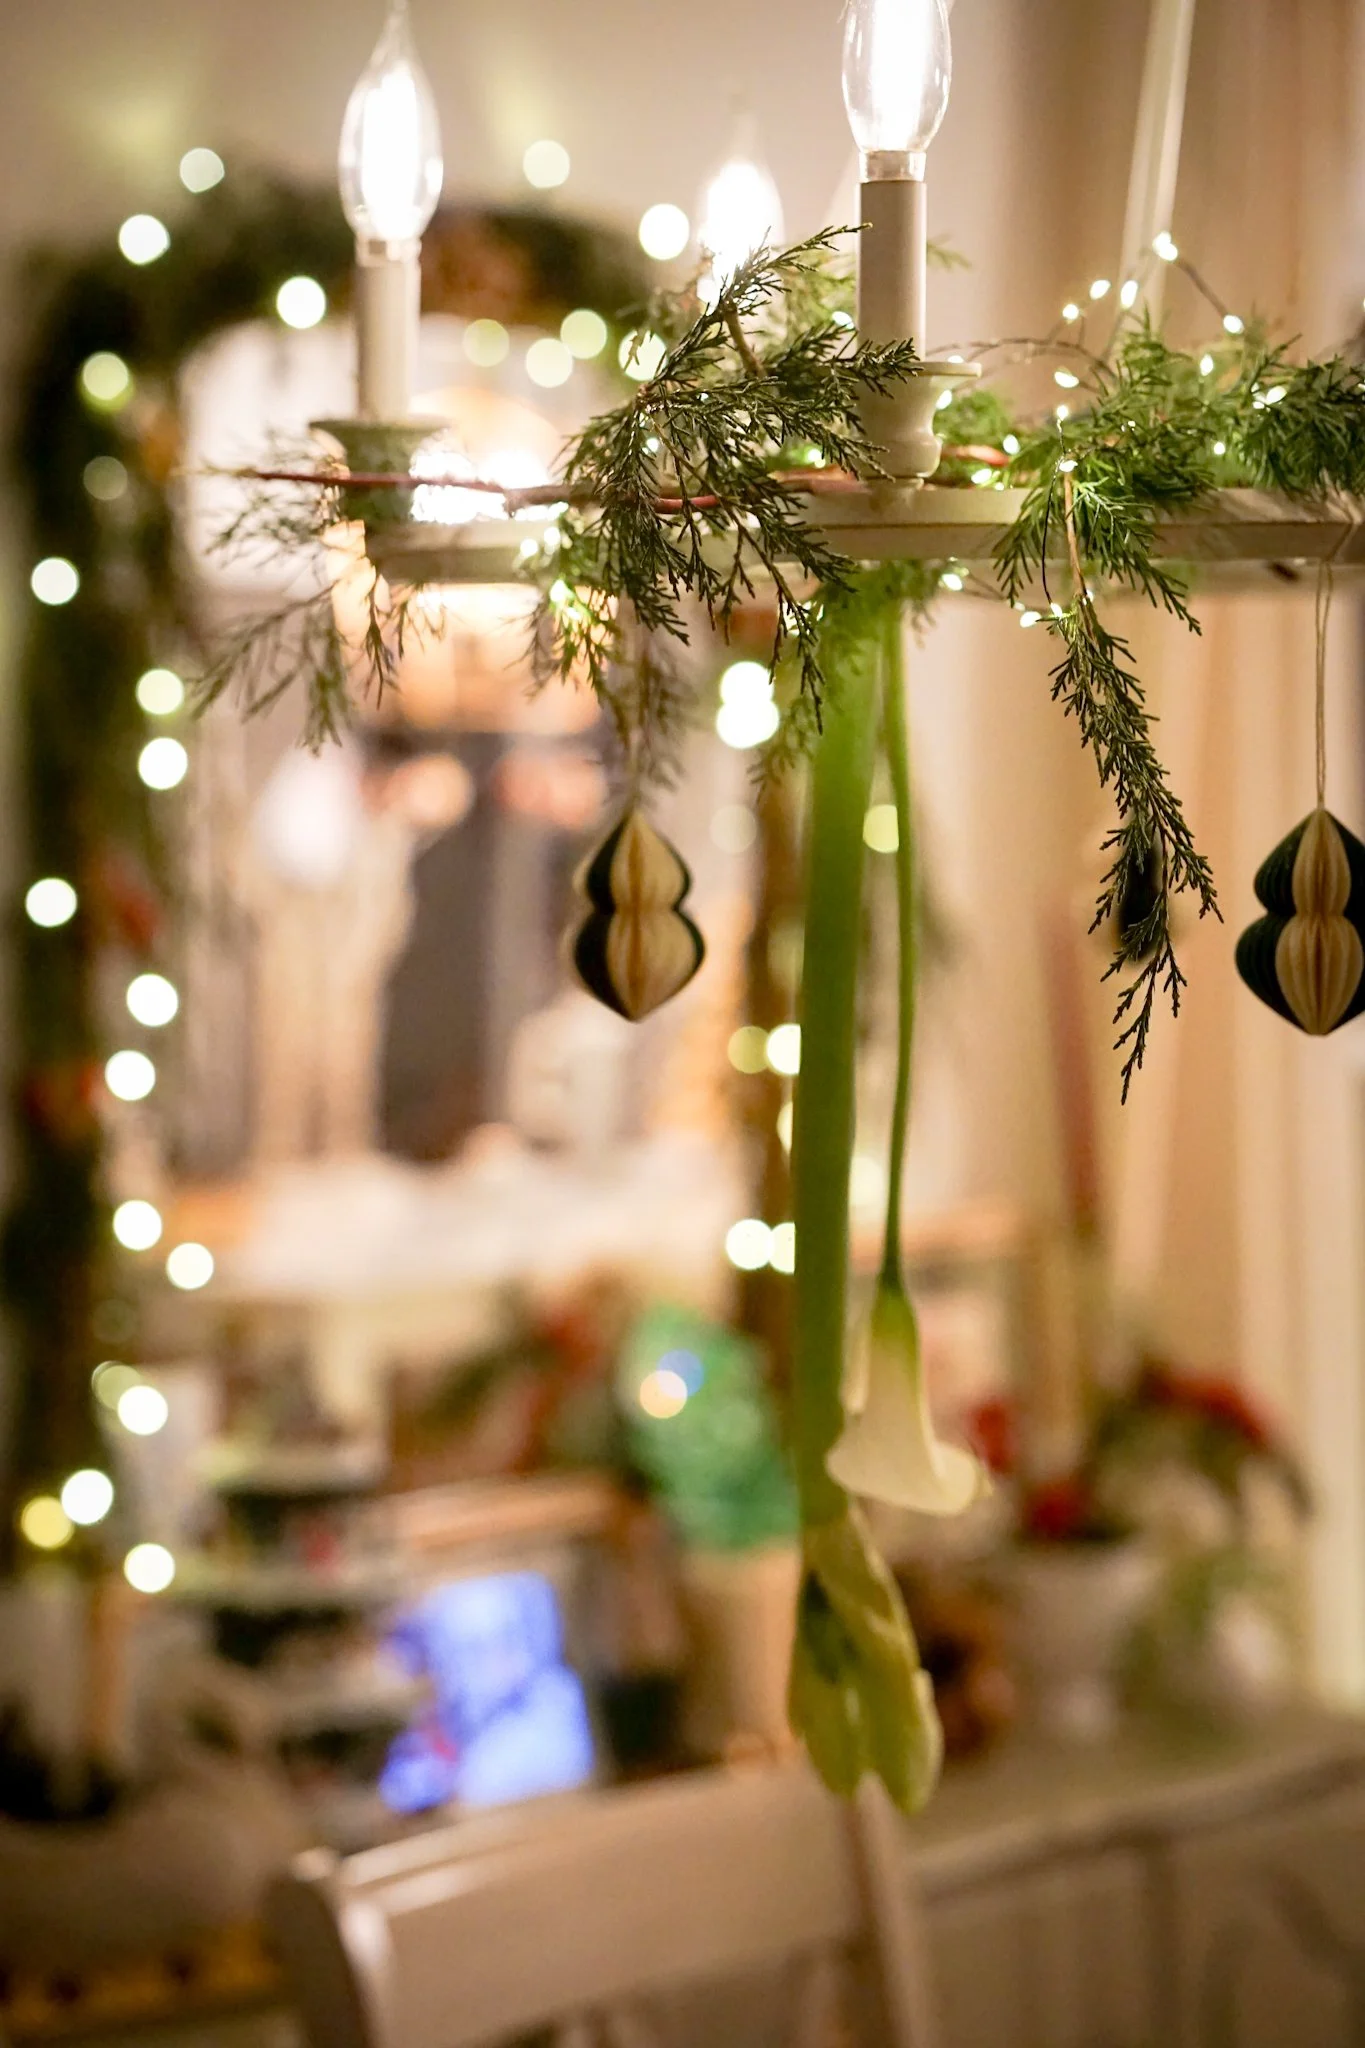
Add your battery pack string lights and spread the lights throughout the greenery. You can do this later, too.
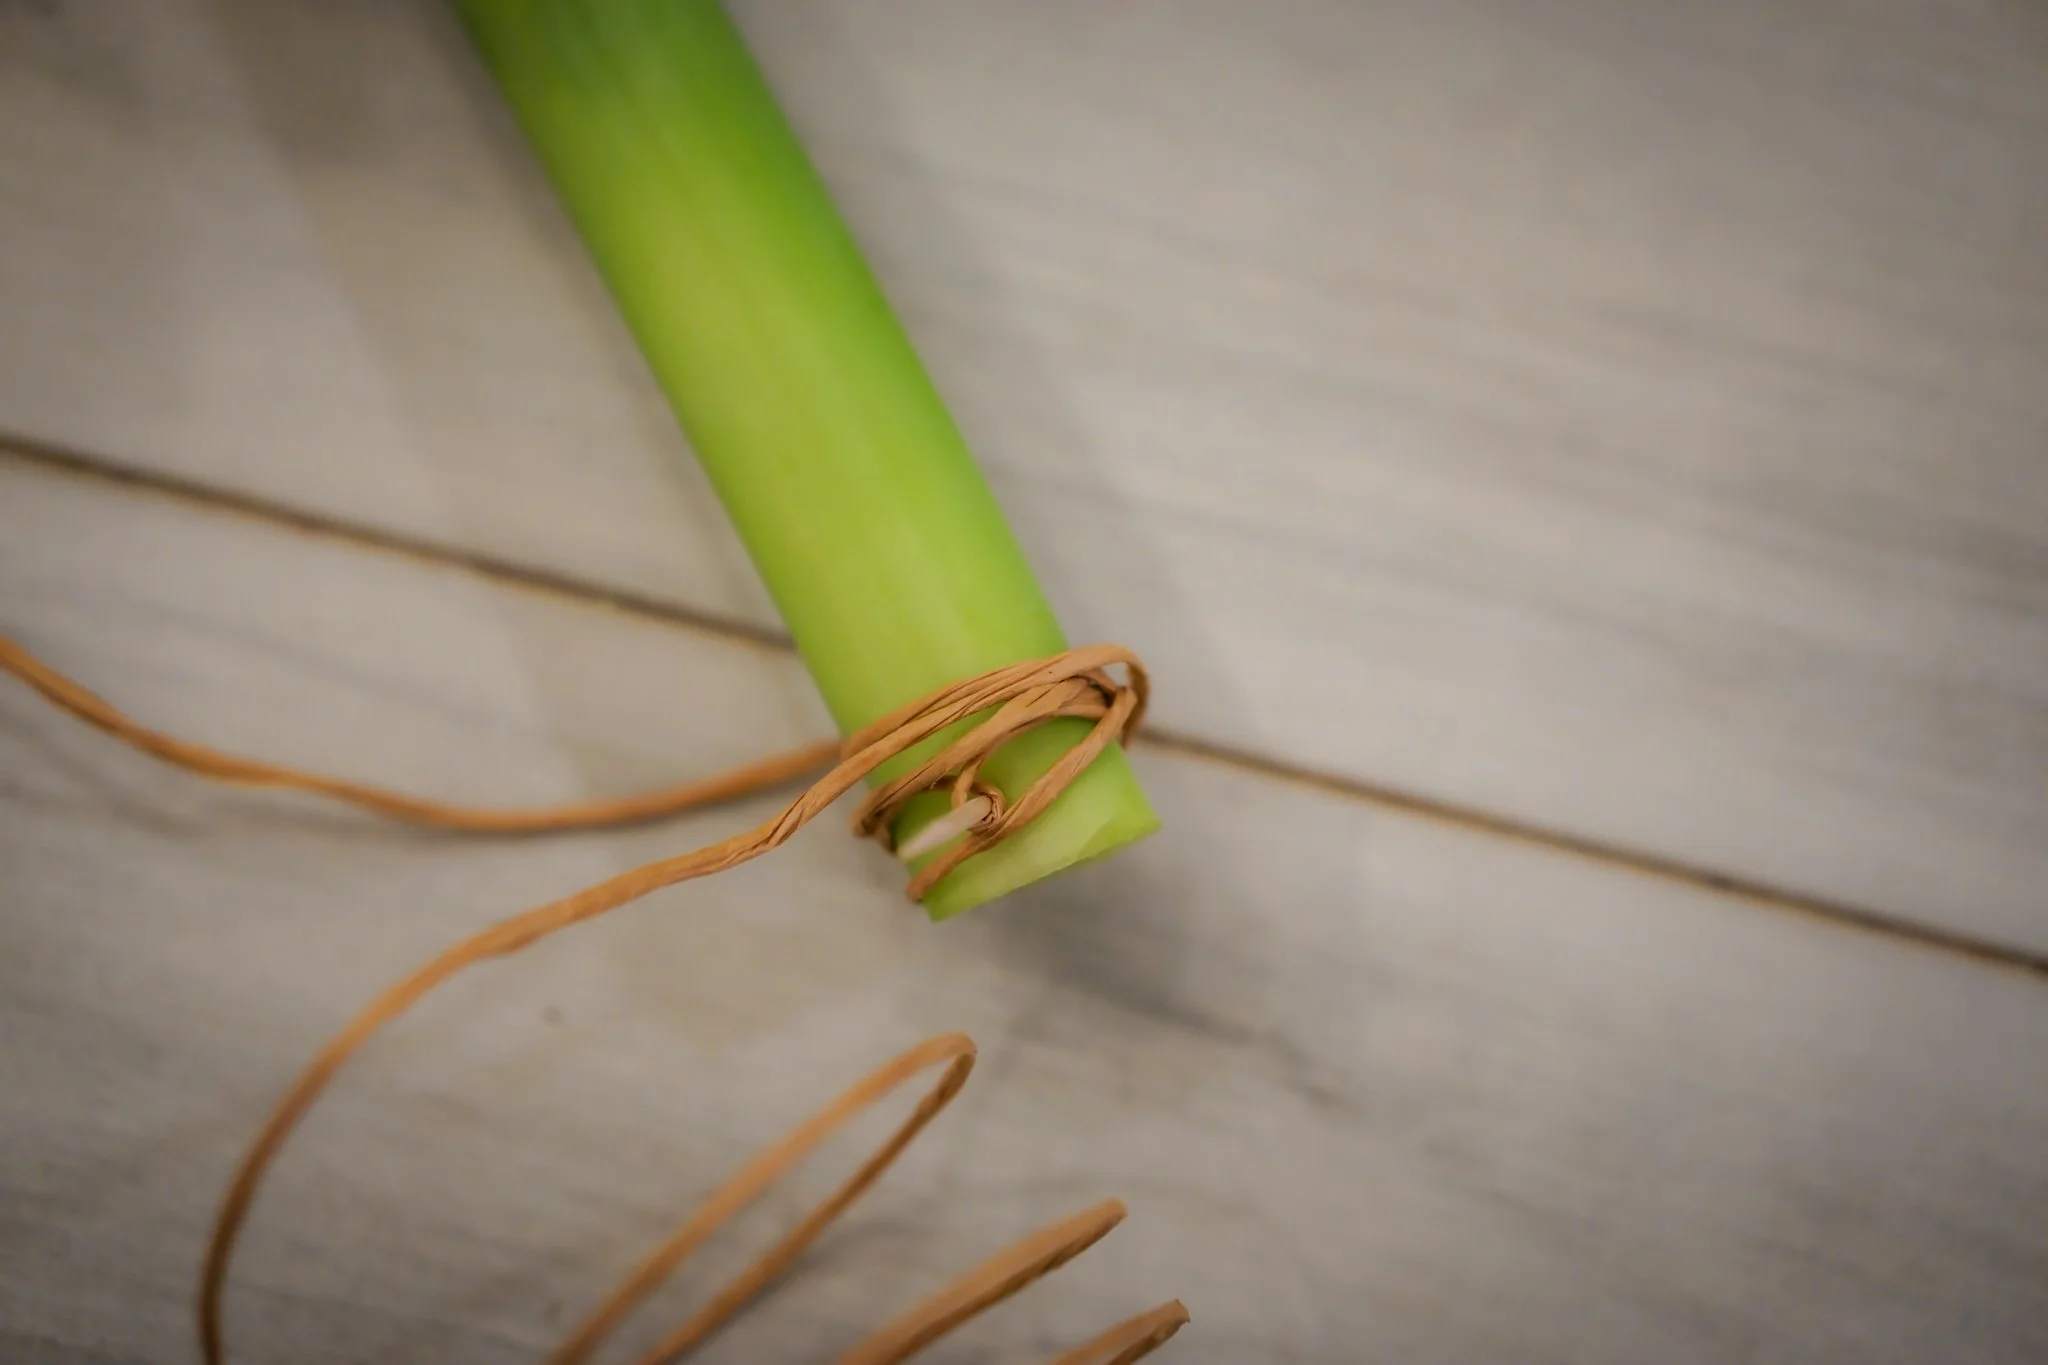
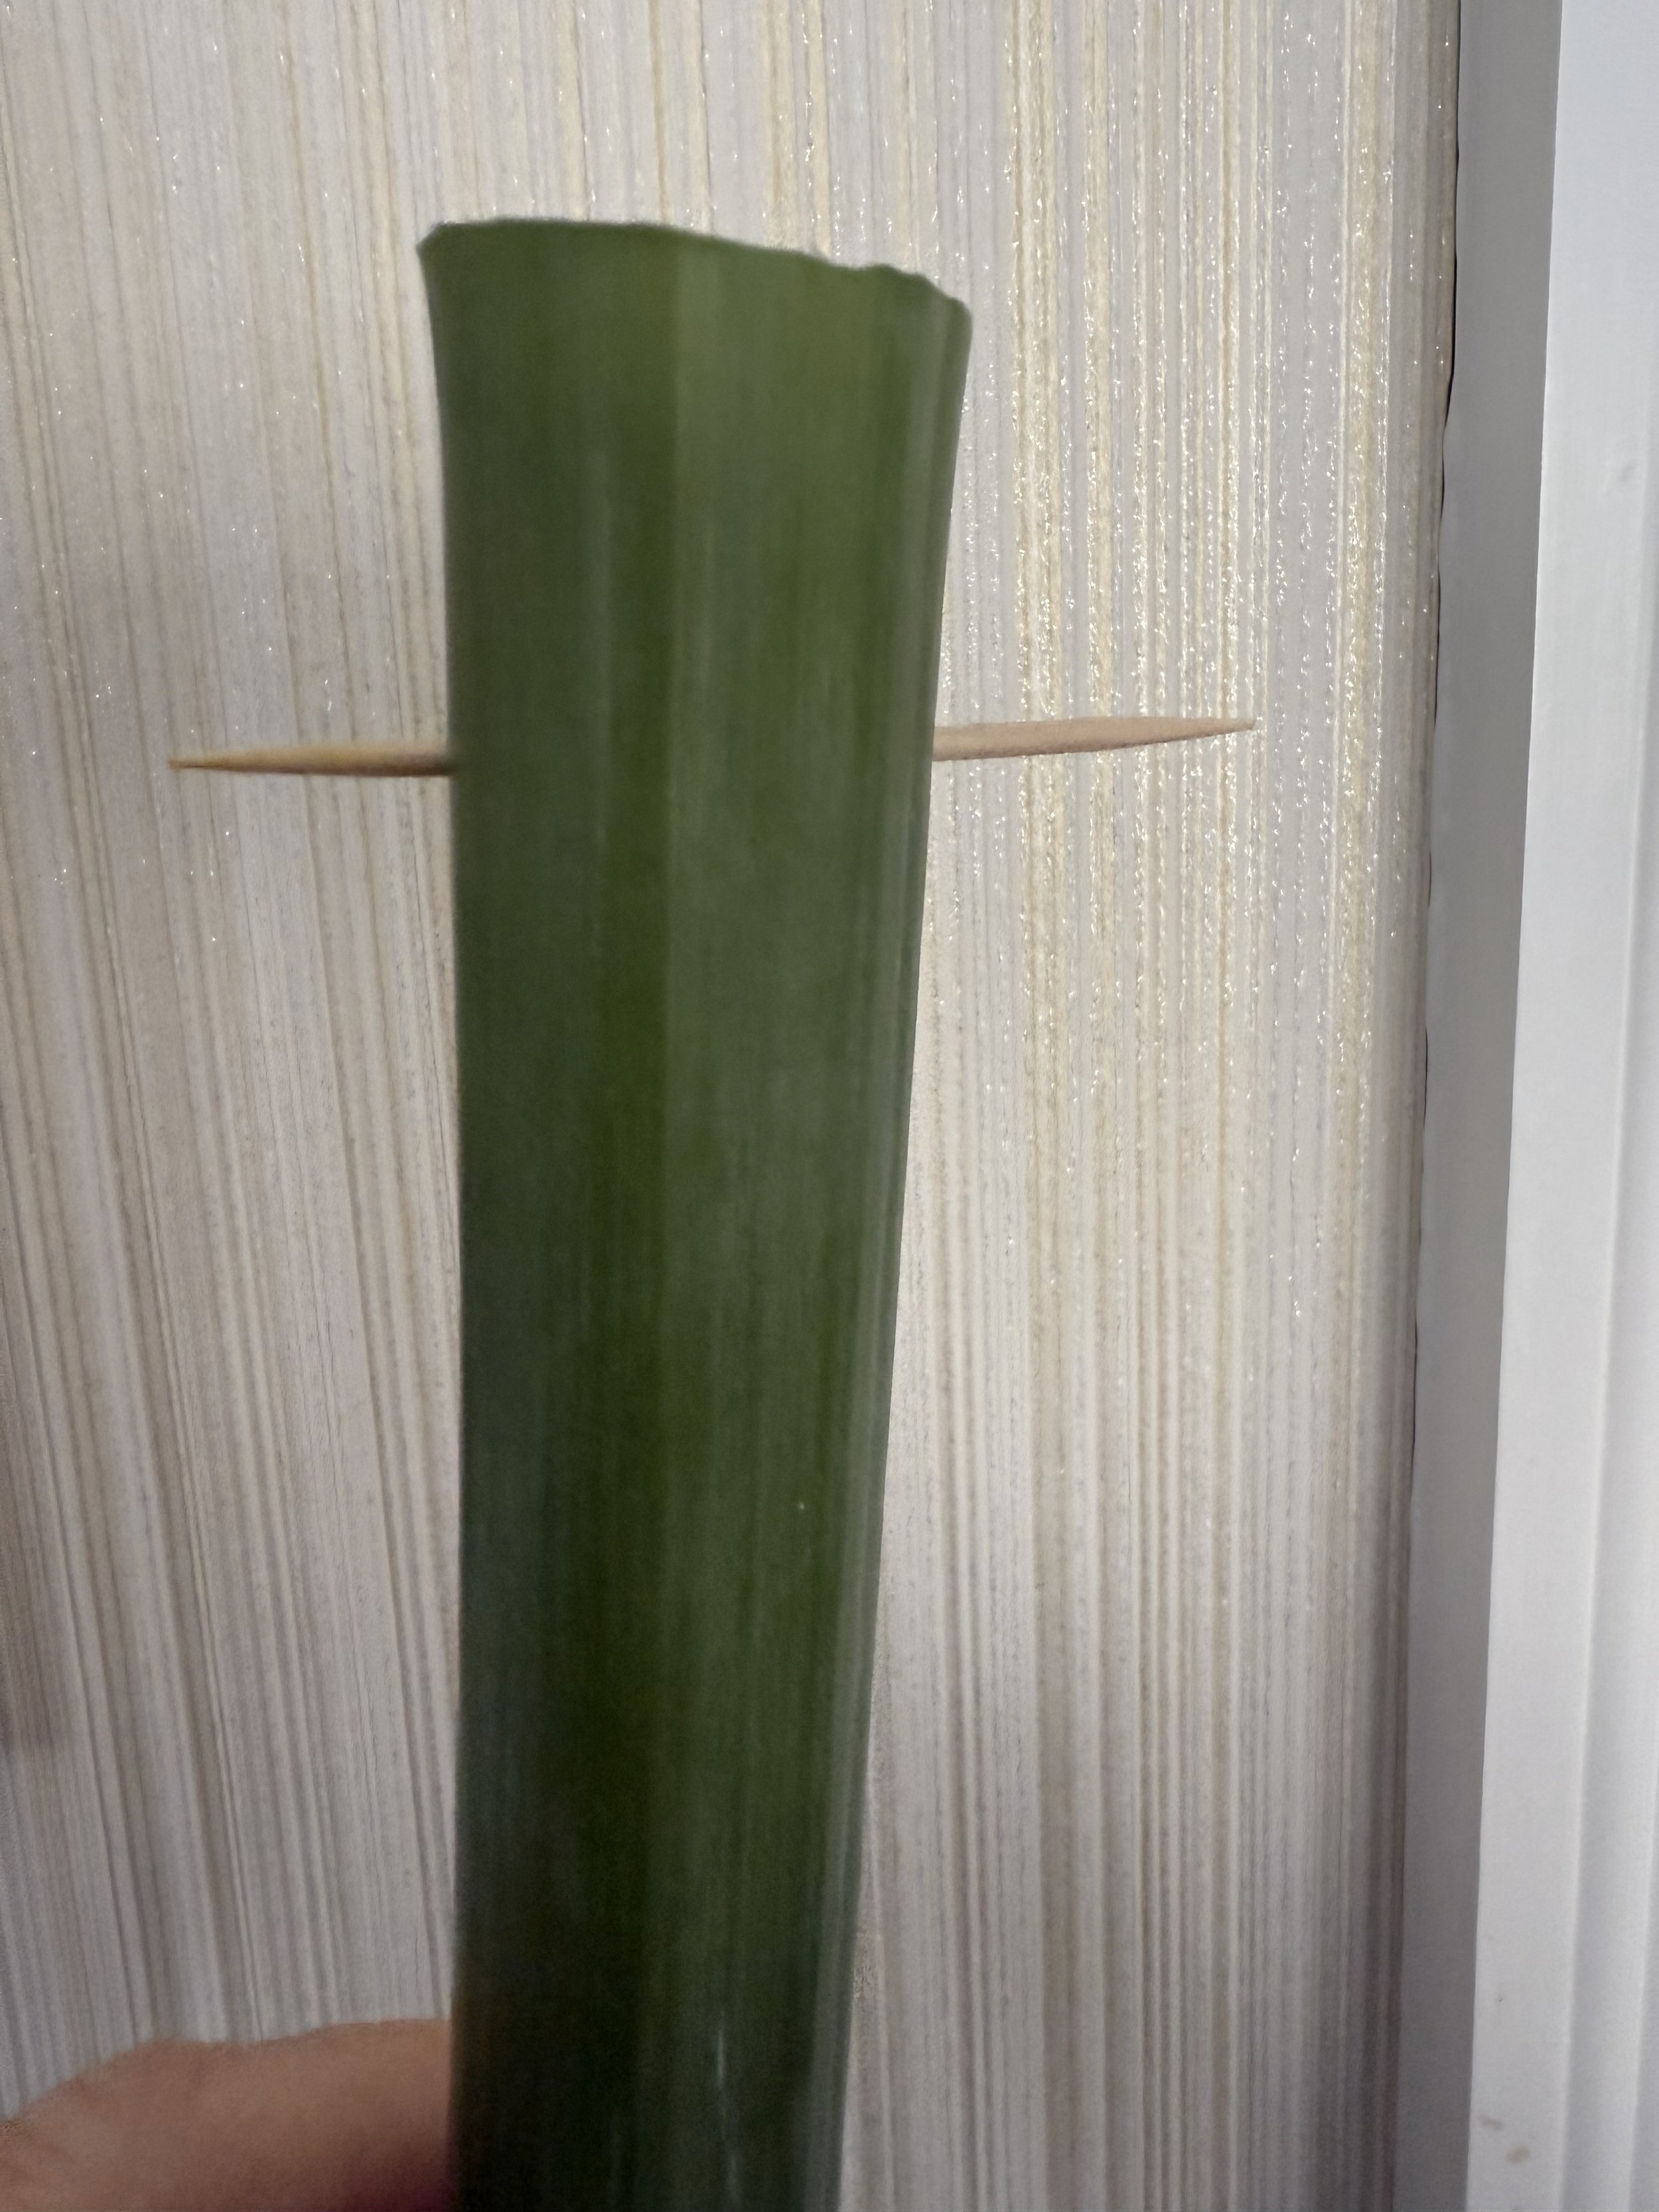
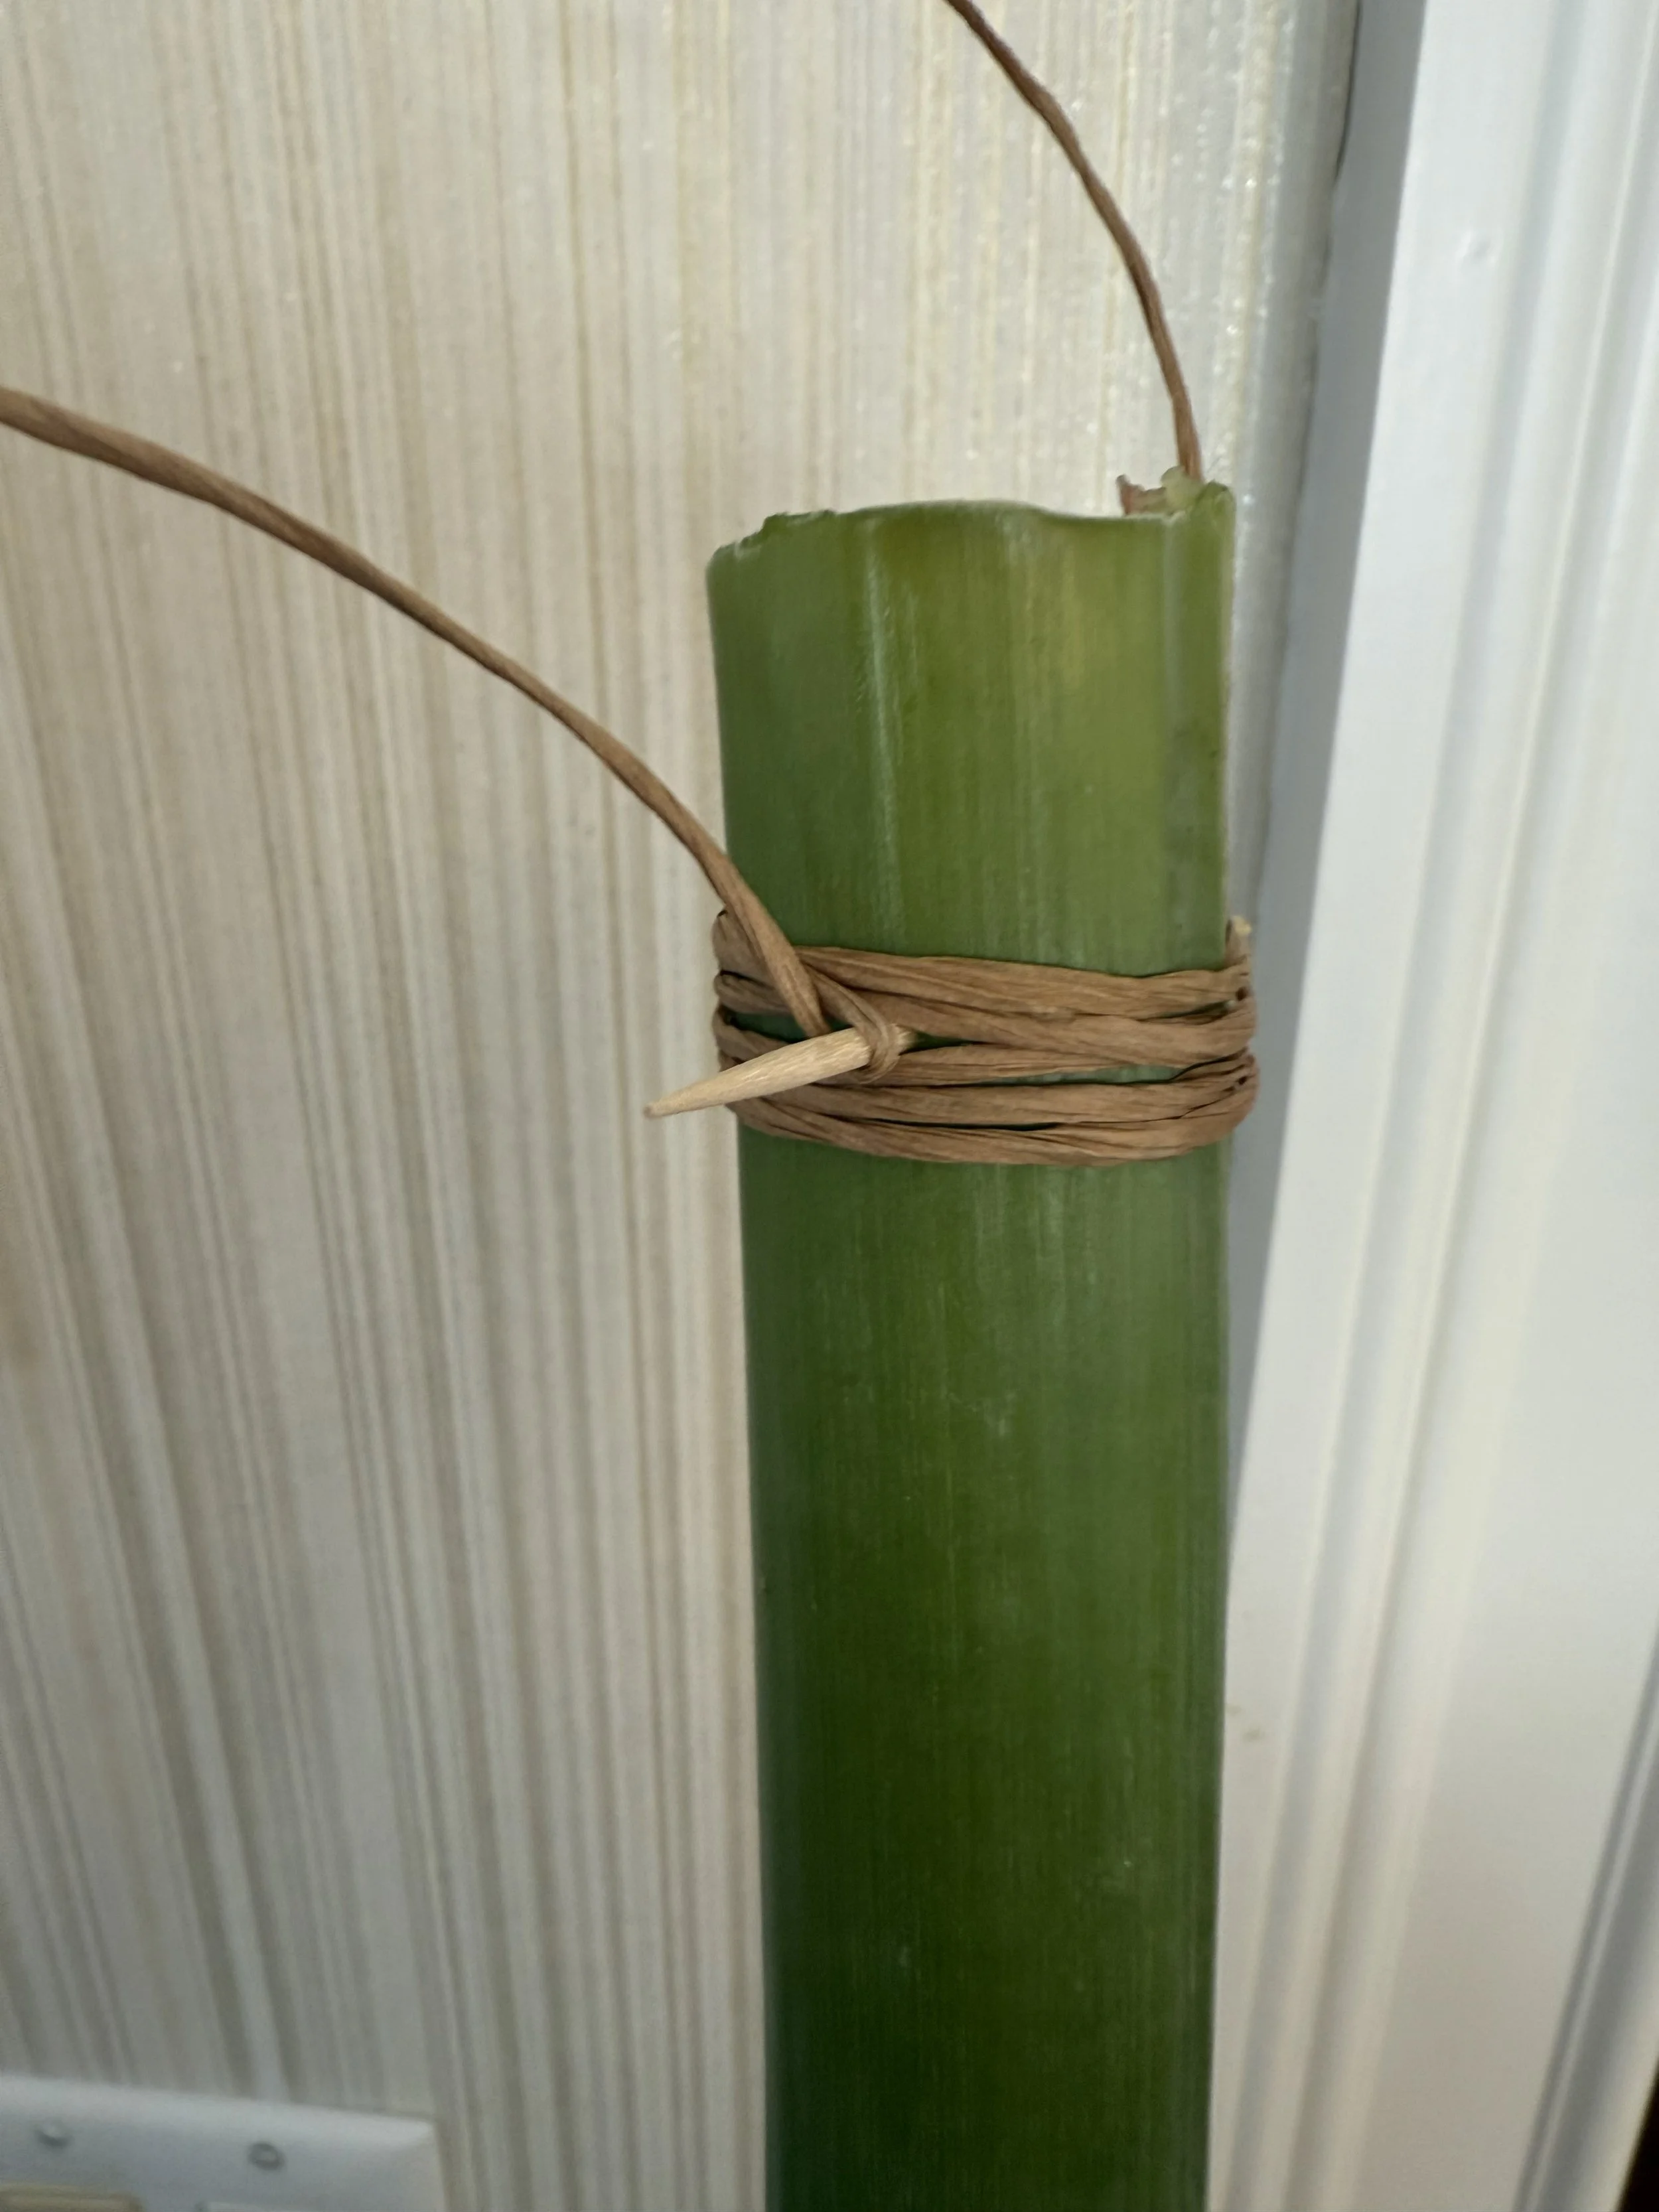
About an inch or two from the bottom of the stem, slide a toothpick through the stem.
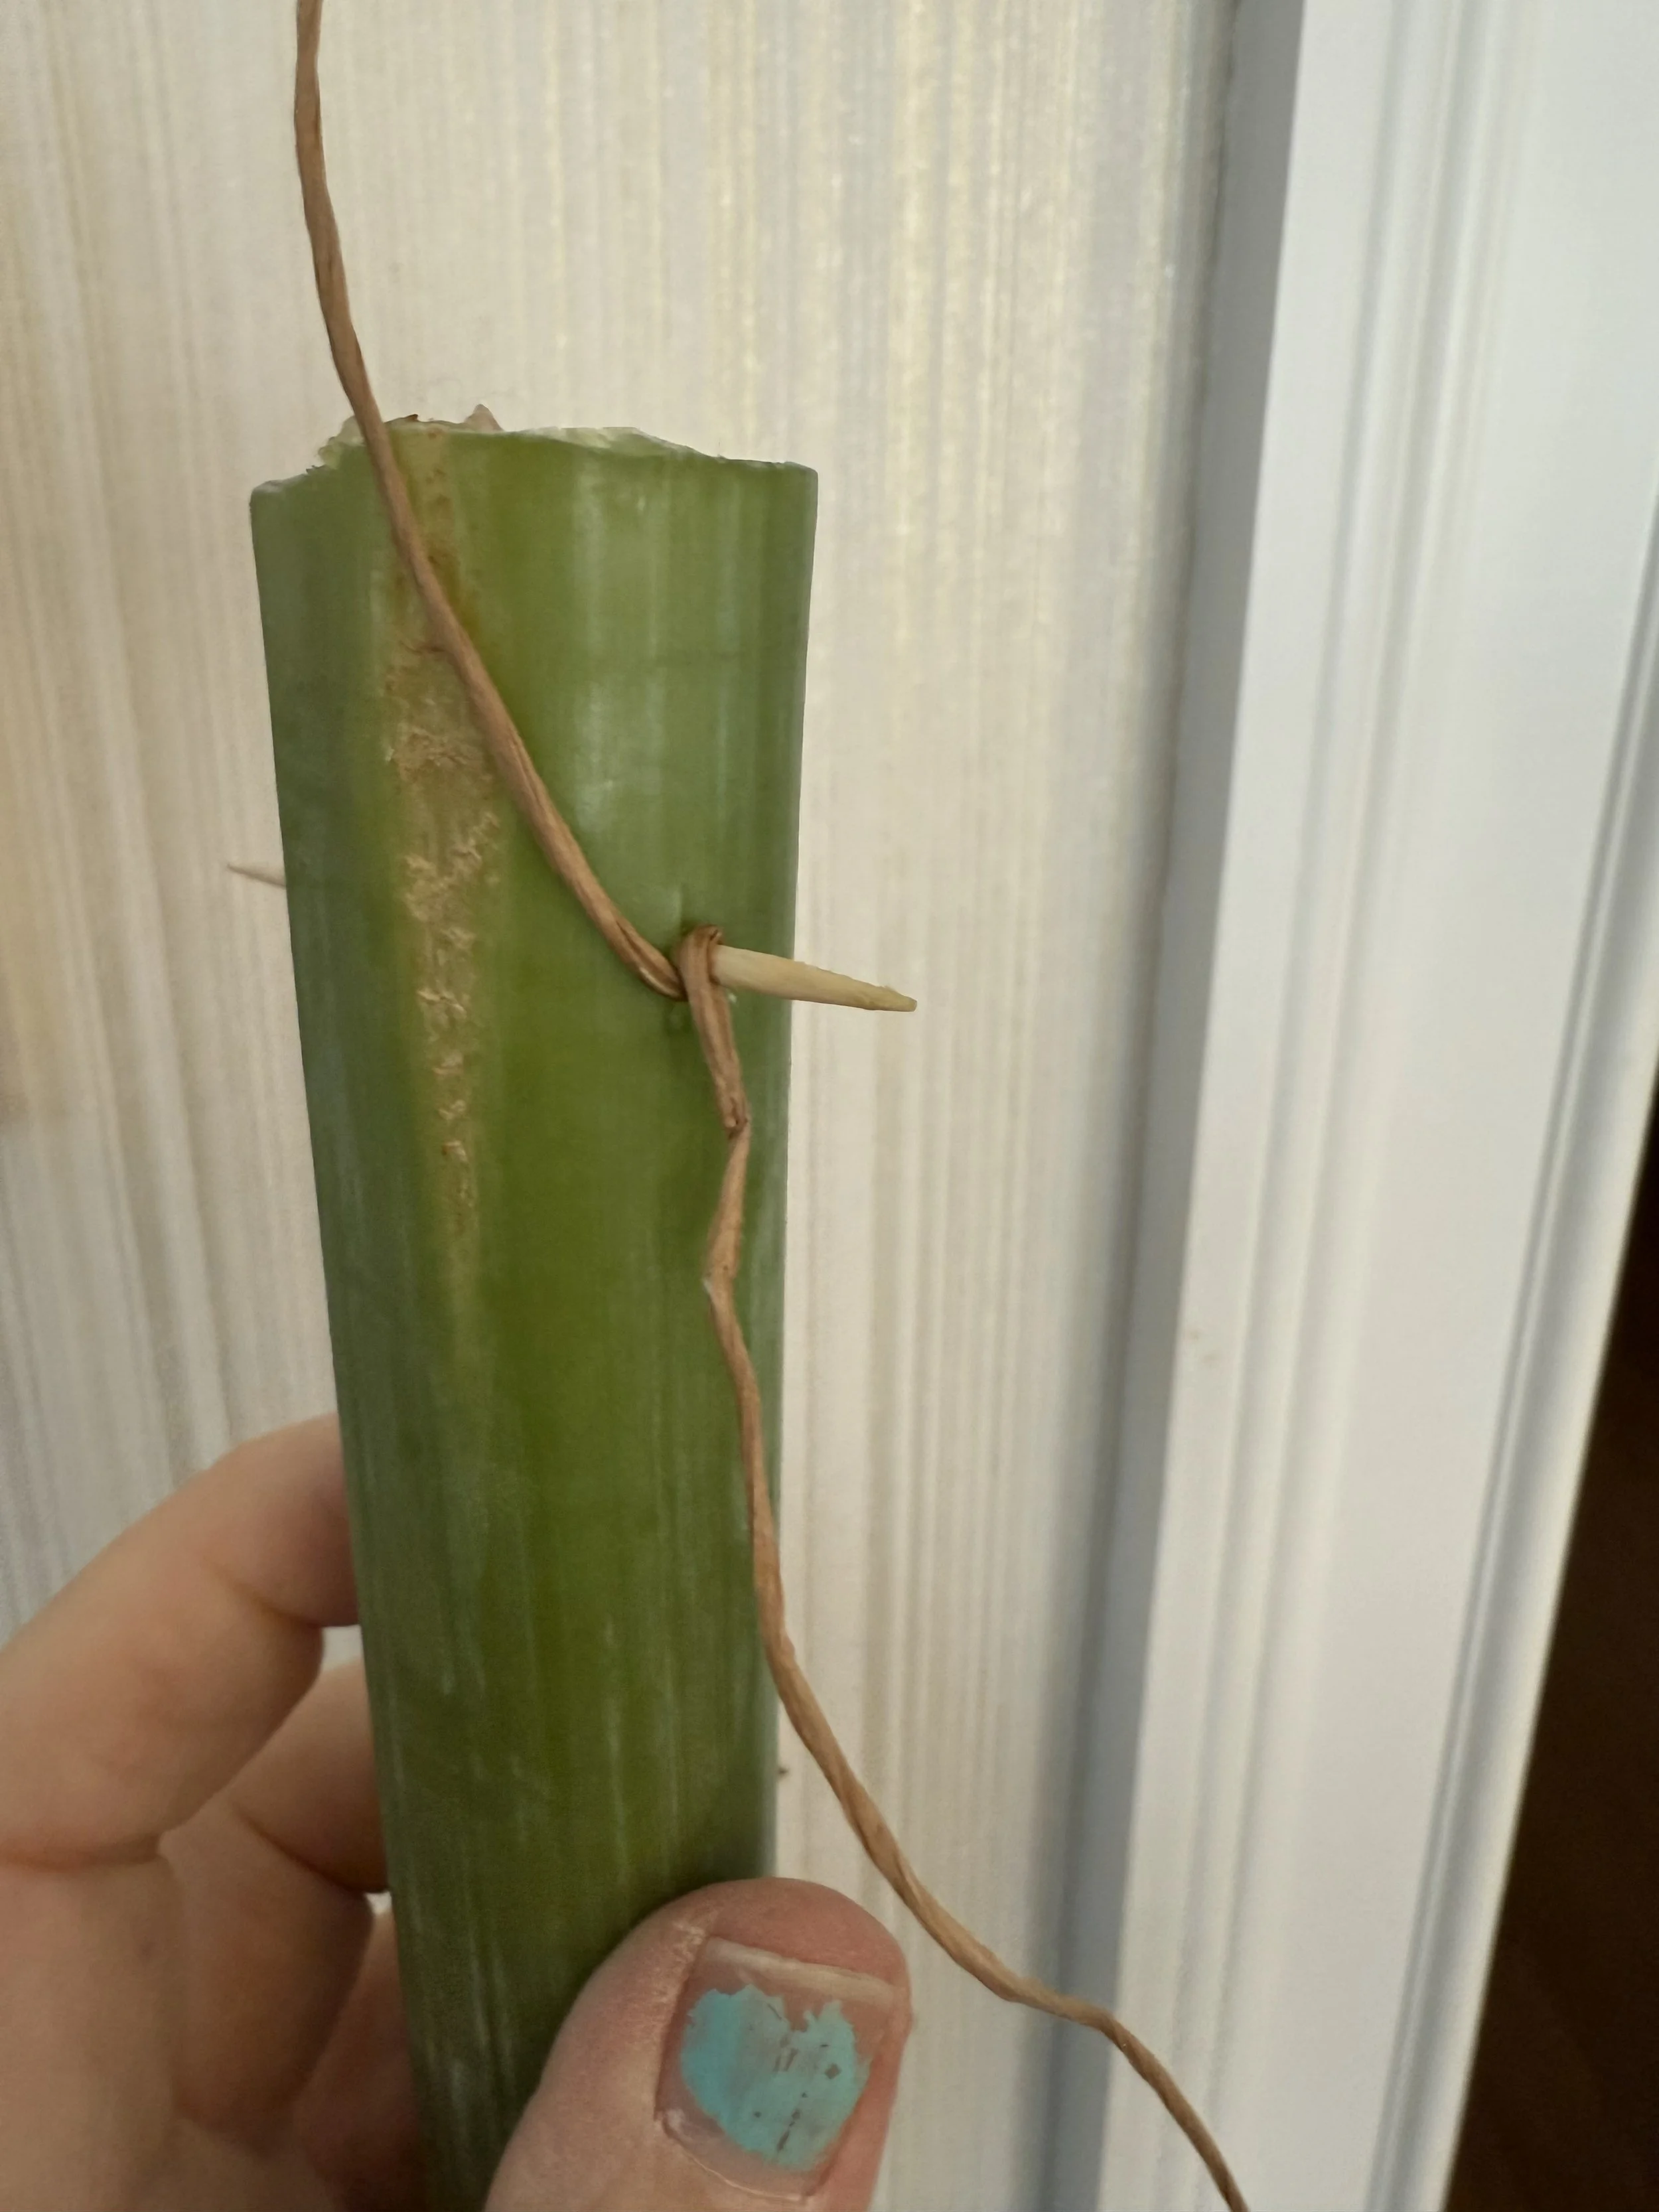
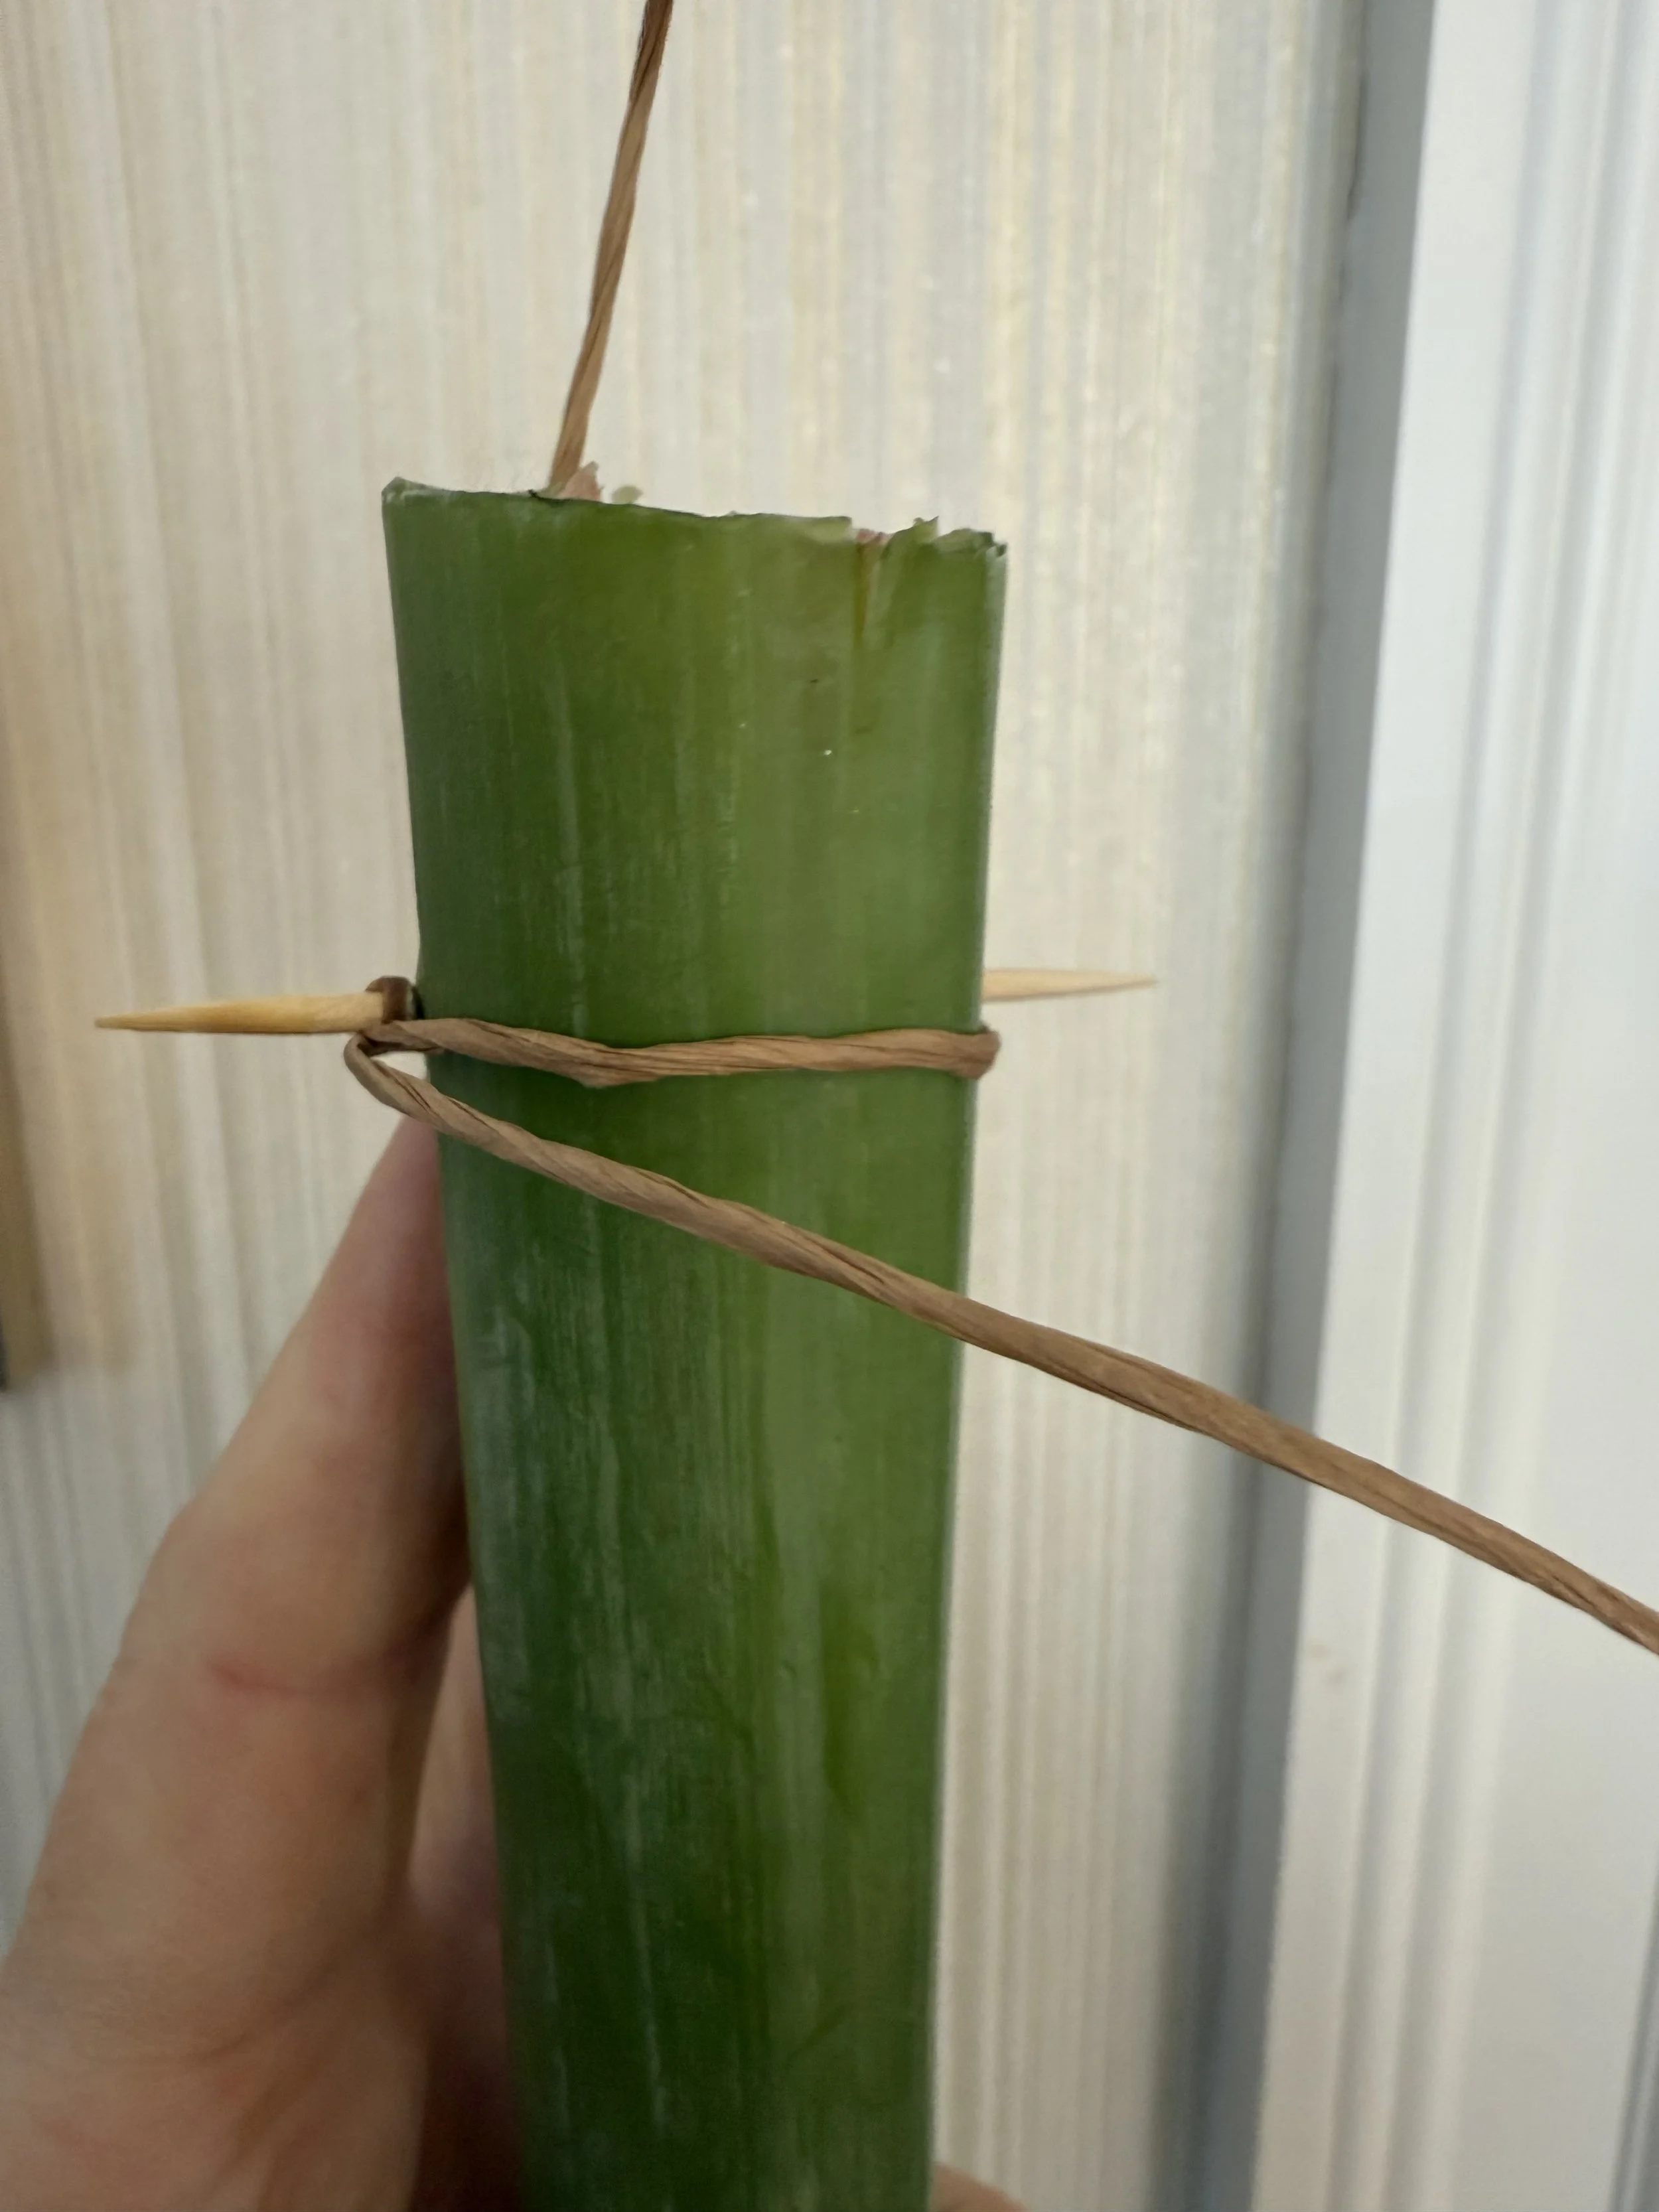
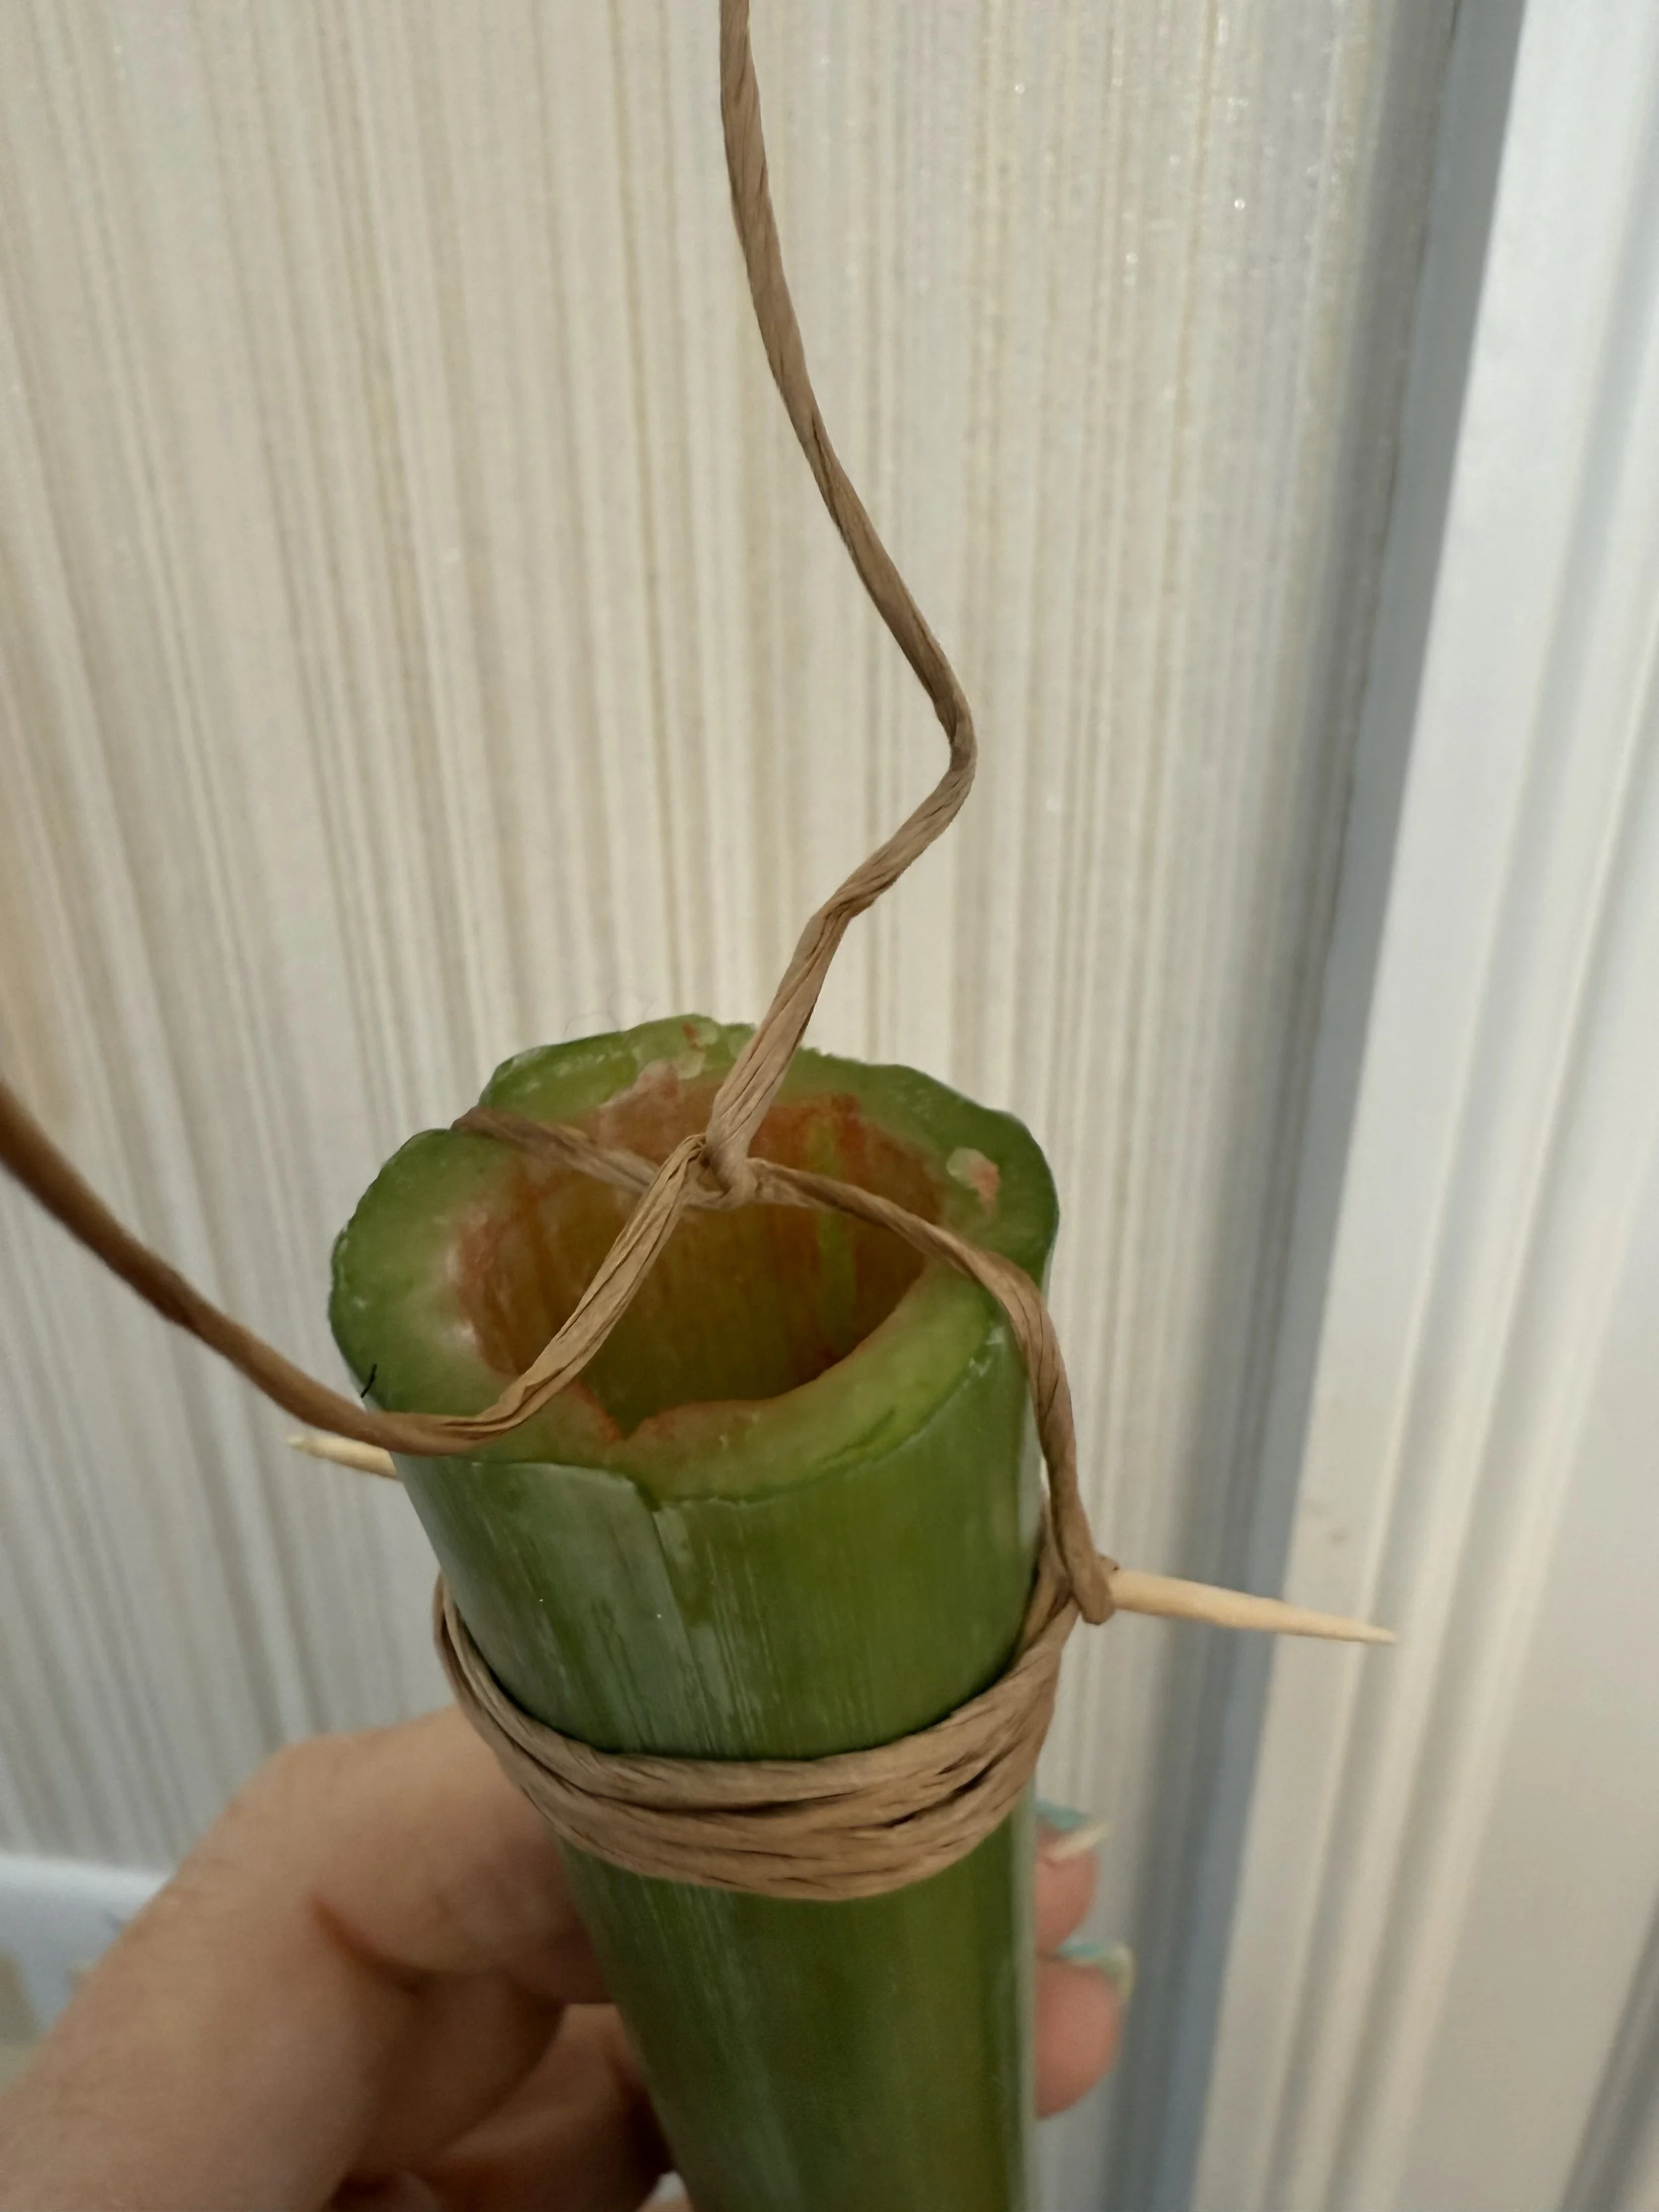
Twist your bind wire, jute, twine, or wool around the toothpick. Wrap the wire around the stem and both toothpicks to give it a good, strong anchor. Leave some room at both ends of the wire and tie them together with a knot directly hovering over the hollow opening of the stem. This way, the flower will hang straight.
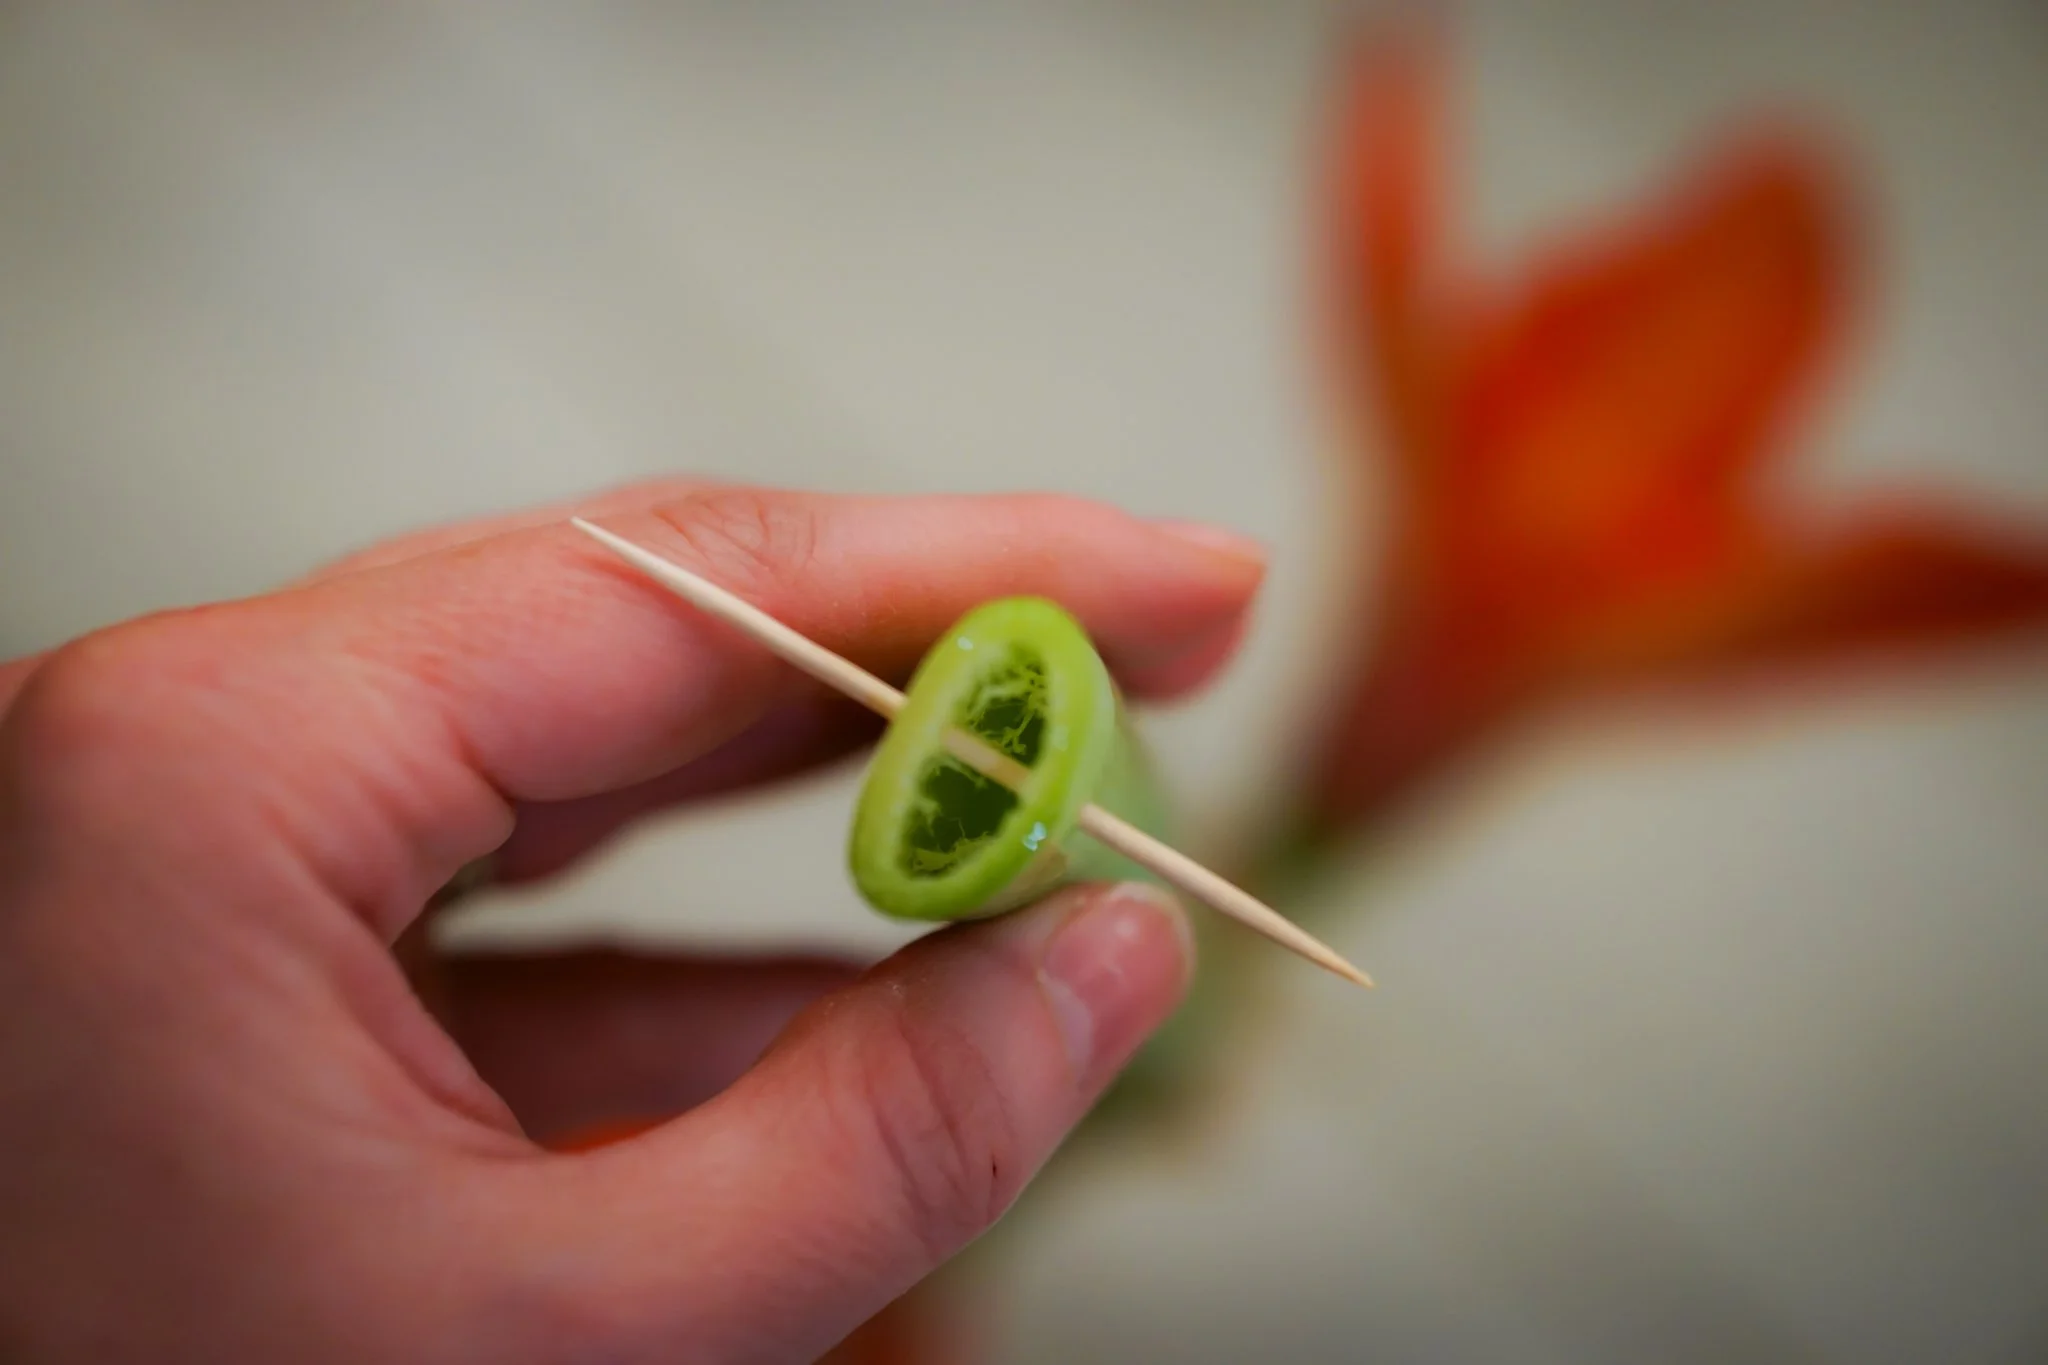
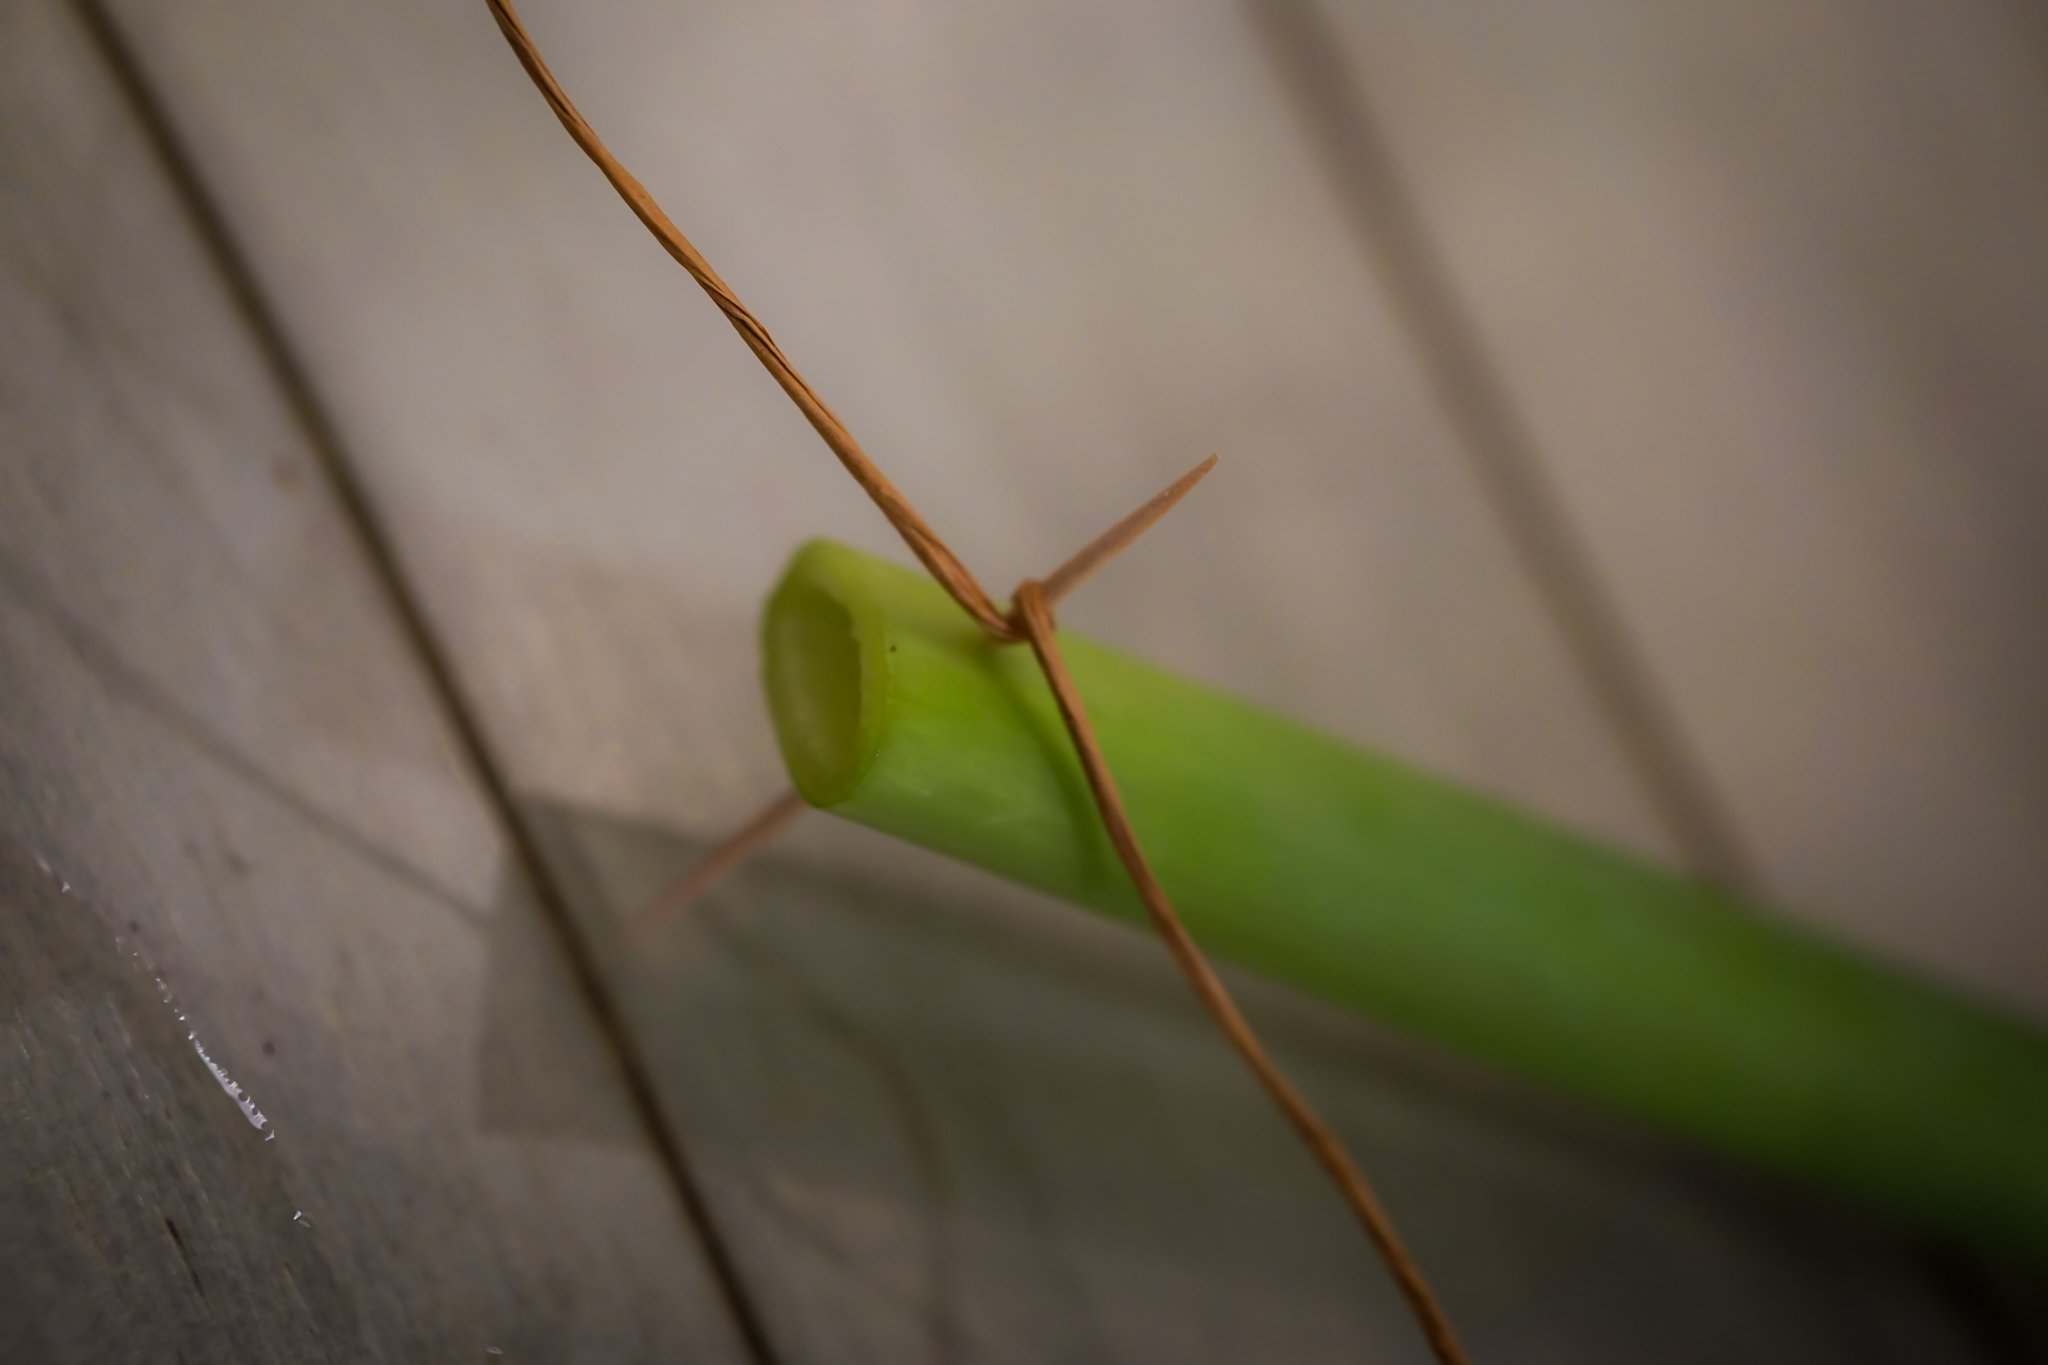
Here are Maureen’s helpful photos of this process:
Tie the flower to a strong branch or even part of the chandelier if it’s concealed.
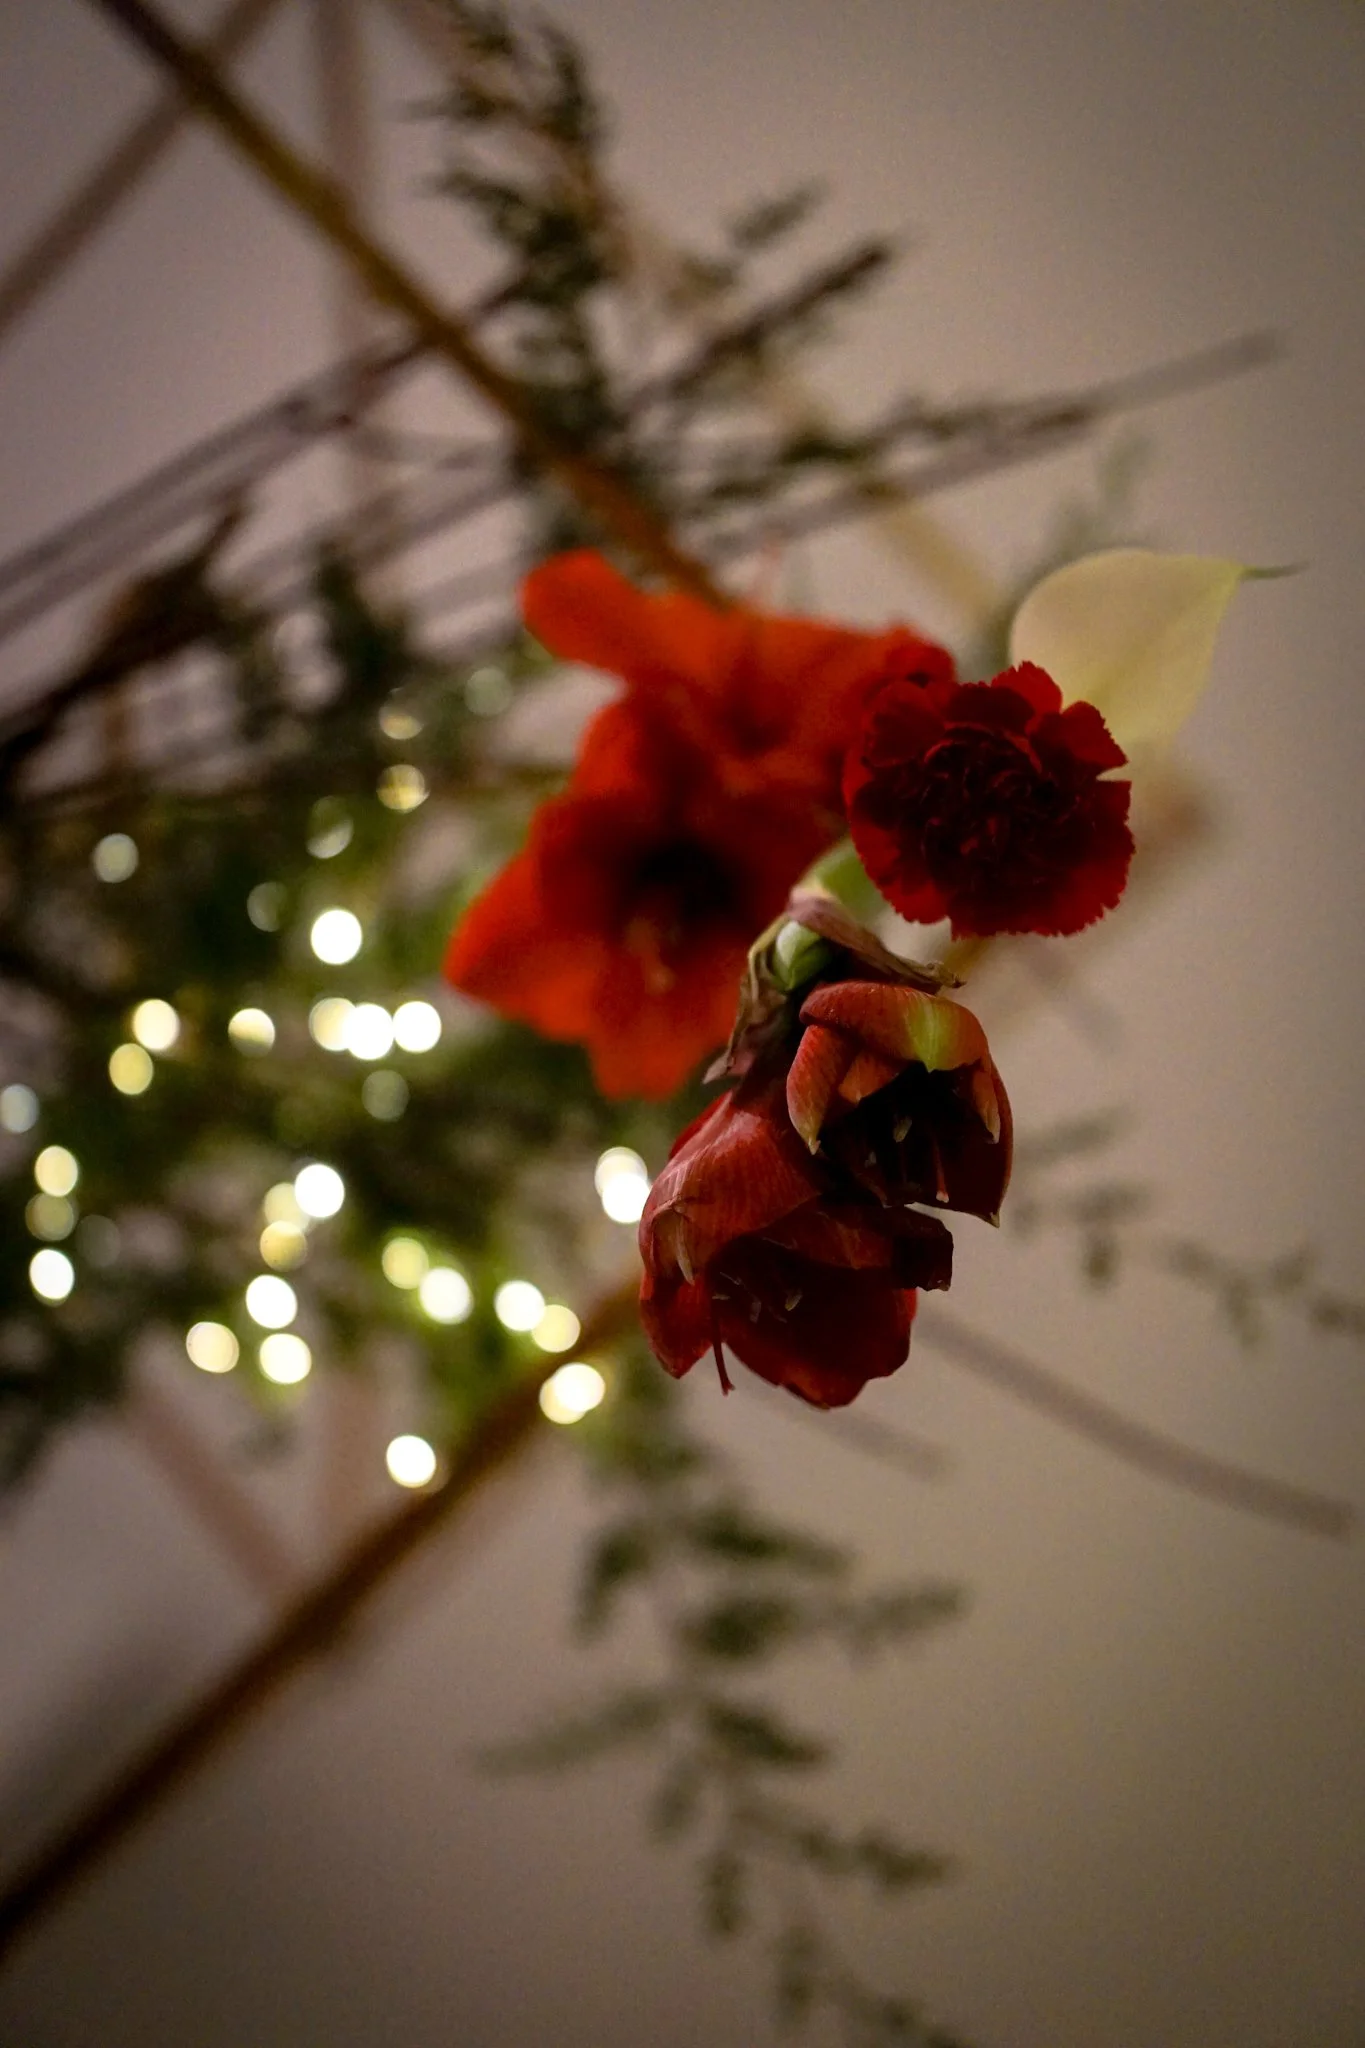
Repeat with other flowers until you have the arrangement you’re looking for. We pinned other, smaller flowers right to the amaryllis stem rather than using more bind wire.
Flower show judge note #1: “You’ll find using a minimum of 3 flowers/groups of varying lengths and not all on the same plane to be visually pleasing.”
Flower show judge note #2: “It’s good to try to hide the mechanics.” When you’re done wiring the flowers and before or even after hanging them (that’s us, we didn’t do this at first!), you can trim the toothpicks so that you can’t see the hanging mechanism.


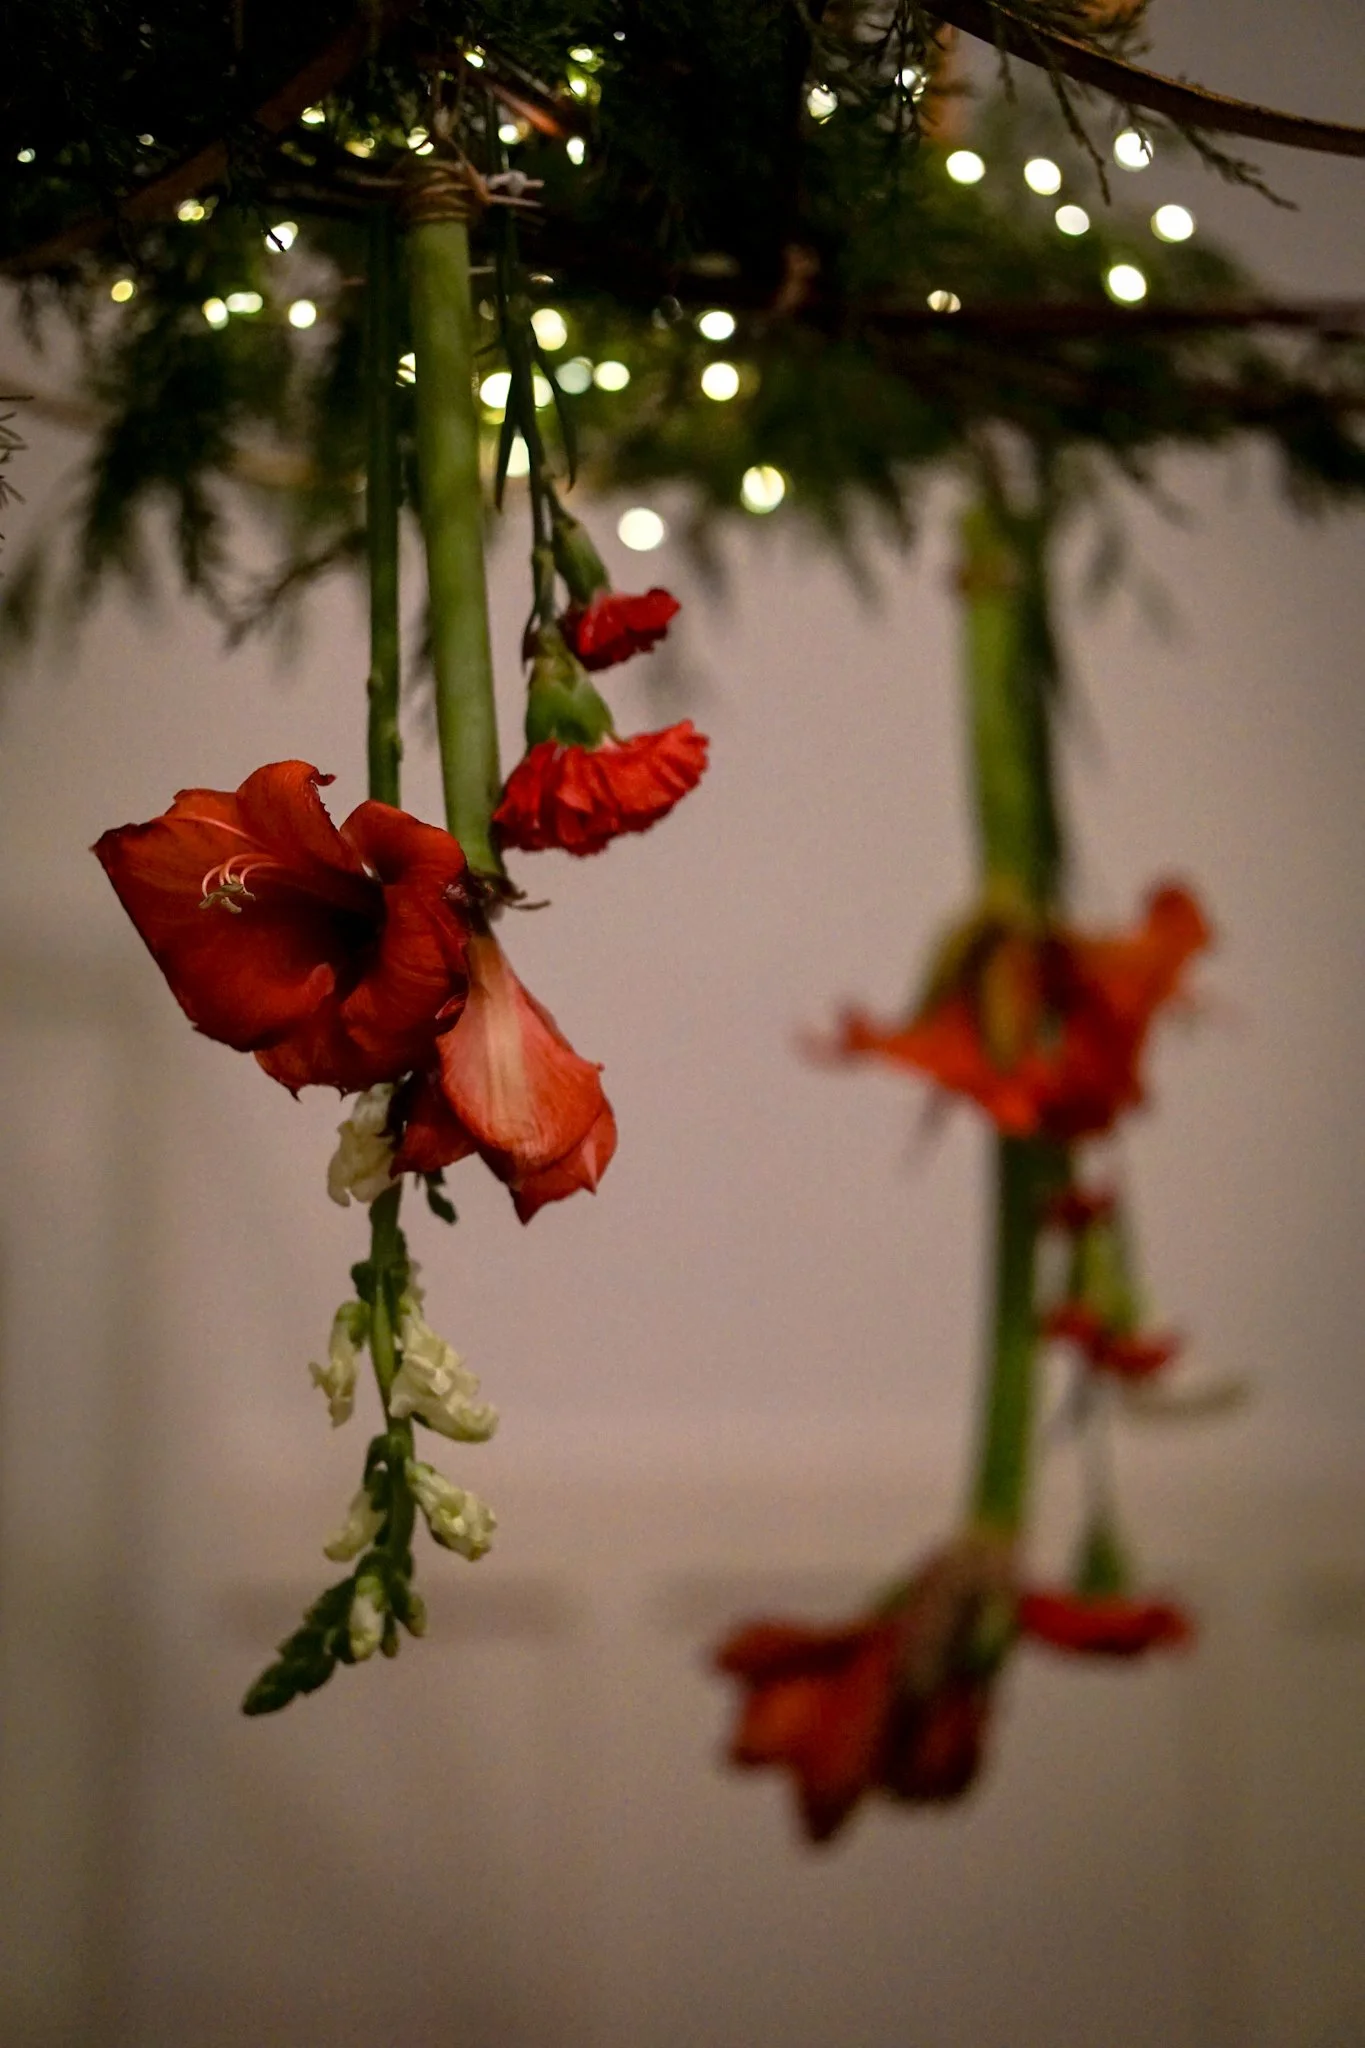


Maureen’s styling. How magical with the snowy background!
Use your squeeze bottle (or peri bottle or baster!) to squeeze water into the stem of the flowers.
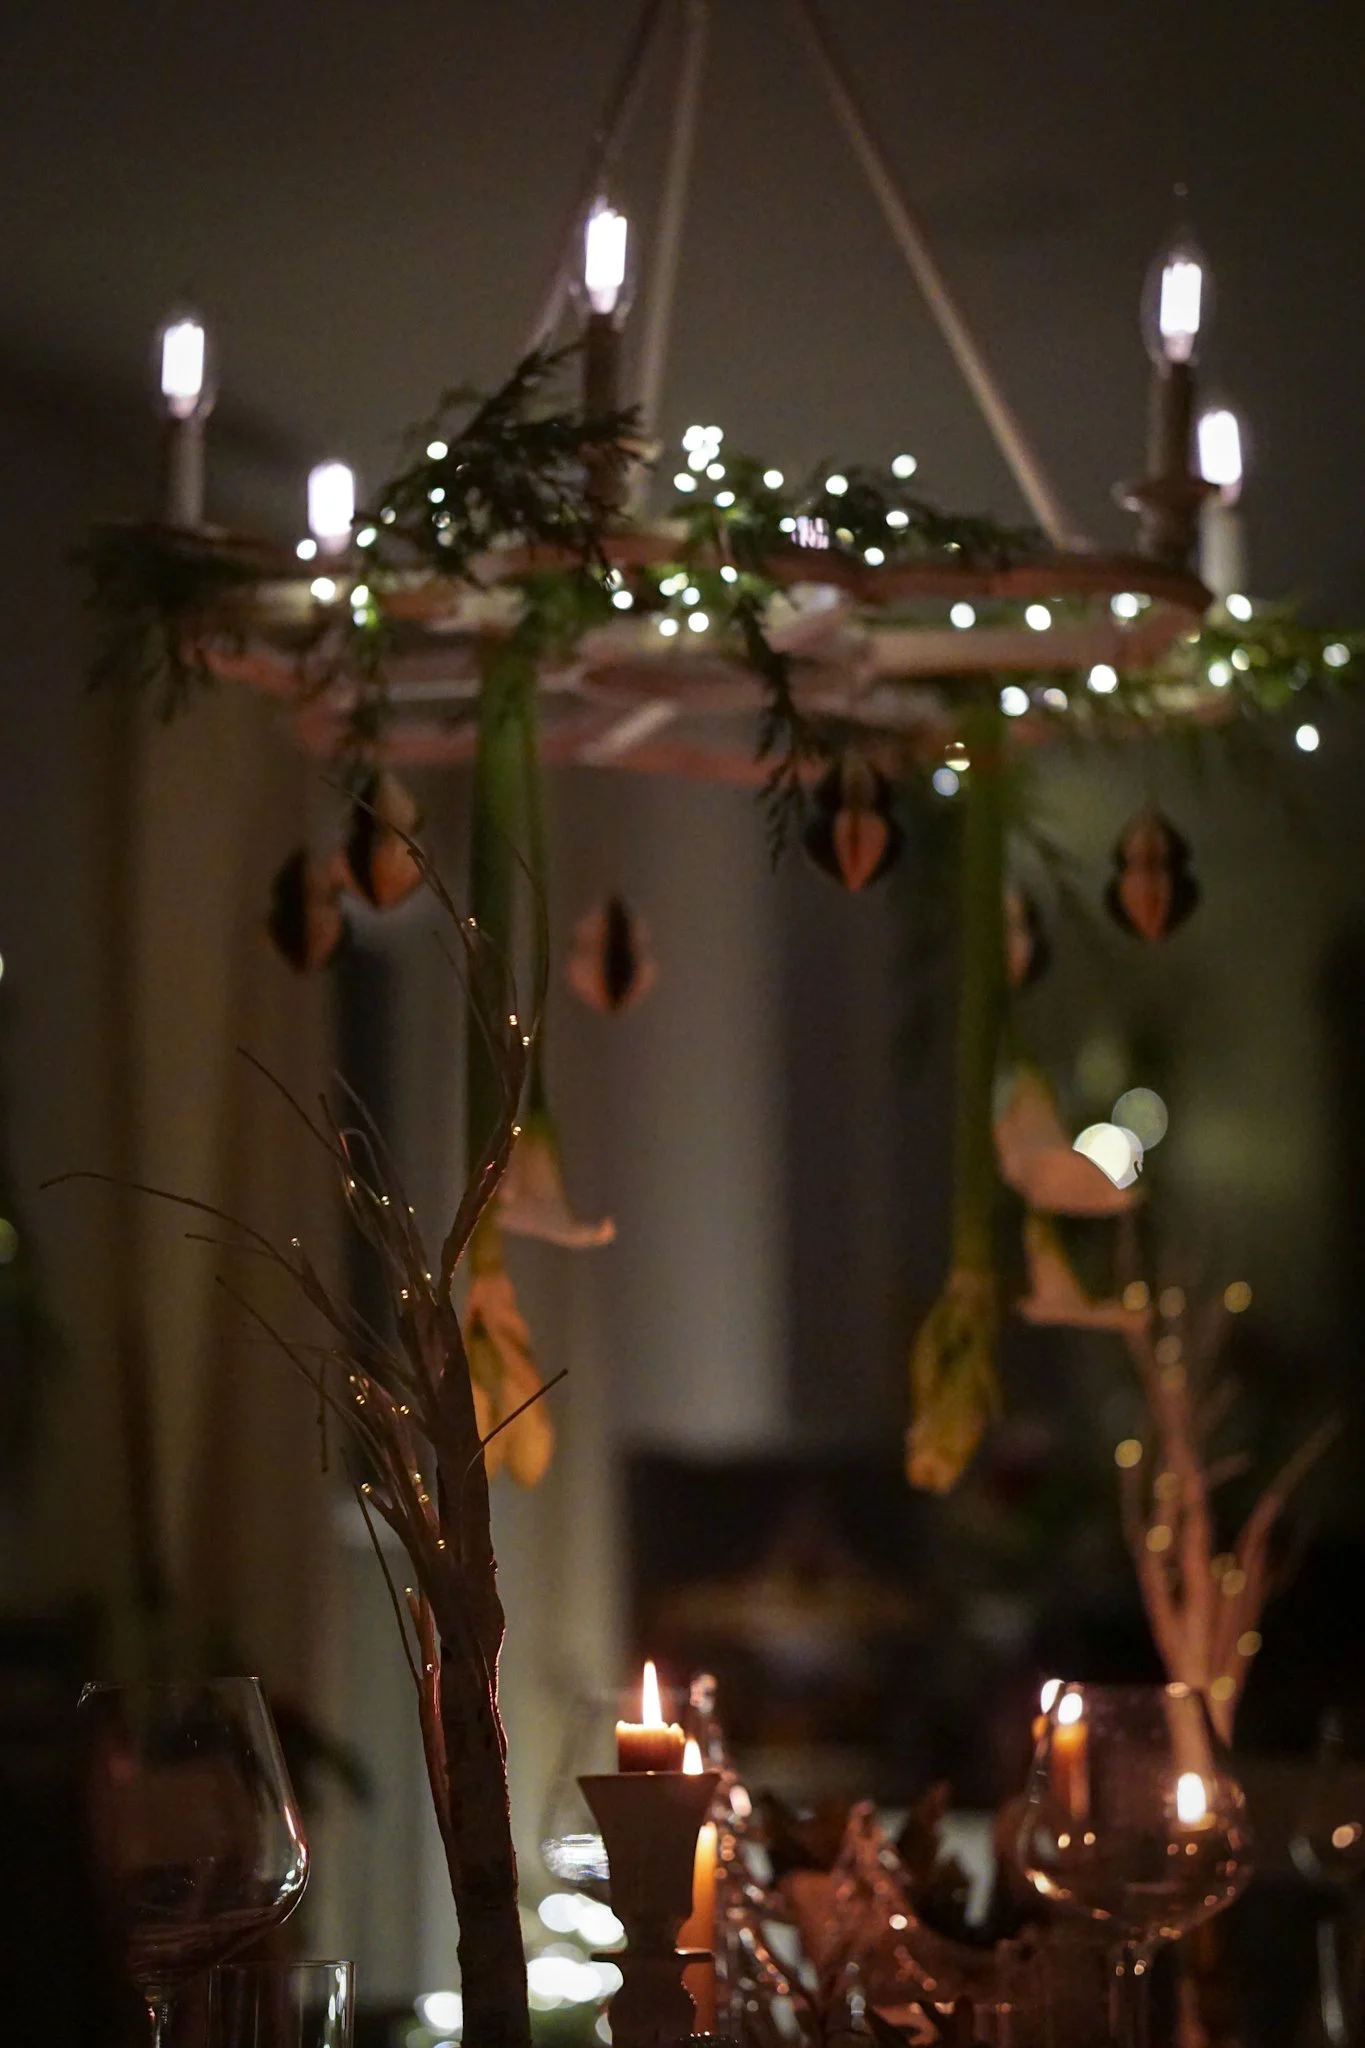
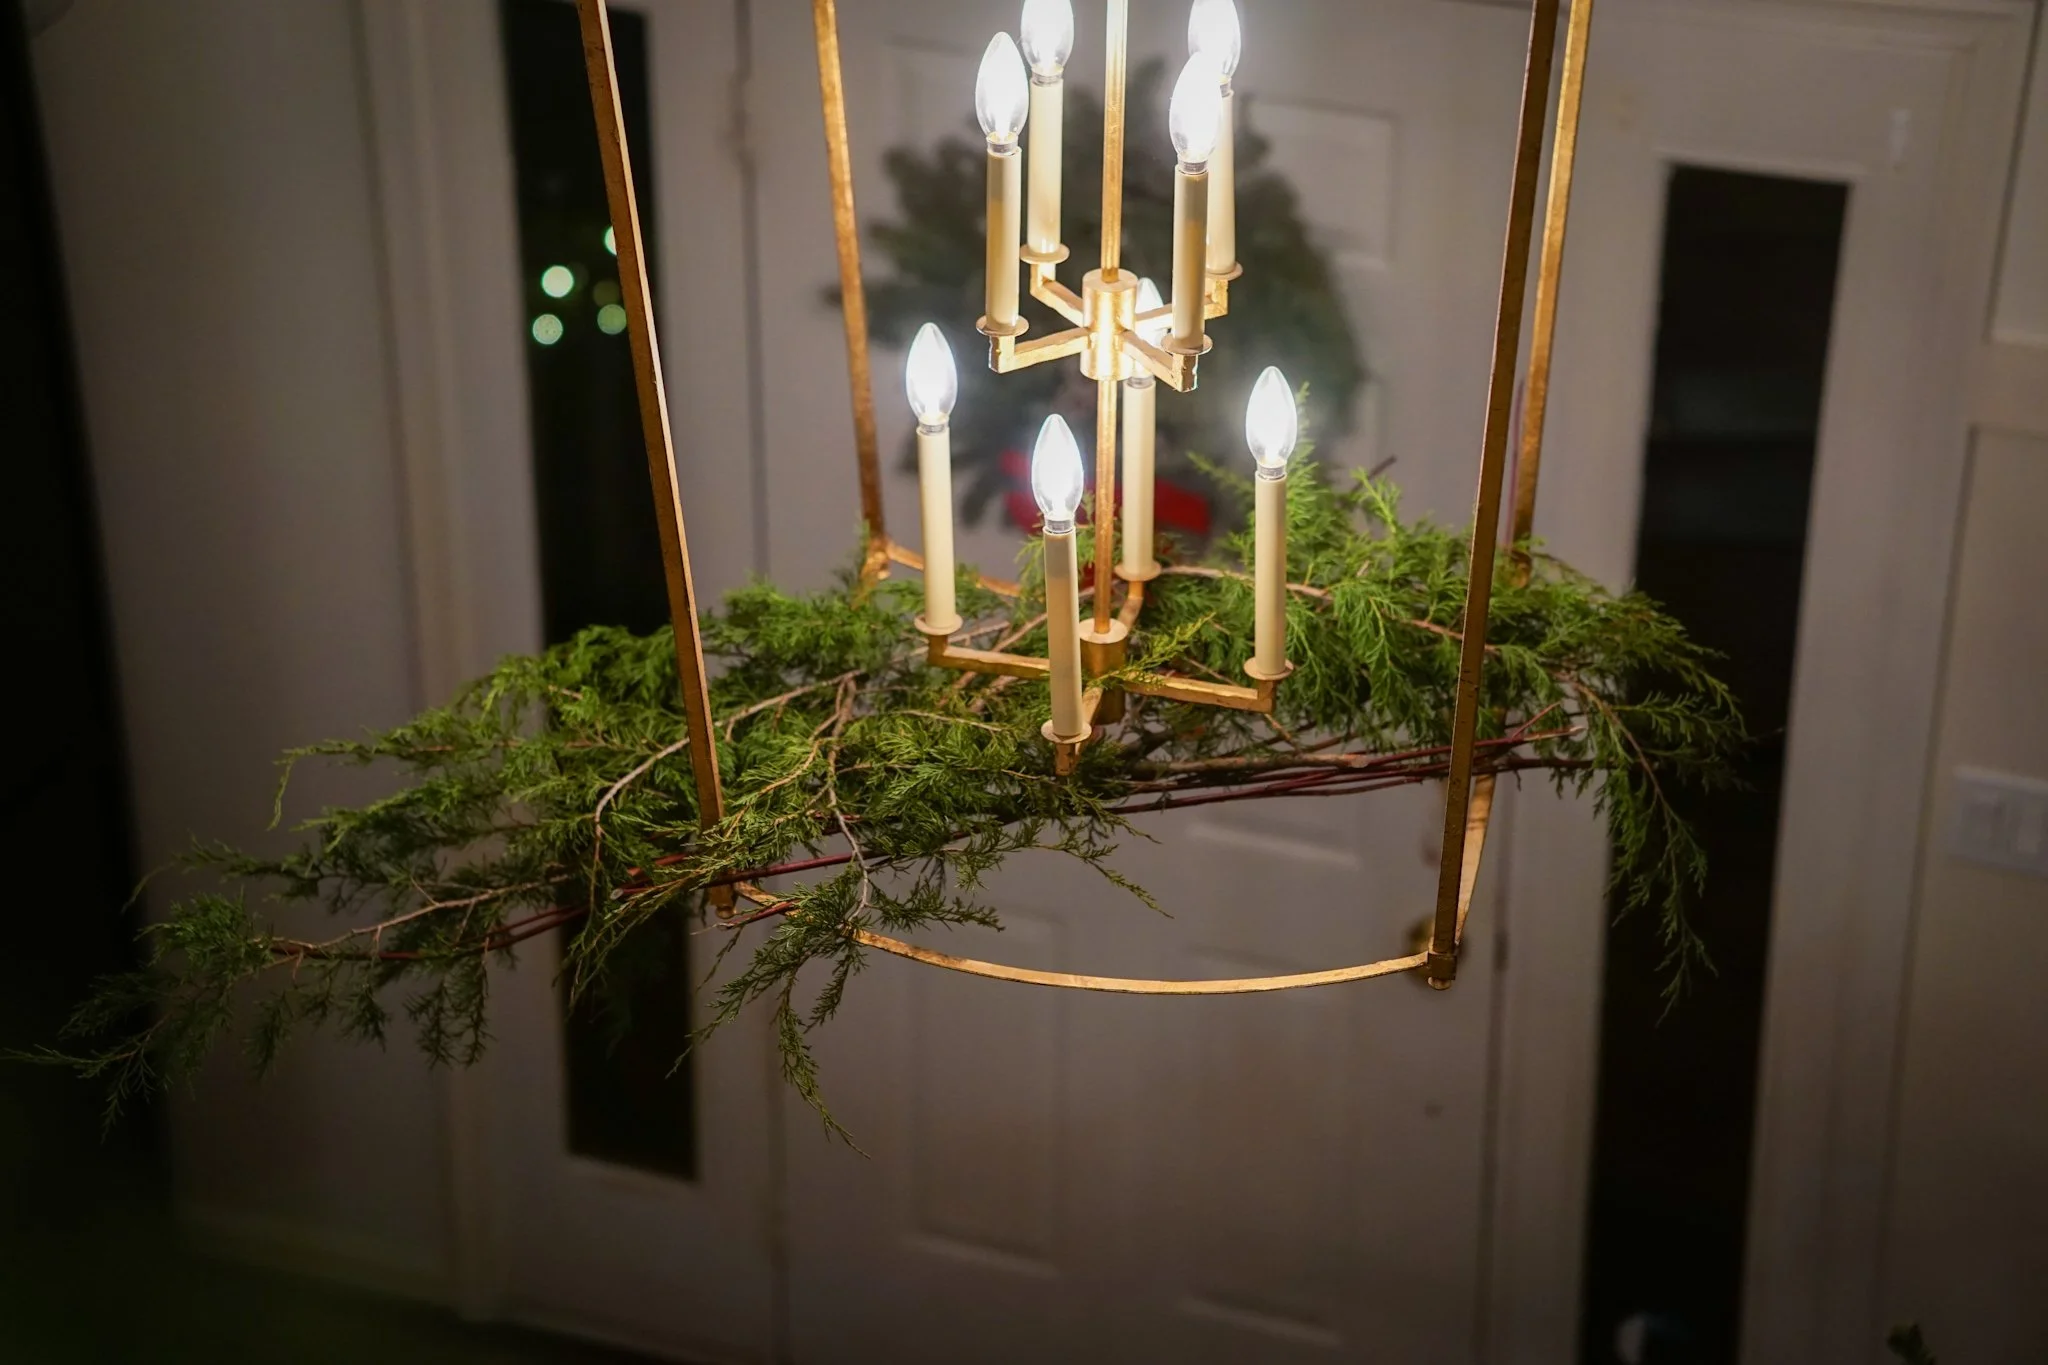
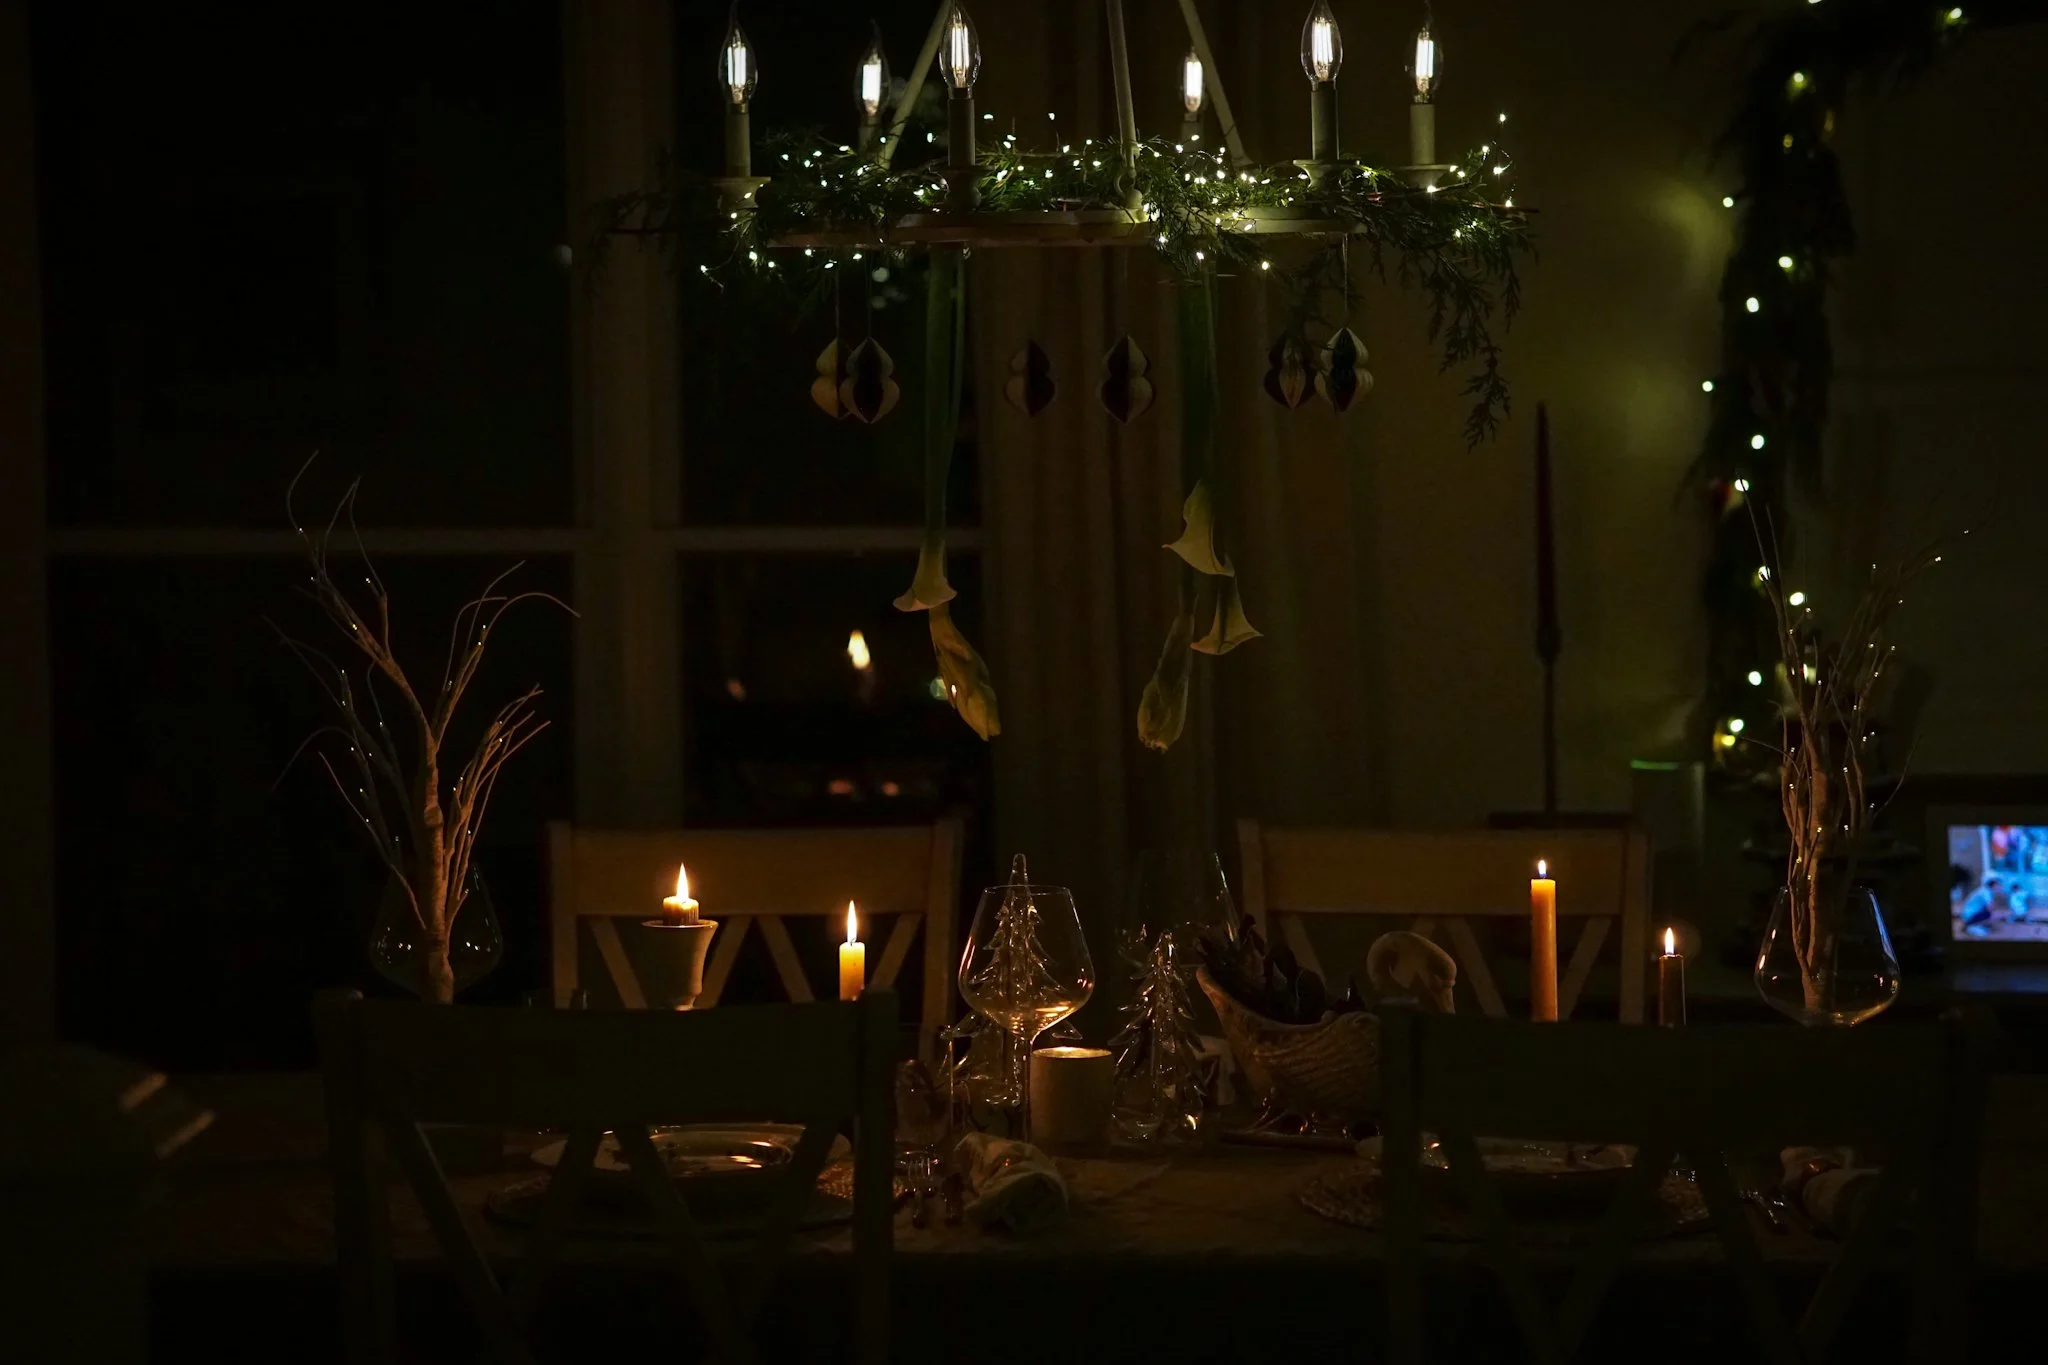
Step back and admire. This is stunning during the daytime, and when night descends and rooms darken, this twinkles with magic and whimsy. We absolutely love it and hope you do, too!
I don’t know about you, but I already feel like I know more simply using the phrase “bind wire”.
Have a very merry, magical Christmas to all who celebrate.