Fresh greenery, dried oranges and other early December musings
Holiday season decorating, an ode to fresh greenery, and how we elevated our kitchen window garland this year
The holidays are here. It’s December 4th, people. Even those who vehemently reject the notion that the holidays start before Thanksgiving can’t deny it any longer.
As always, I must point out that we are in the opposite camp: for us, the holiday season starts on November 1st. We decorate in waves, and each season we try to have our storage bins organized accordingly. Every year we tell ourselves the old mantra: if at first you don’t succeed, try, try again!
We opt for more “subtle” holiday decor between November 1st and mid-month-ish. Anything wintry, cozy. Think: glass trees, swans (okay, a singular gorgeous swan/sled situation I found last year), frosted decor. We swap out our orange candlesticks for burgundies and greens. We put a Frasier Fir candle in every major room. We start listening to the Christmas Coffeehouse playlist on Spotify every day; whoever gets downstairs first always asks Alexa to play it (and always with a “Please”—why do I feel like we need to be polite even to robots, especially in front of our kids?)
We had a faux flocked Christmas tree for years named “Elsa” that always went up on November 1st. At the end of the holiday season last year, Elsa’s lights went out. Her usual corner felt quite dark and empty for the first few weeks of November this year while we waited for her replacement (Elsa II). All of our Christmas trees are named after female characters from a winter-y or Christmas movie. I couldn’t tell you how that tradition started; all I can say is that it now feels WRONG to not name a tree and refer to her with reverence.
Around mid-November we ramp it up, bringing up more Santa and directly Christmas related decor. Outdoor lights go up. Christmas plates and mugs make their seasonal debut. Our Christmas carousel that my parents gifted a few years ago graces our countertops and we always have a little ceremony; it’s one of those Christmas decorations that never fails to bring out that pure Christmas magic in our kids’ eyes.
Usually at this point, the house is becoming so magical that we don’t hold back any longer. What we unpack, we decorate. On the day after Thanksgiving, we get our real, tall tree (Shelly—this year, Shelly VII) and we are in the full swing of things.
Which brings us to today. These early December days can feel fleeting, but they’re full of some sort of brightness, a buzzing energy. It still feels early in the season but you have a heightened awareness that this year’s core Christmas memories and activities are within reach and happening now.
If you’re one of those lucky people who got to see snow in past couple of days—we envy you! Last weekend, my 4-year-old burst into my bedroom to tell me “MOMMY! Daddy says that it’s raining but it MIGHT turn into snow! HURRY! Come see!”
Sadly, the cold rain did not transform into snow that morning, but our family’s excitement for that first snowflake has not dwindled.
So… the house is decorated, snow is on the horizon. A blog post that I intended to be about how we did our kitchen window garland this year grew into a post that also includes our holiday decorating strategy; thank you for enduring that.
Onto greenery!
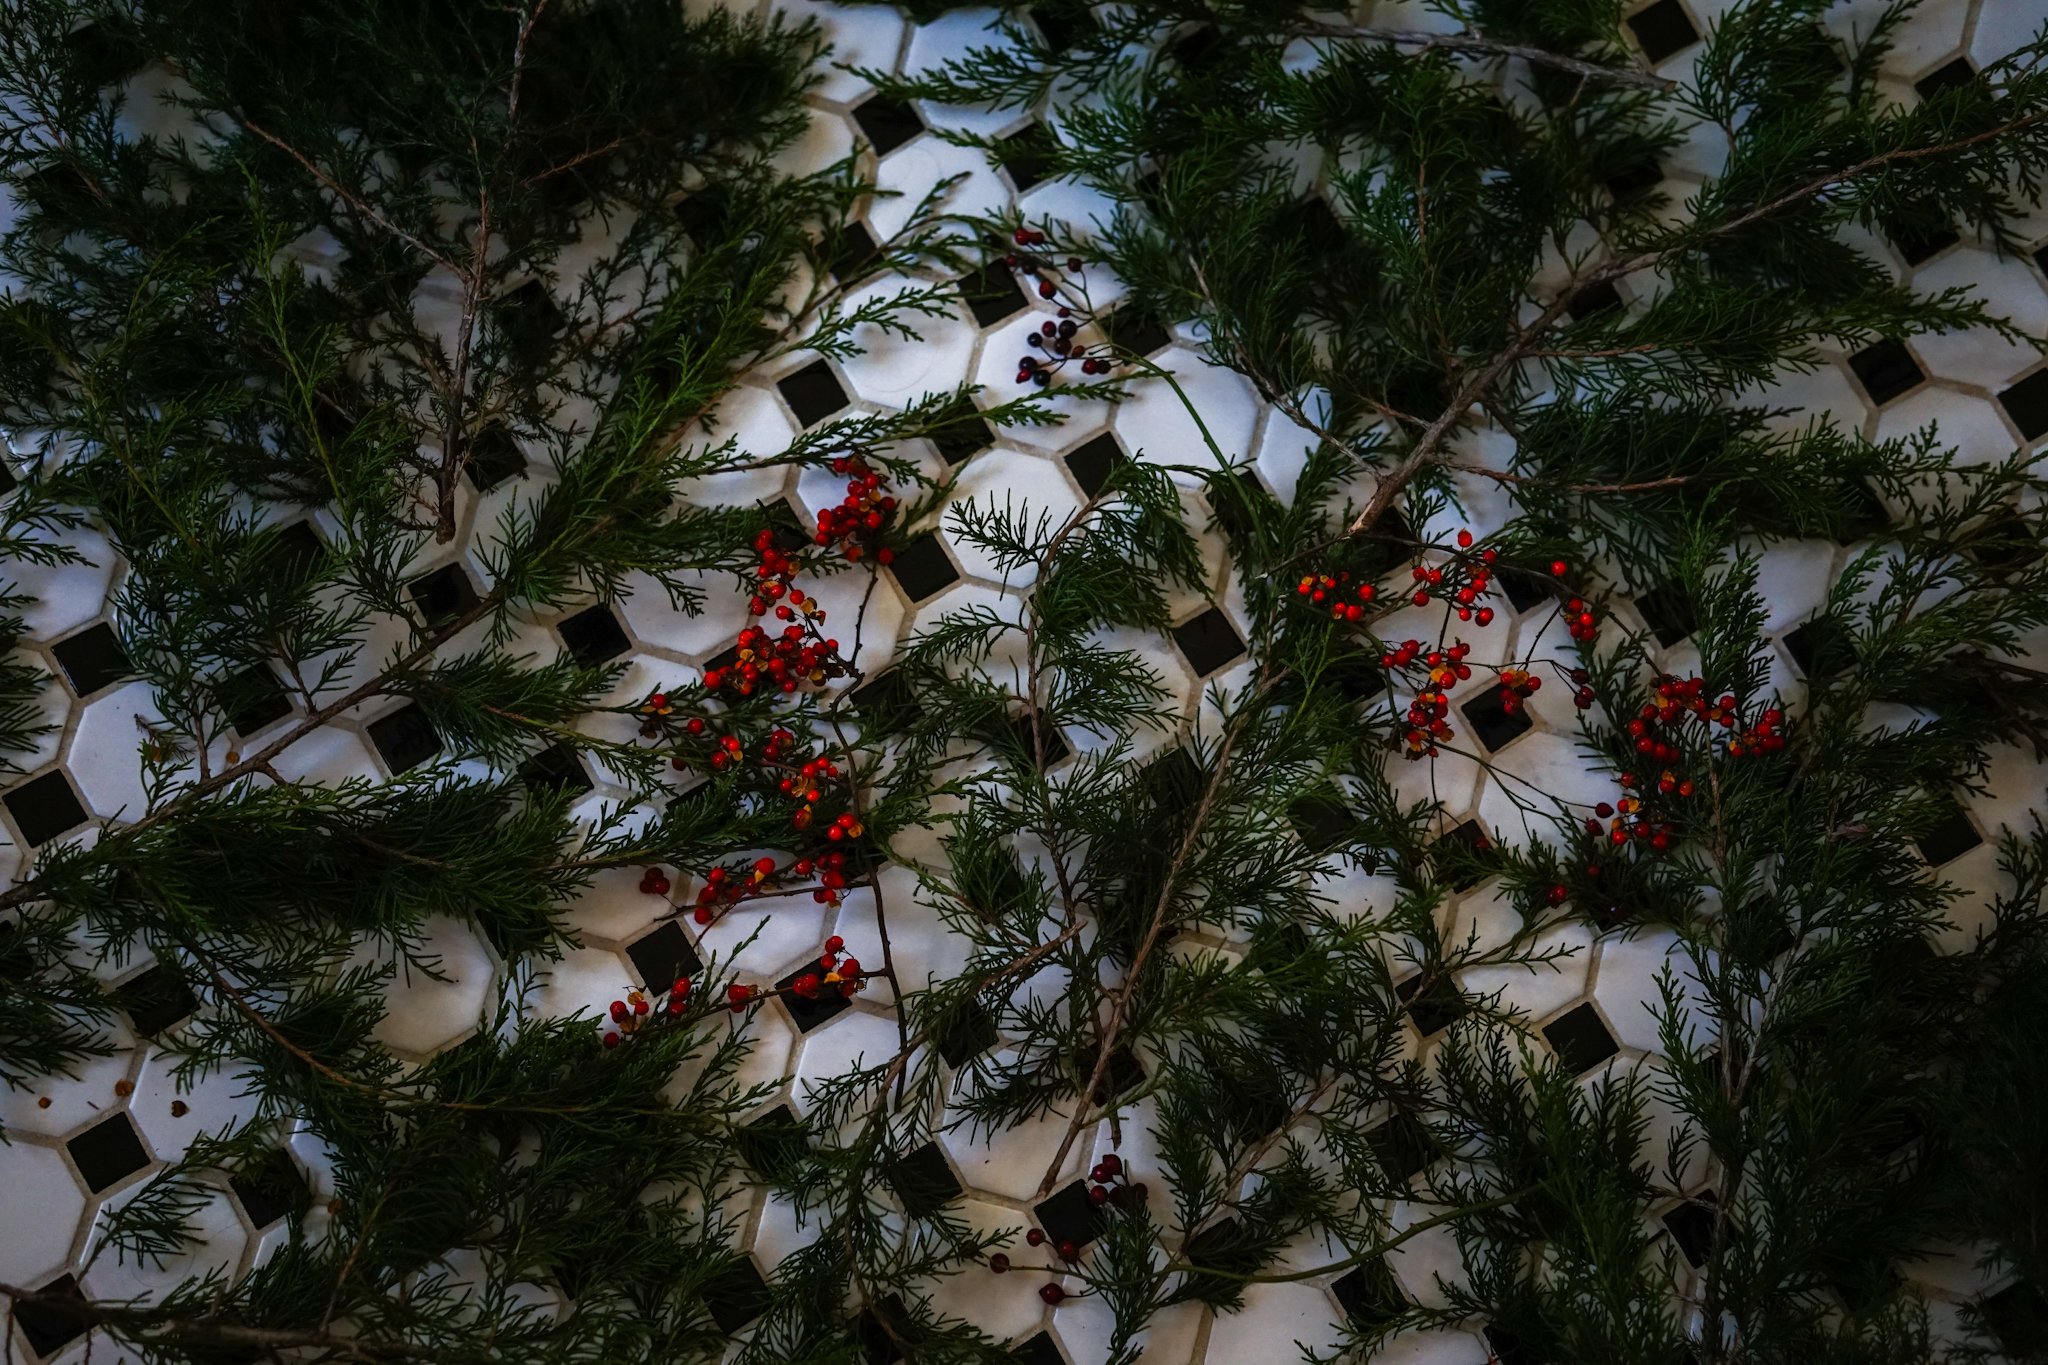
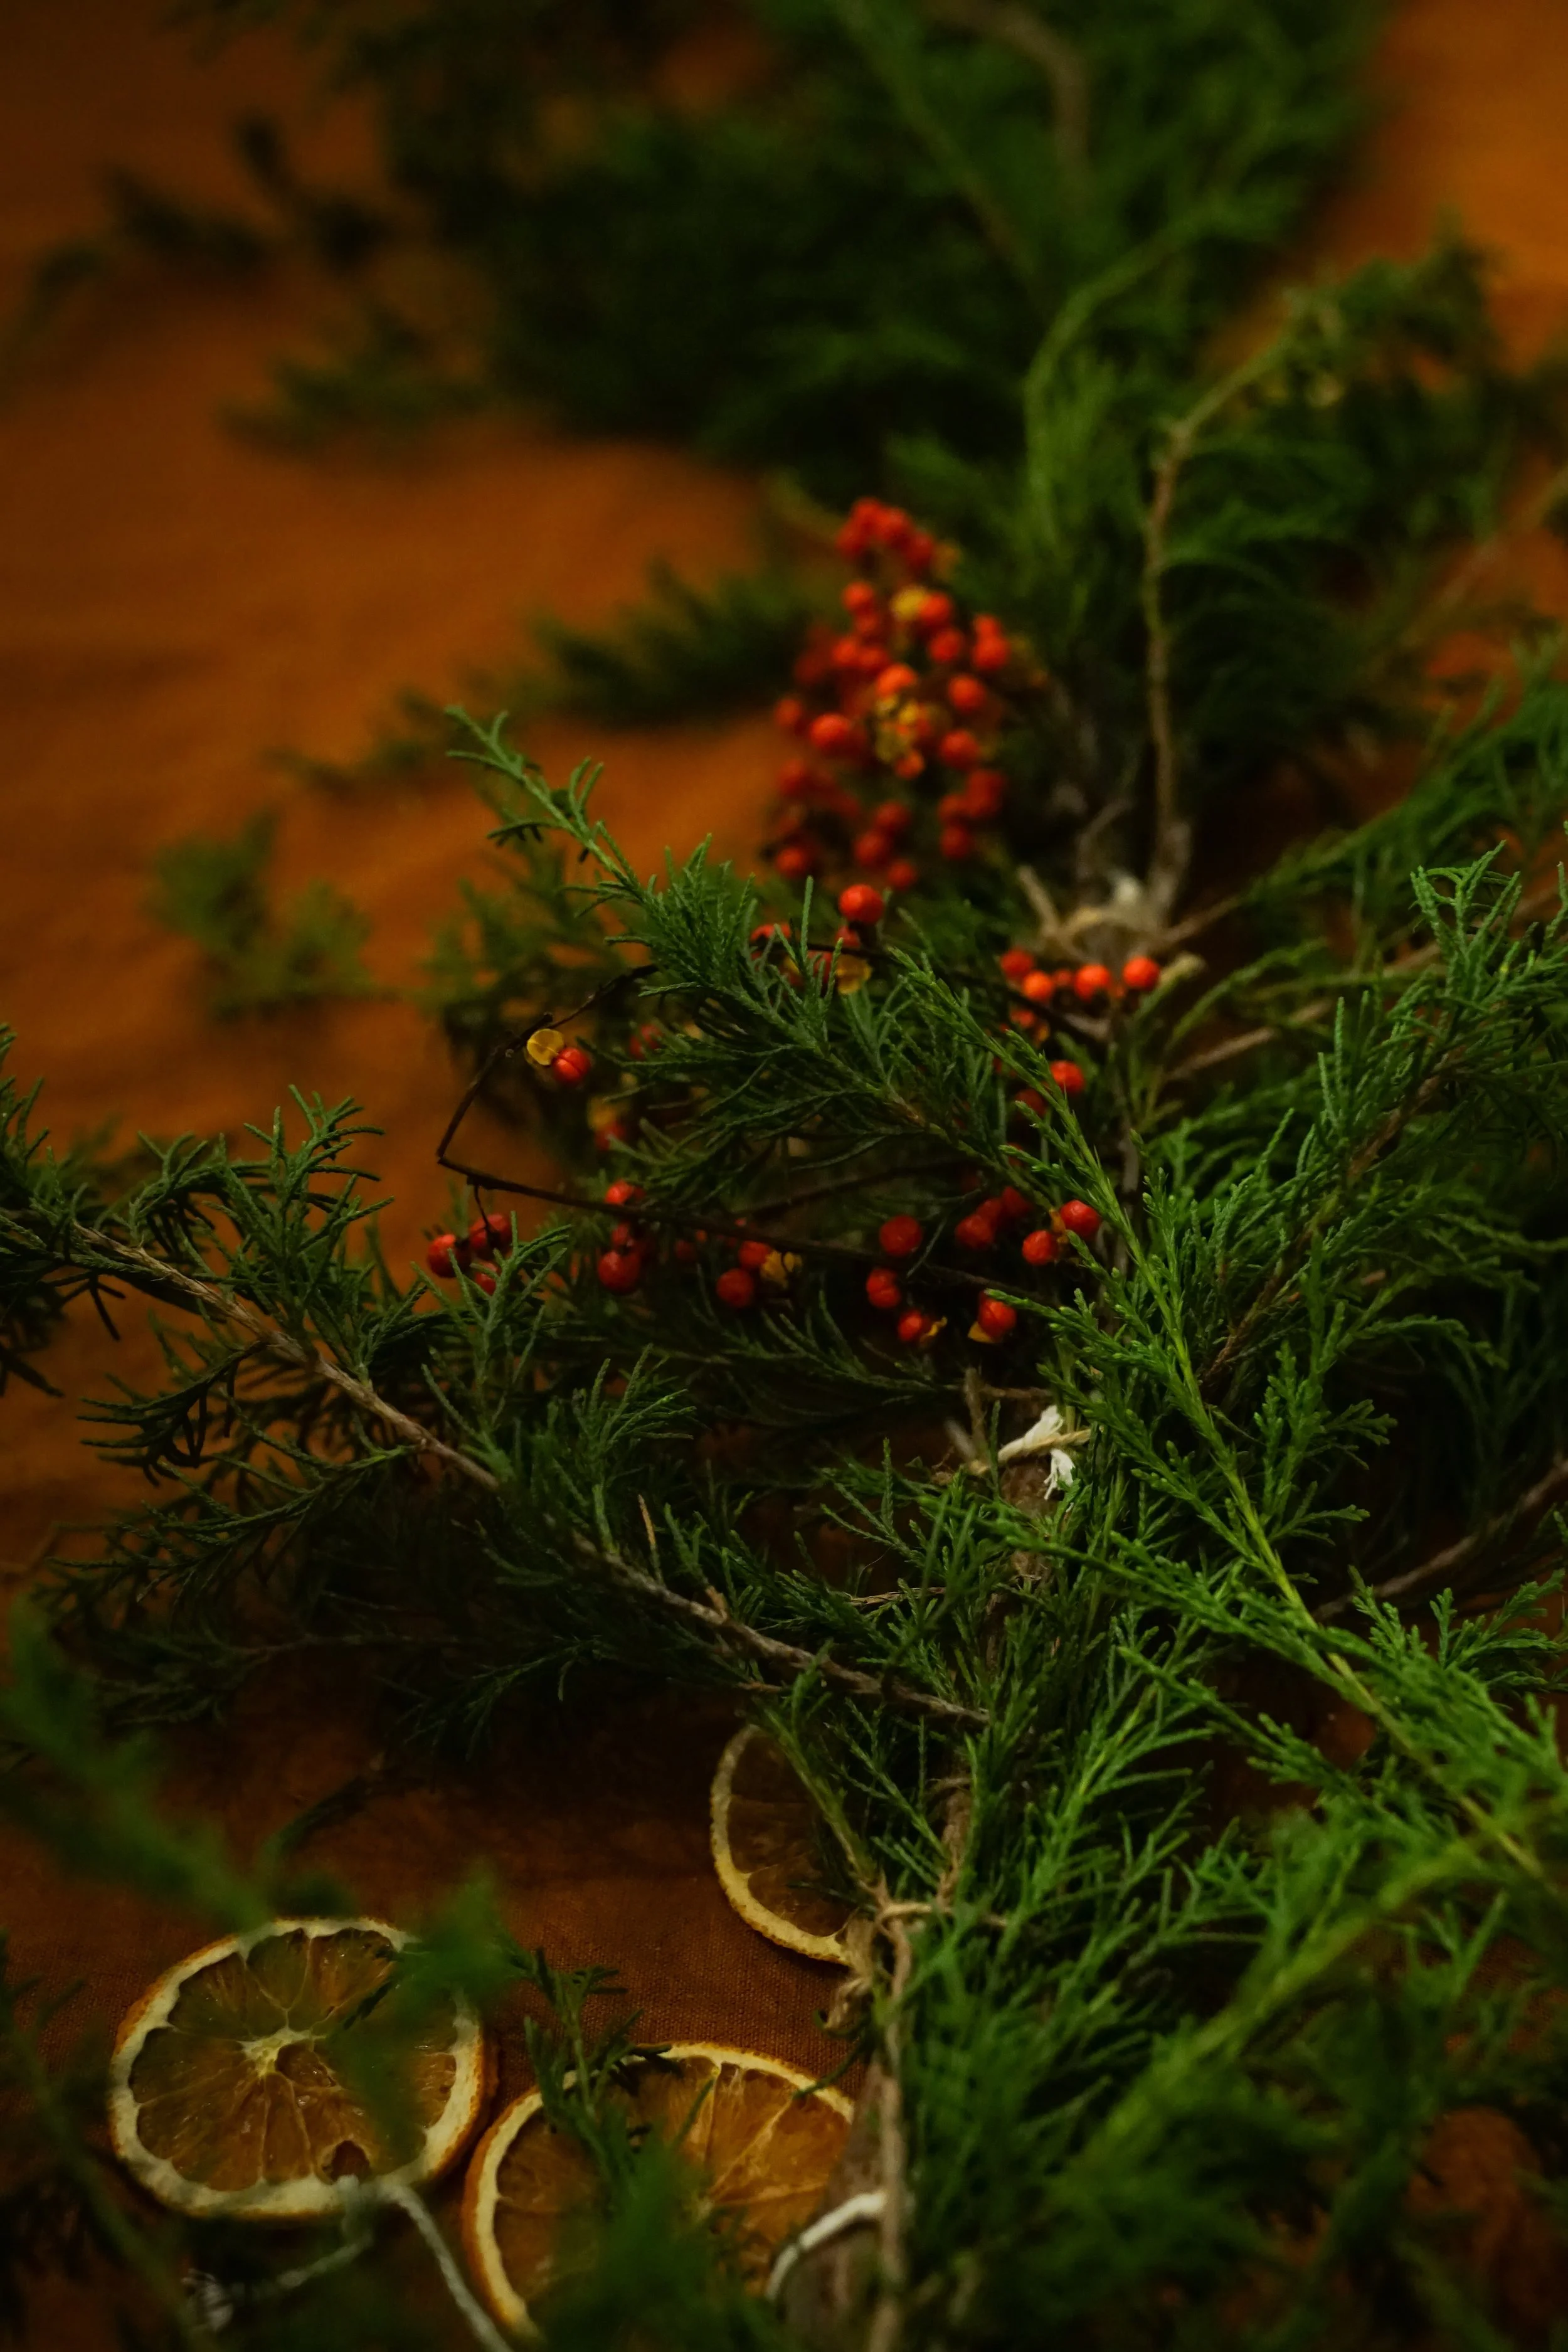
There’s something so energizing about having fresh greenery around the house. People have been bringing nature indoors for centuries. In ancient times, people would hang greenery in windows and doorways to keep away evil spirits and illness. I think many of us can relate in this world so full of hate right now. If greenery can help ward away that kind of energy (and cold + flu season too, please!), sign me up. I also like to believe it when I hear that having real greens in your house helps purify the air.
For the past few years we’ve been doing more fresh greenery around the house. Banisters, mirrors, windows, whatever we have time for. Some greenery is purchased and some we forage from our own backyard.
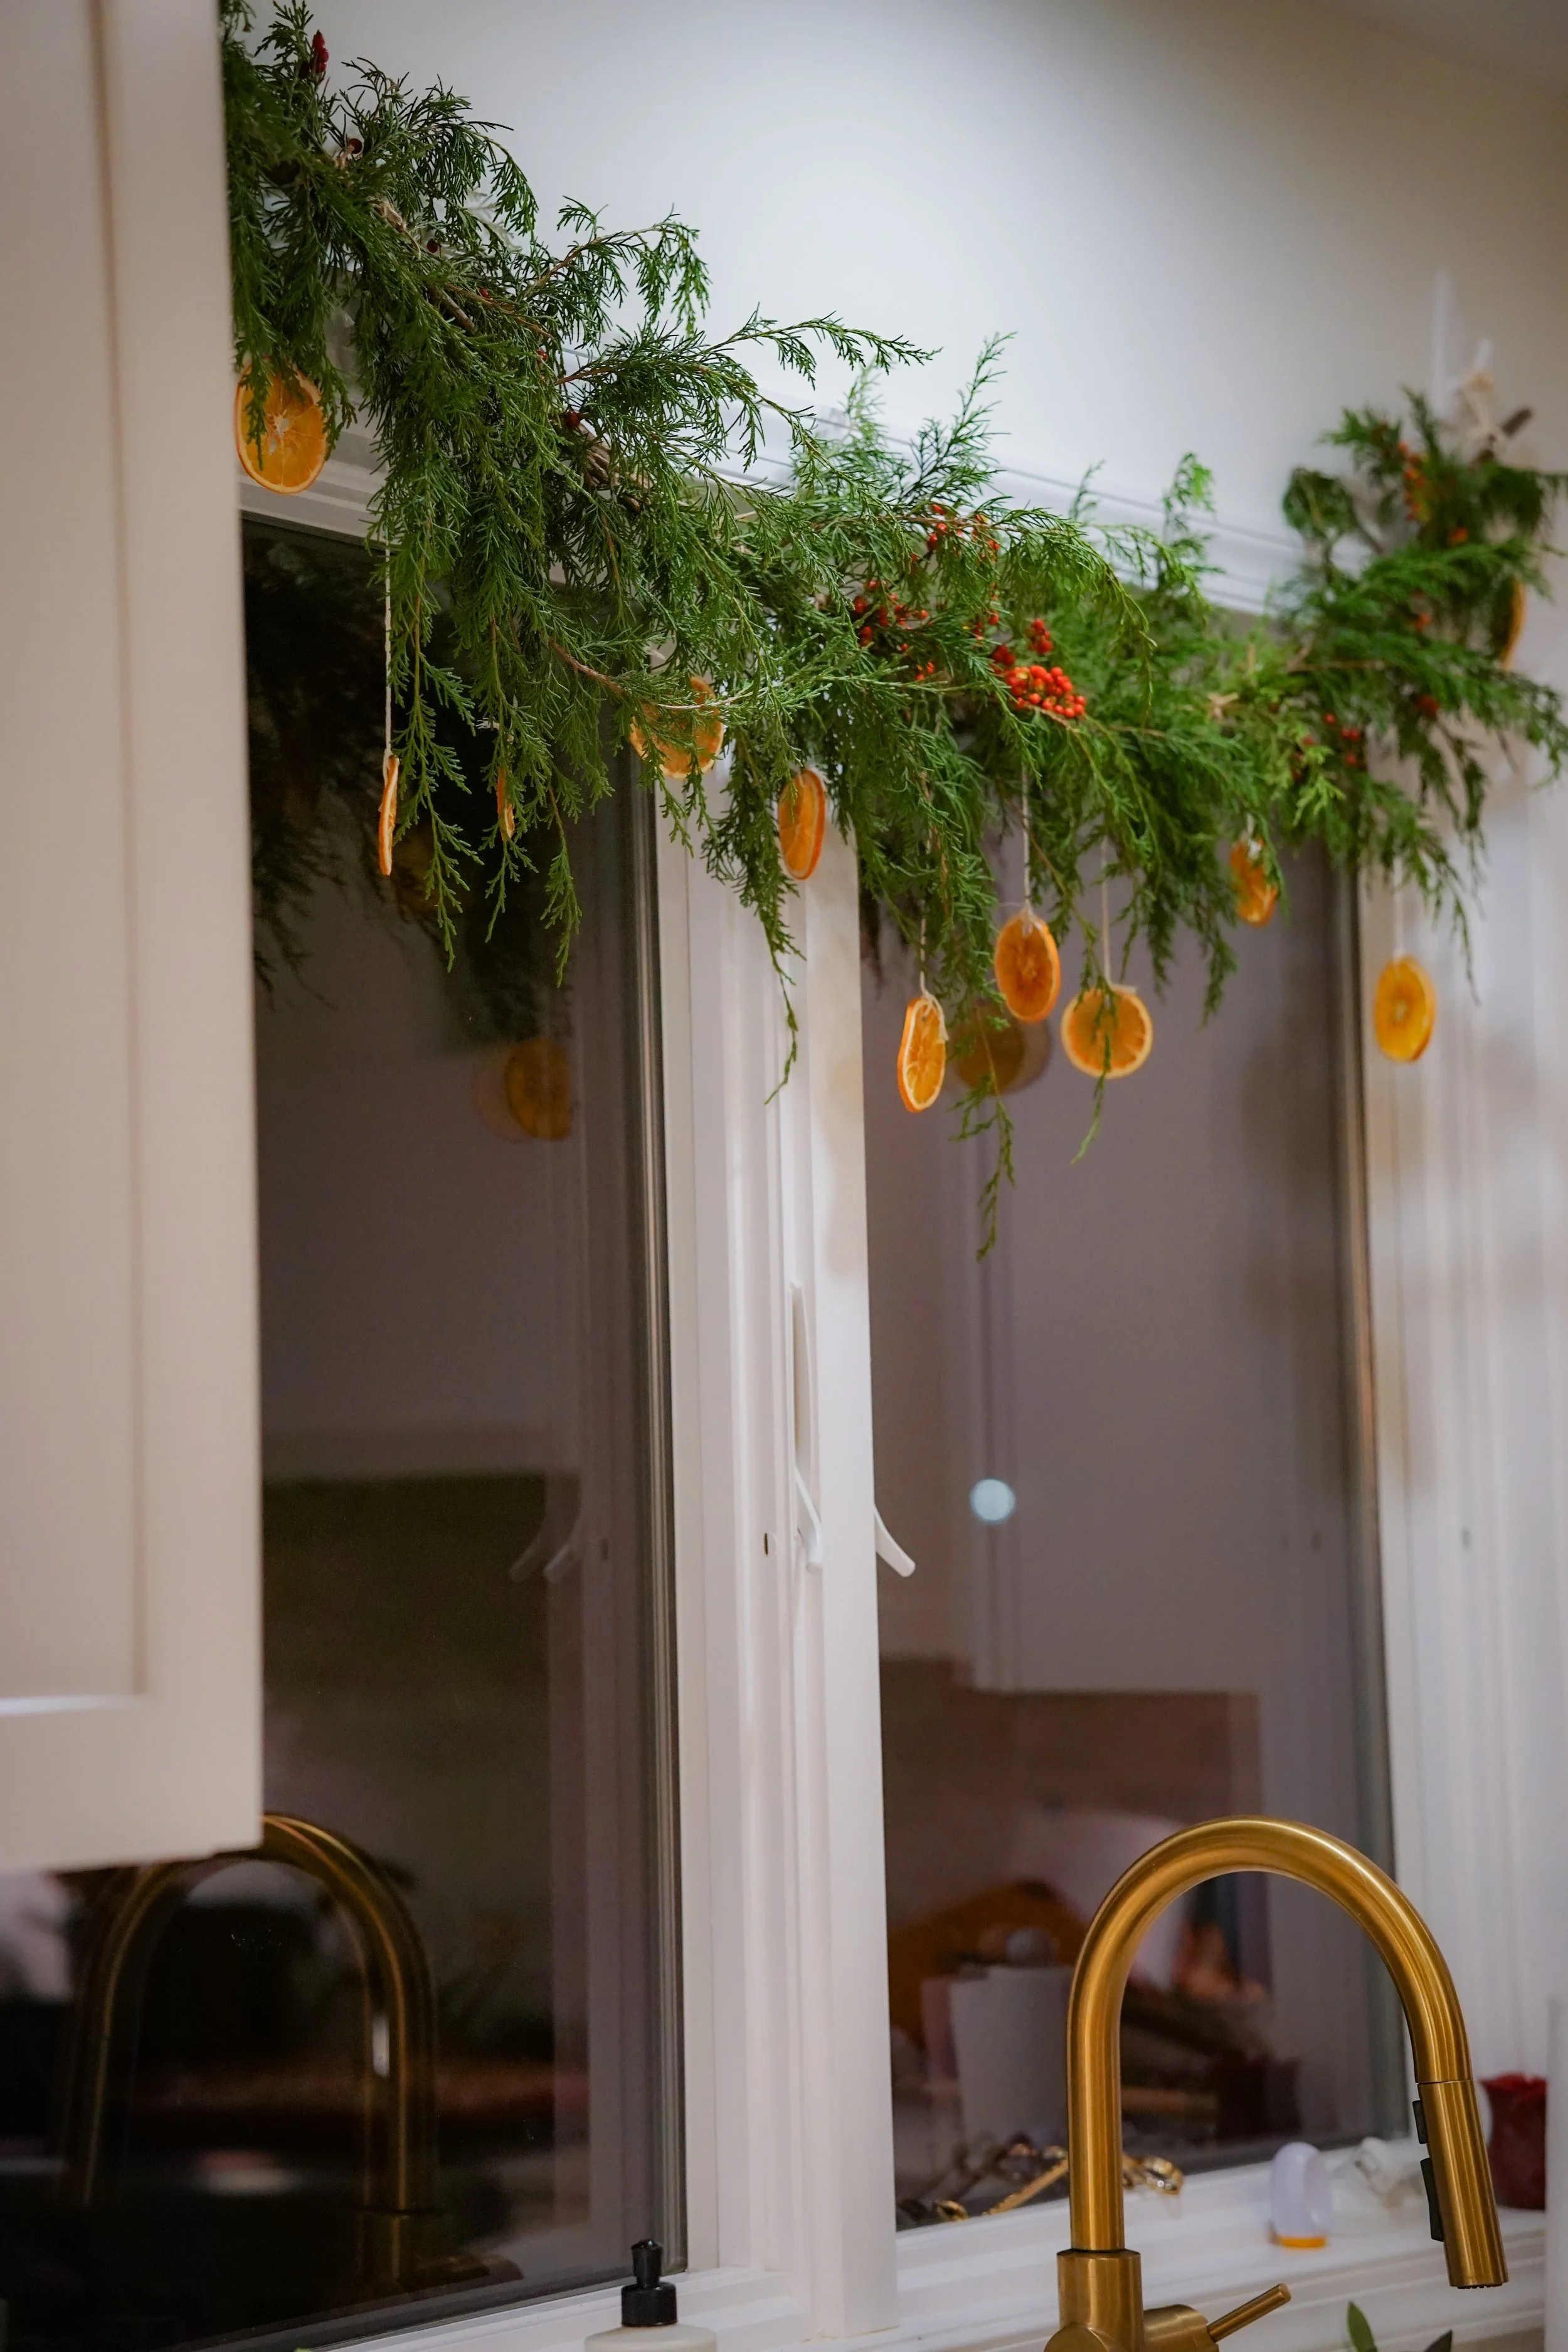
After a super windy day a few weeks ago, the kids and I found a long, smooth stick in our yard with a cool shape. This stick became the inspiration for a new garland to go over our kitchen sink—it happened to be the exact length of our double kitchen window, and I thought it would give the garland a nice swooping shape.
We went a step beyond a traditional green garland this year by adding a few extras, including dried oranges. Oranges date far back in Christmas lore, too, allegedly representing a more affordable version of the gold that Saint Nicholas is said to have gifted to the poor. Oranges in stockings became a tradition, and at various times throughout history oranges have been seen as a rarity and a luxury. It was fun to decorate with something with historic holiday significance and that brings warmth, color and light to our kitchen.
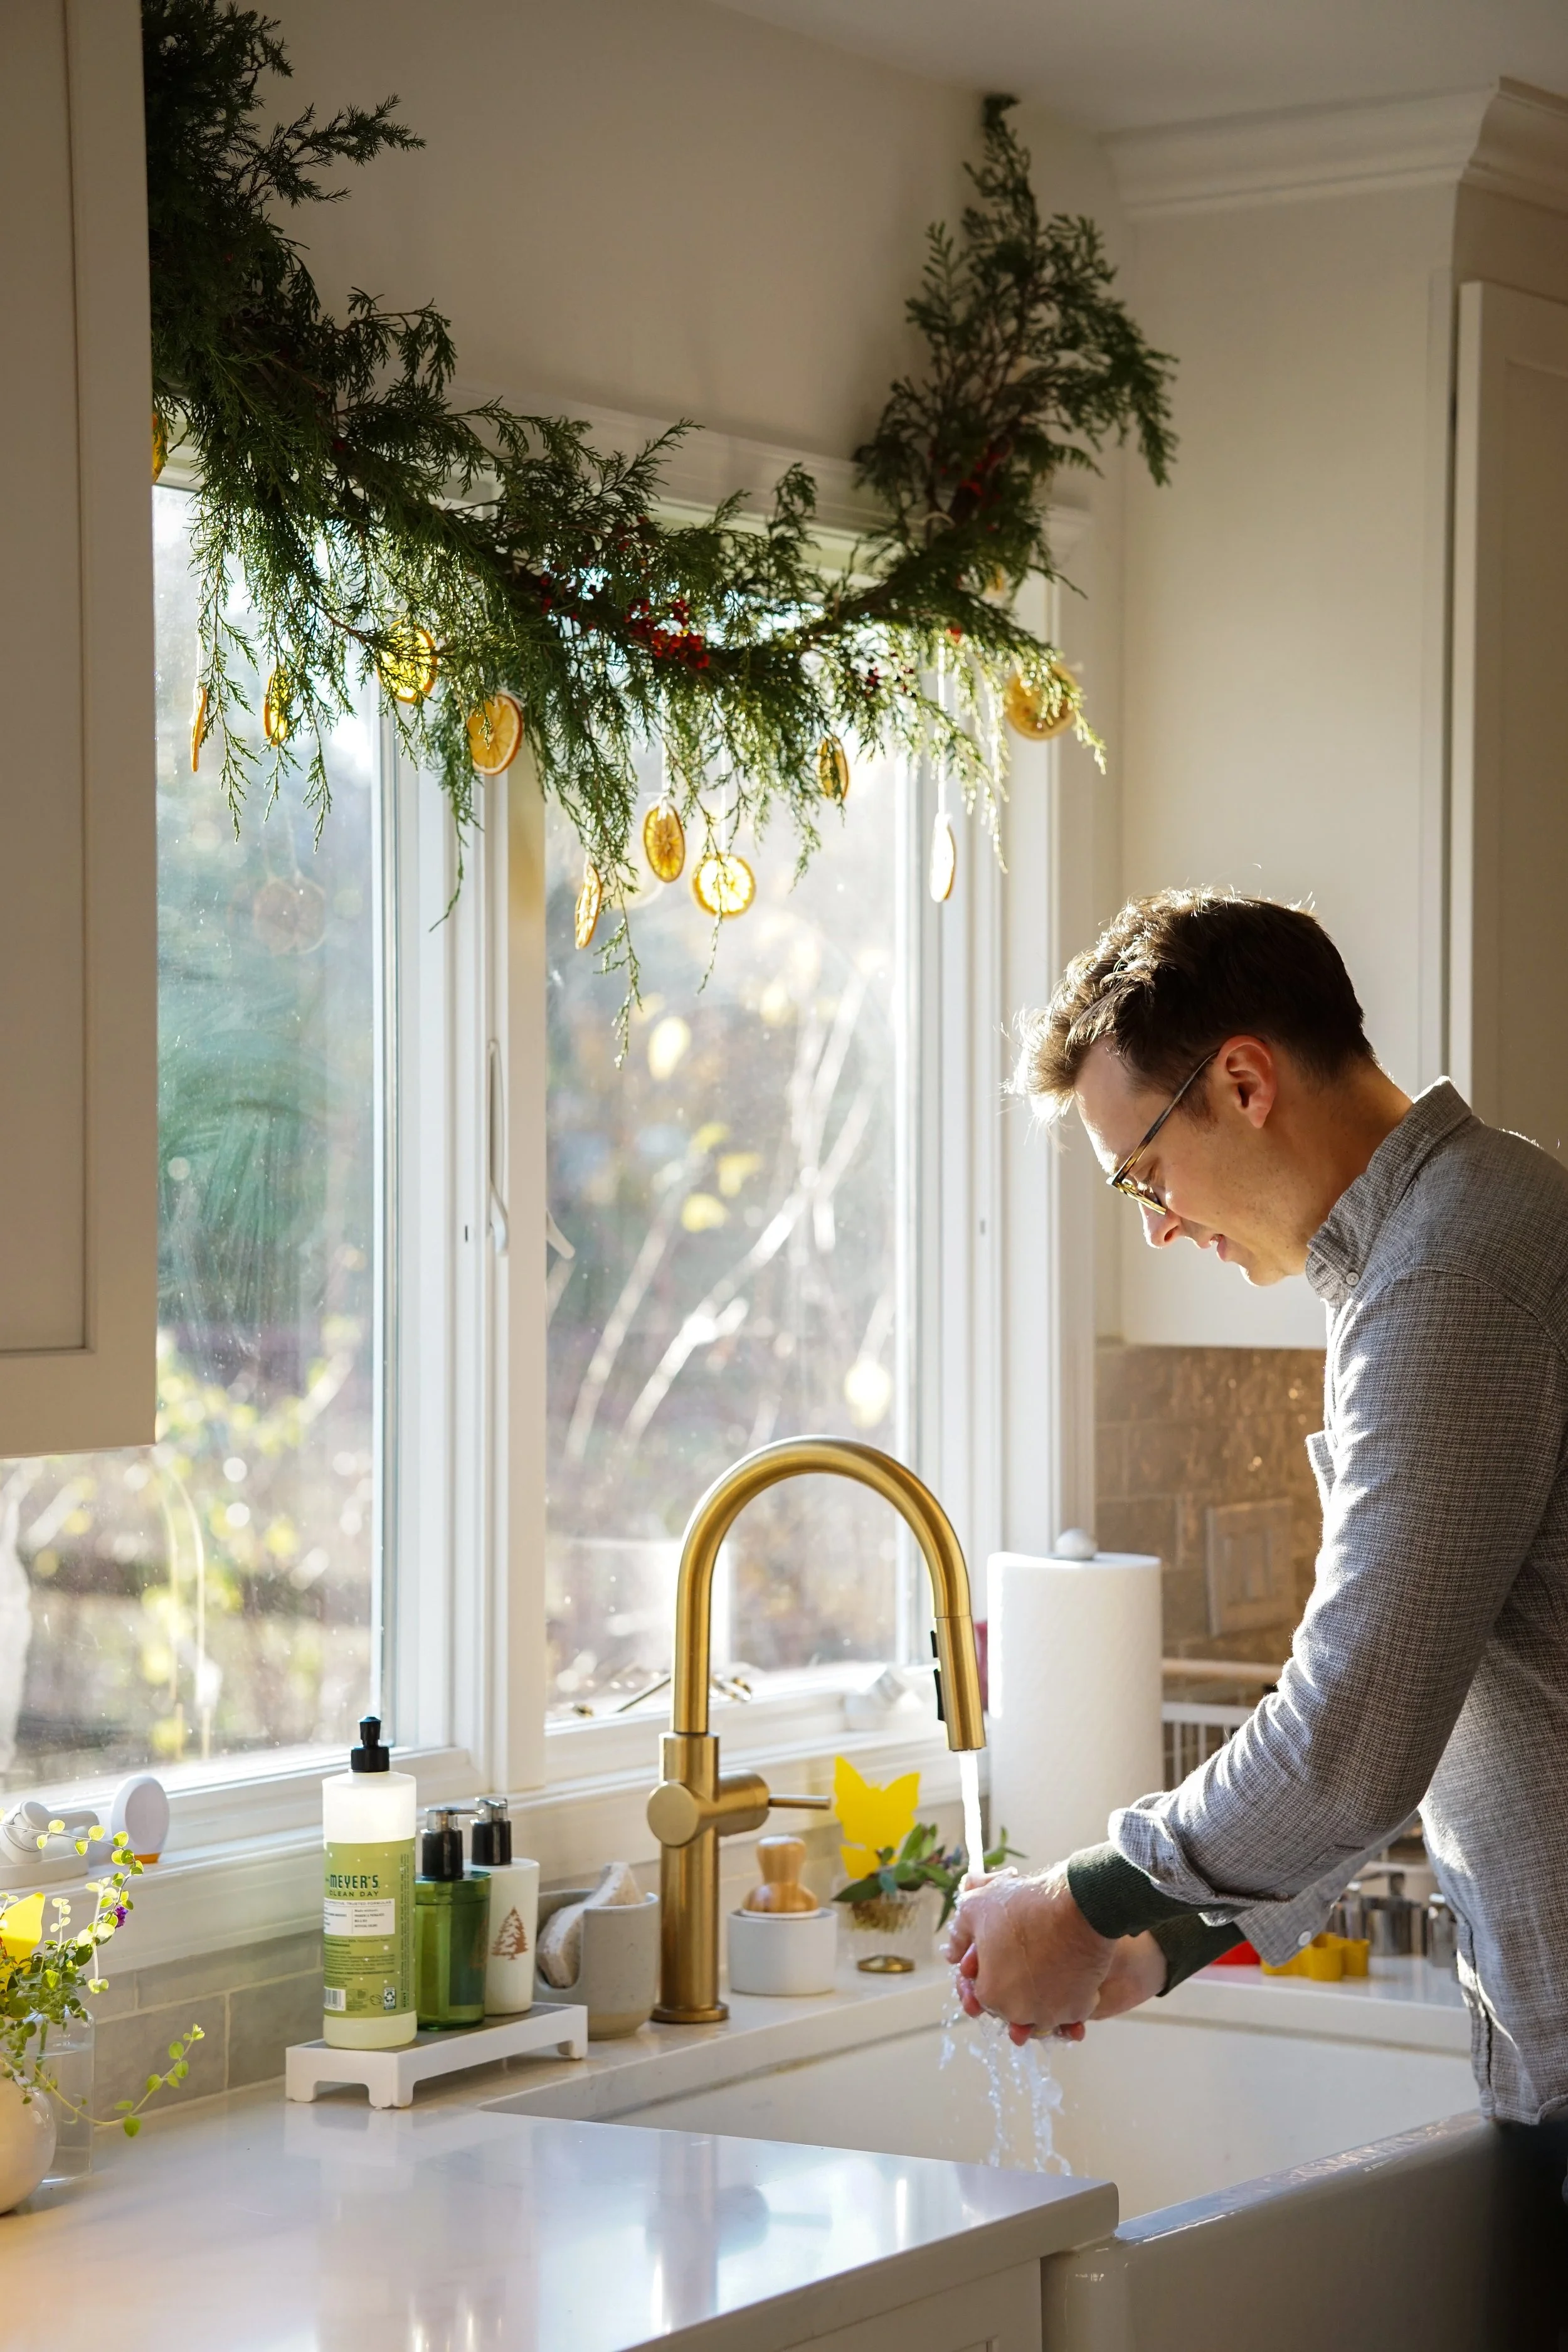
This garland is straightforward, maybe a step above your average (and just as beautiful) garland. Everyone had fun helping to make it, and it truly sparkles in the sunlight that streams through our windows every morning. I think that any variation on this garland—whether simpler or more maximalist—would be beautiful. Here’s how we did ours.
Materials we used:
Long stick (cut down to window size if needed)
Evergreen branches (any kind would be beautiful!)
Twine / string (I used both twine and white kitchen string for this project)
Command hooks (I got white to match our walls and blend in more). You only need this if you don’t already have a curtain rod or other place to secure your garland
Oranges
Optional: berry branches, stems with pinecones, ornaments, battery pack string lights, etc.
Drying your orange slices
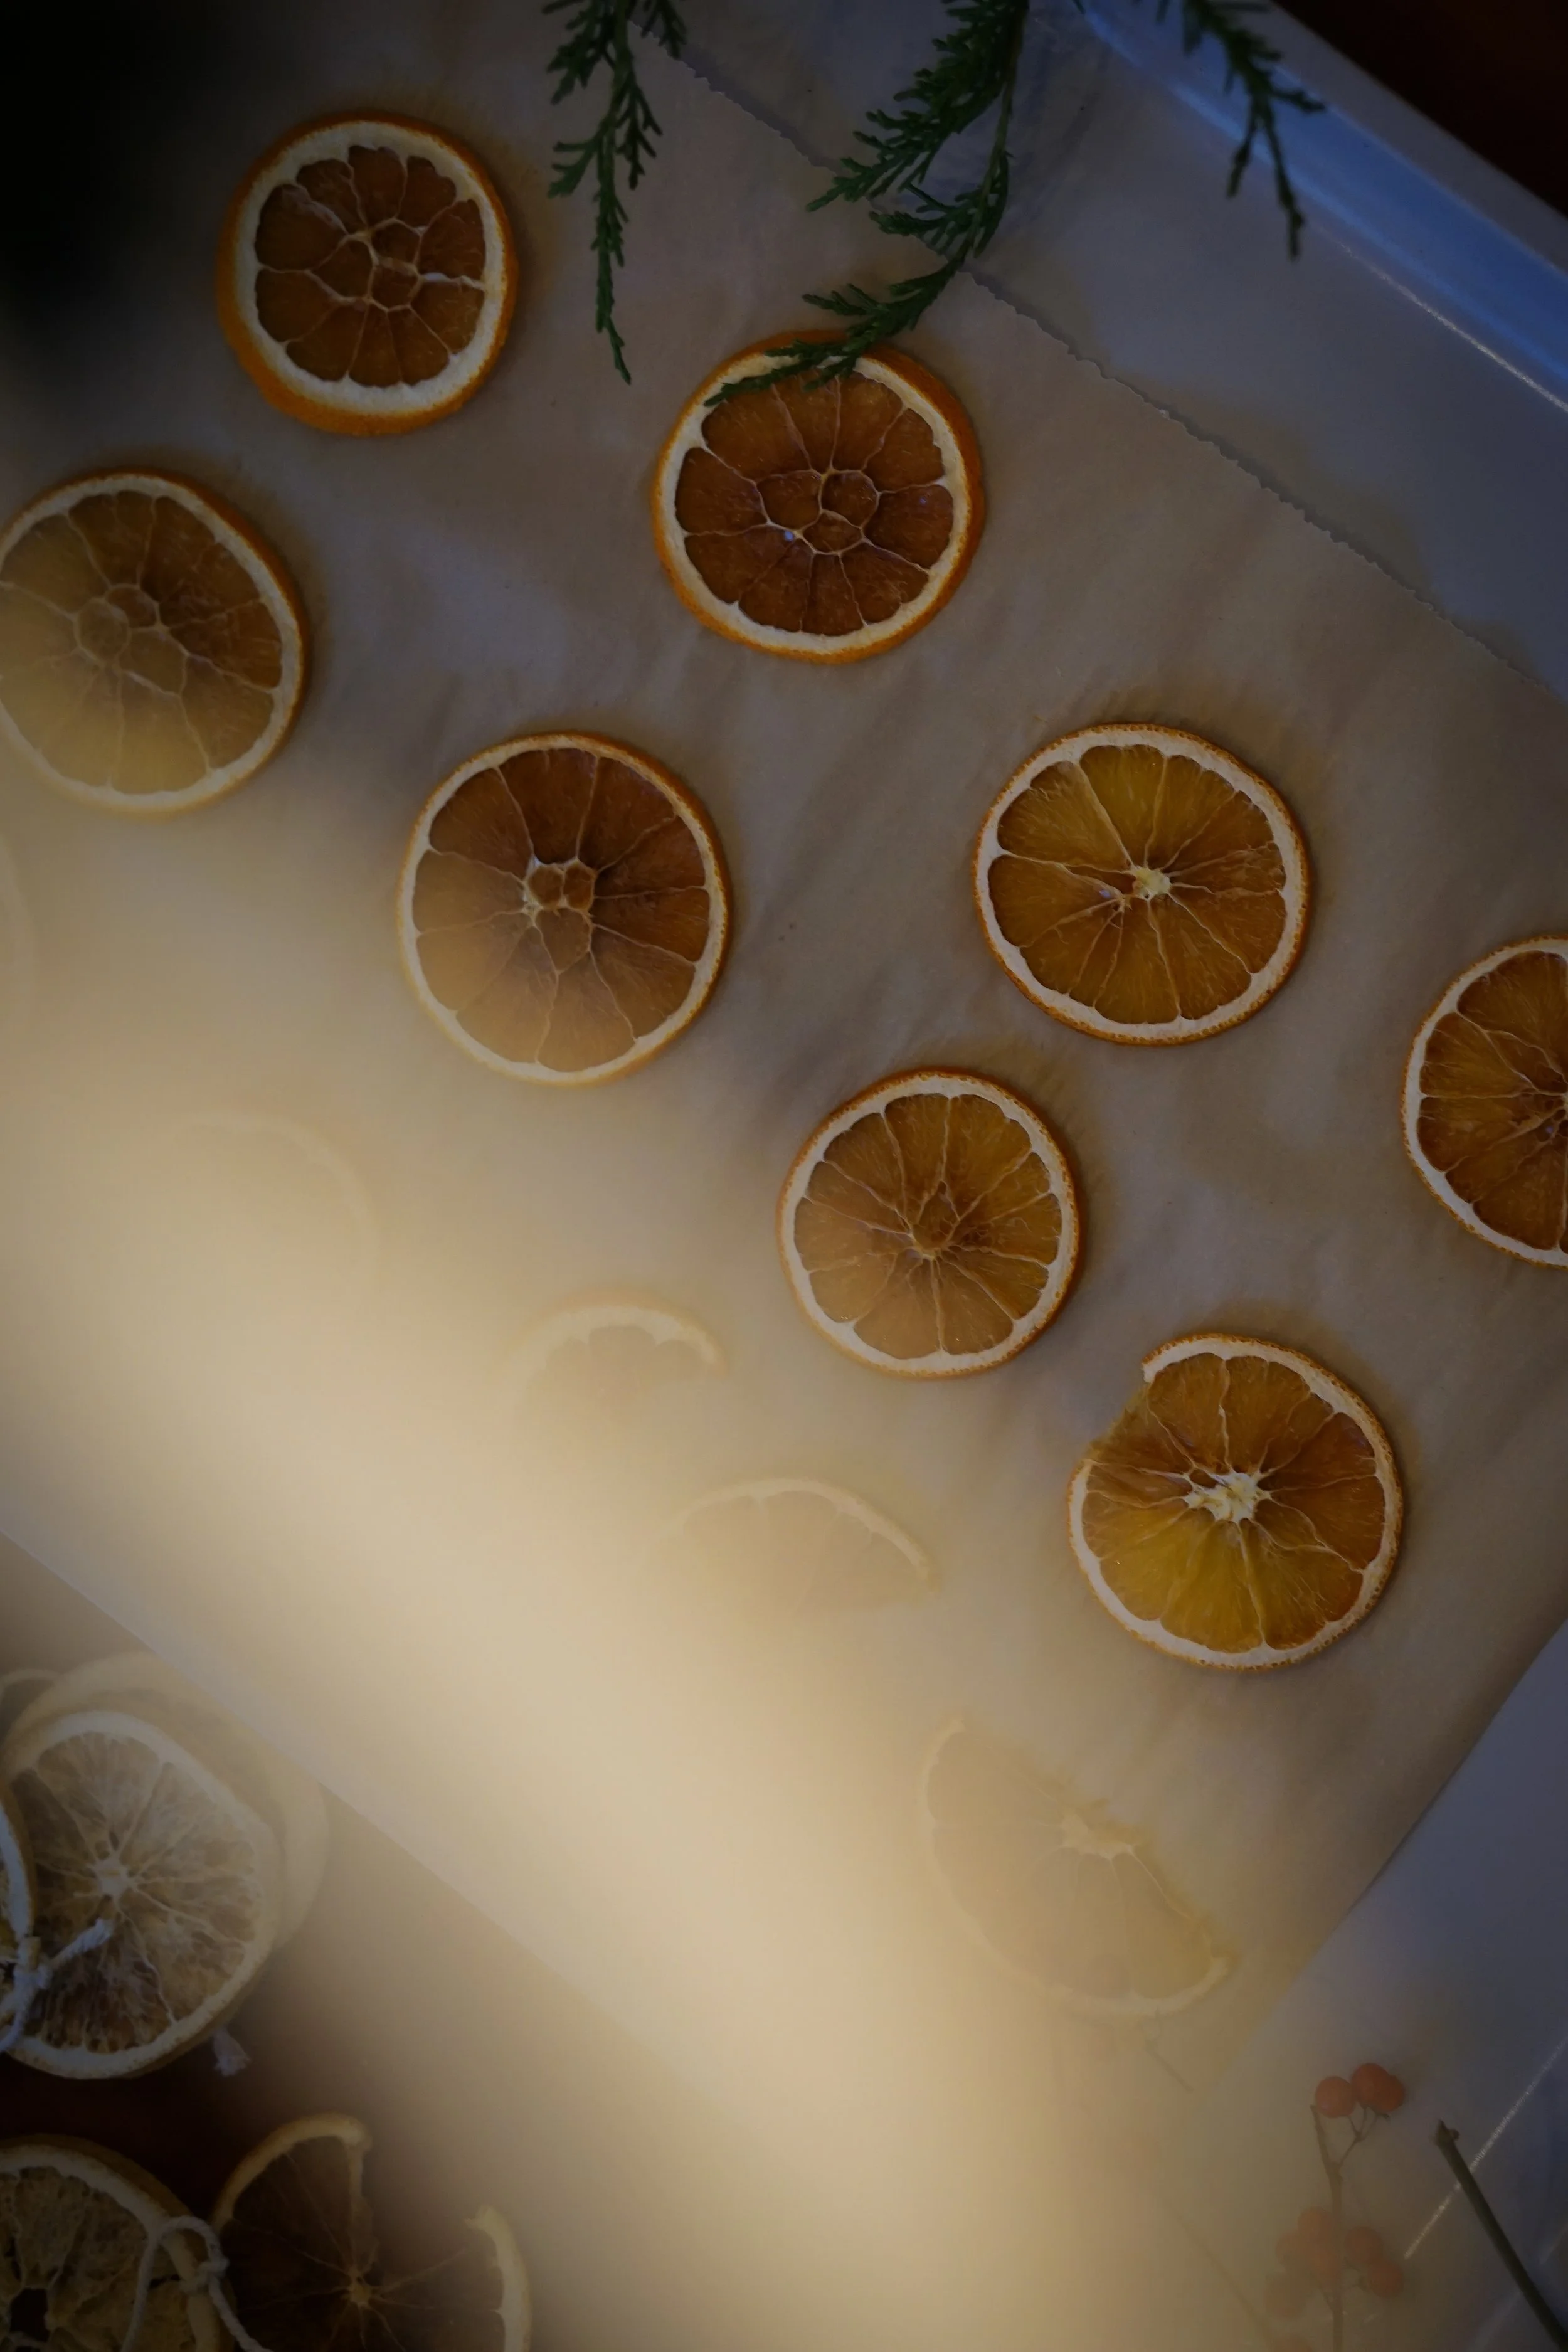
You can do this while your branches are soaking or anytime beforehand! You just need a chunk of at least 4 hours of being home. Pop these in the oven on a weekend morning with nowhere to be, and your house will have a lovely orange smell for the whole day.
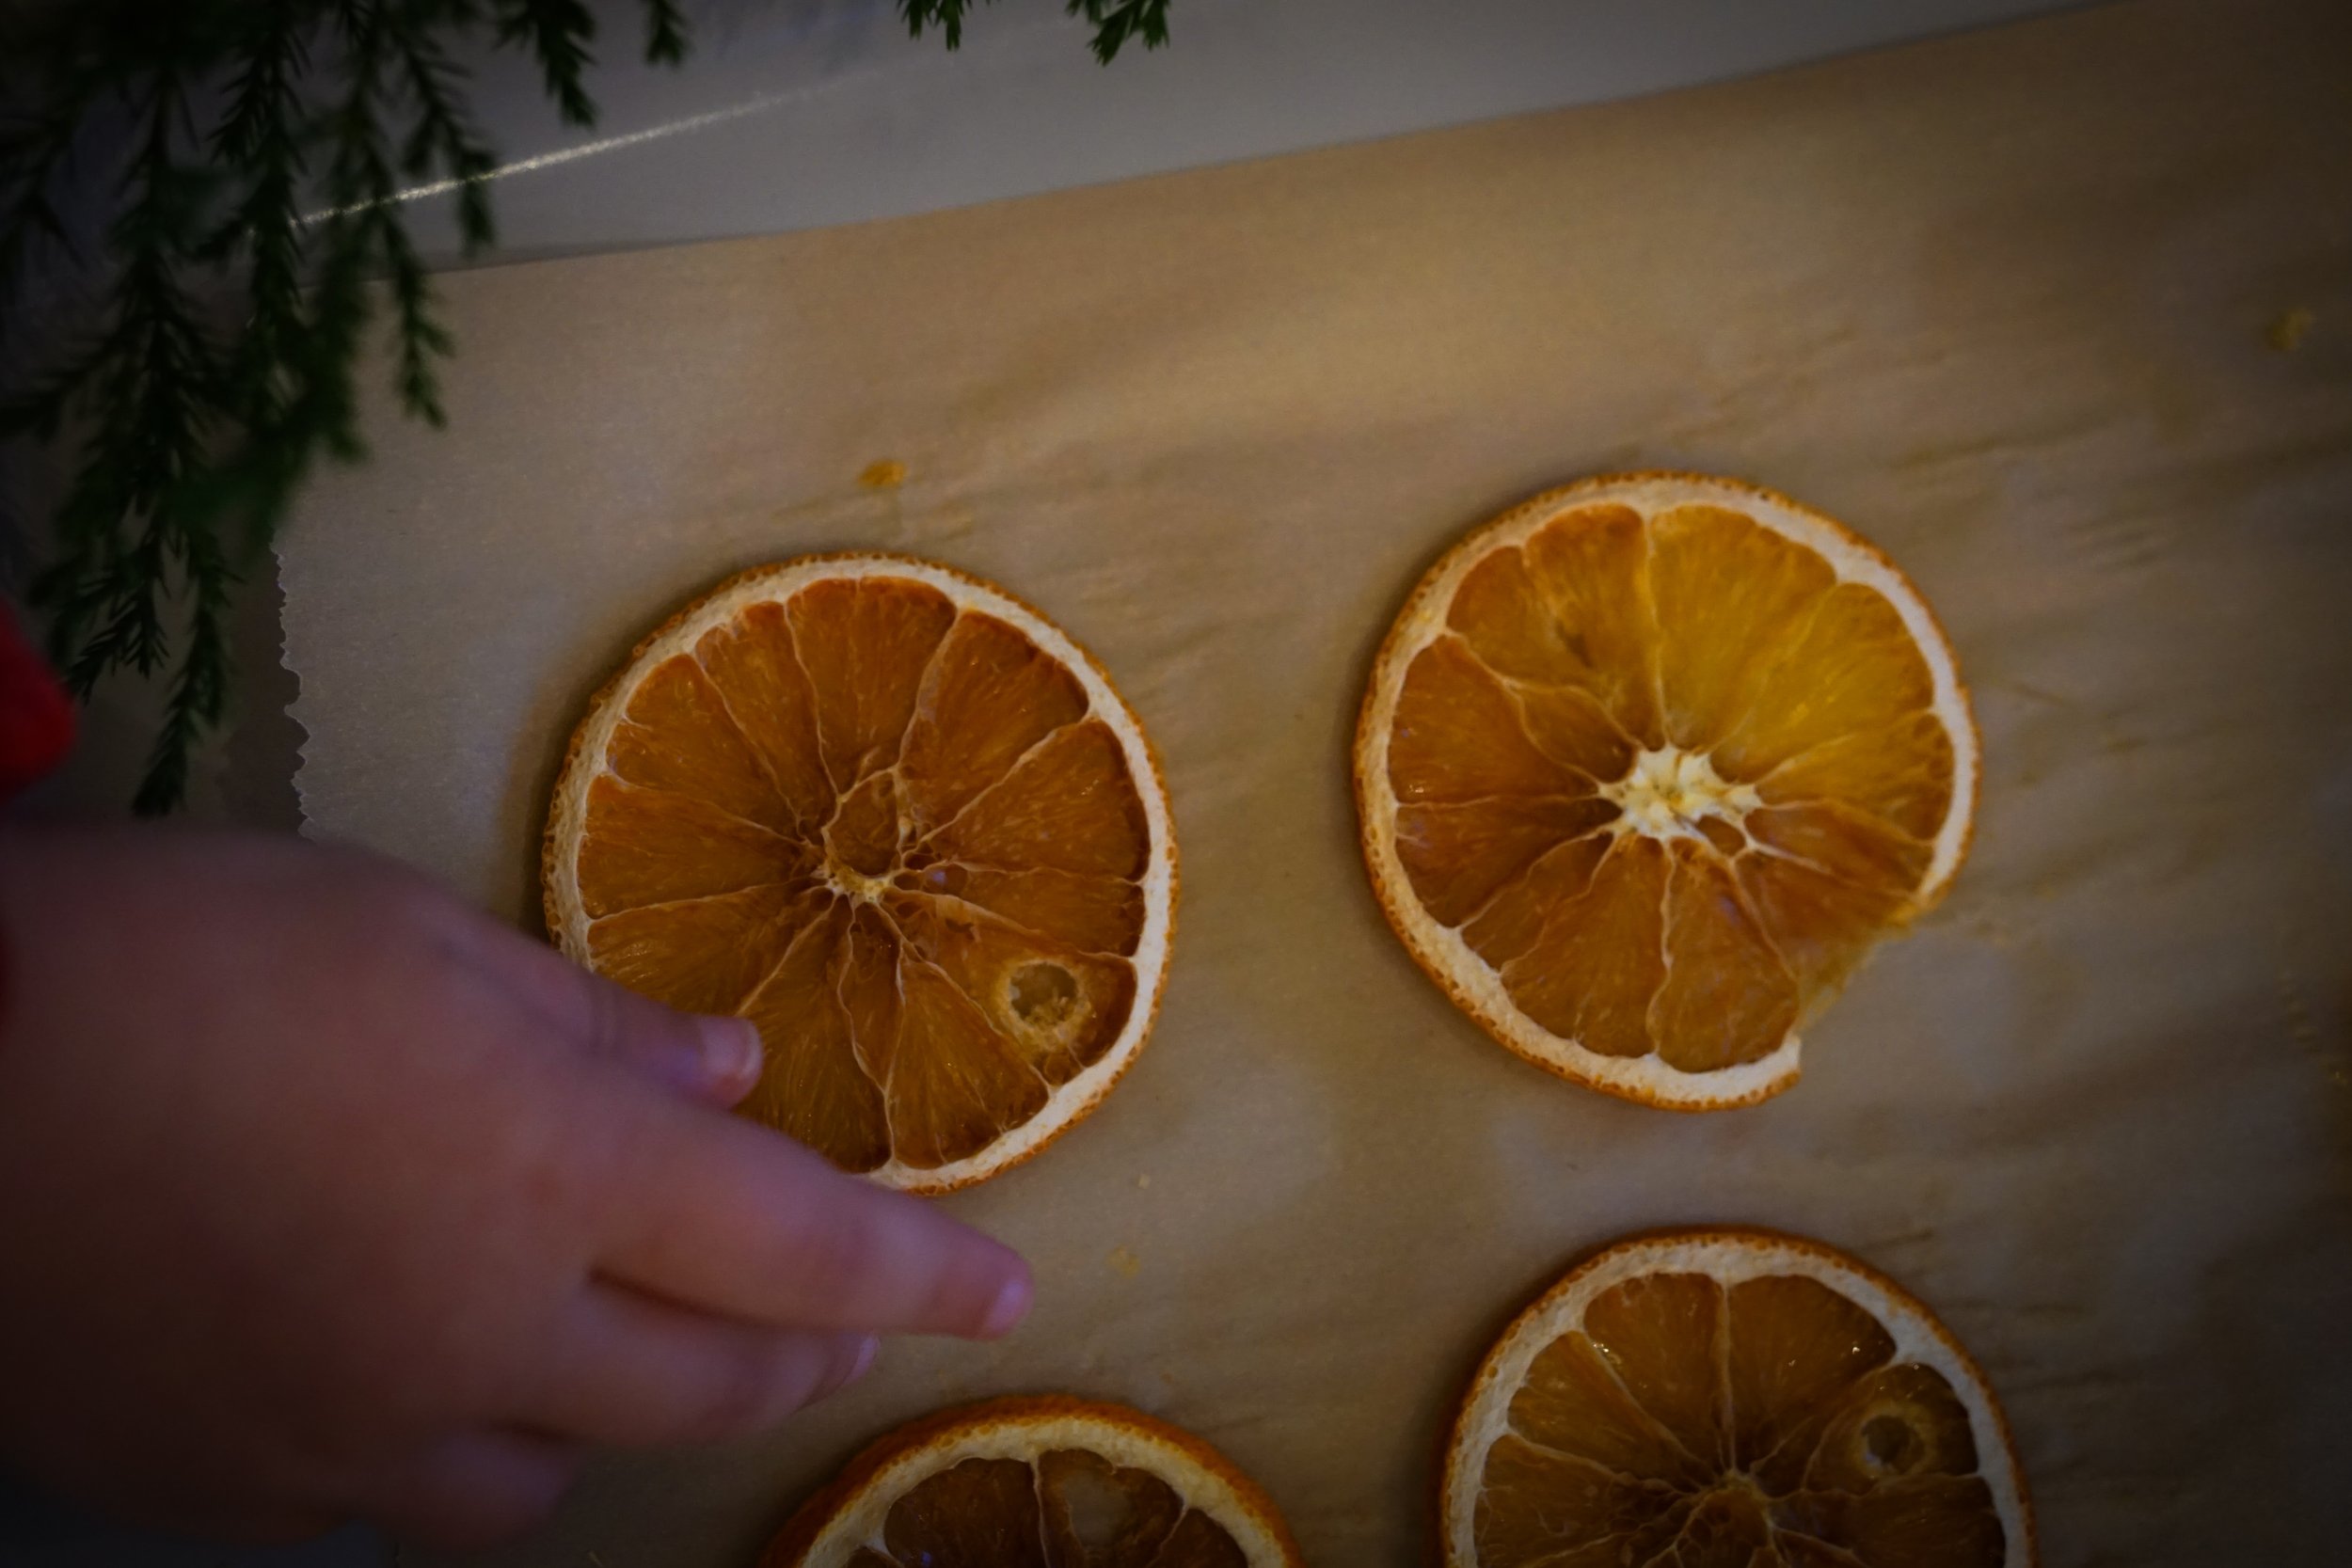
This was our first time drying orange slices, and aside from almost slicing my finger off, it was amazing. My number one piece of advice here to avoid slicing your finger off is to only take a few slices of each orange. Don’t push yourself too far. Give up!! When you think you might be able to get just one more slice off of your orange, don’t do it! This is a slippery task, and you can use the other parts of your orange in a smoothie or as a snack. Don’t risk it!!
To safely dry your oranges:
Preheat your oven to a low temperature, 175 or 180 degrees Fahrenheit. Line enough trays with parchment paper to accommodate the number of oranges you’ll have (2 trays worked for us for 4 oranges).
Thinly and carefully (repeat: carefully) slice your oranges into rounds. If you want to be super safe, even half circles work here.
Pat the orange slices dry with a paper towel to jumpstart the drying process.
Place the orange slices in a single layer on the trays and pop into the oven. Let these bake for at least 4 hours to dry out, longer if the slices were thicker.
Assembling your garland

STEP 1: GATHER MATERIALS
Harvest or purchase your greenery, find a stick and trim it down to size if needed. Note that if you don’t have a stick, tying your greens together and artfully draping is totally fine!
STEP 2: SOAK YOUR GREENERY
The first thing we do if we’ve harvested our own greenery branches is soak them. We’ve done this for a few years and it basically feels like giving the branches one nice, long drink before they’re hung up for the season. I asked my floral designer mother-in-law this year if that’s something that actually helps and she said yes. Yay!
We just toss the greens into a bathtub, fill it up, and let it sit there for a day or so. I also threw some berry branches in the tub. We pull them out and set them on towels to thoroughly dry.
If you’re buying branches, I think many are pre-soaked, but if you’re not sure—you could give them a quick bath!
STEP 3: MAKE SURE THE GARLAND WILL HANG
I placed my command hooks where I thought the draping would look best, and then tied string onto each end of the stick to loop over those hooks. I figured I’d use greenery to cover the hook where possible.
STEP 4: TIE YOUR ORANGES
I cleared our kitchen table and laid a tablecloth down to consolidate any mess. I laid the stick across the table and started to place the oranges. I wanted them to hang in a non-uniform way, so staggered them to have some with longer strings, and some with shorter strings.
My 4 year old was a huge help here. She loved poking a hole through the oranges with a pen and then looping string that I pre-cut through them. We worked together to do this for all of the oranges and tie them onto the stick.


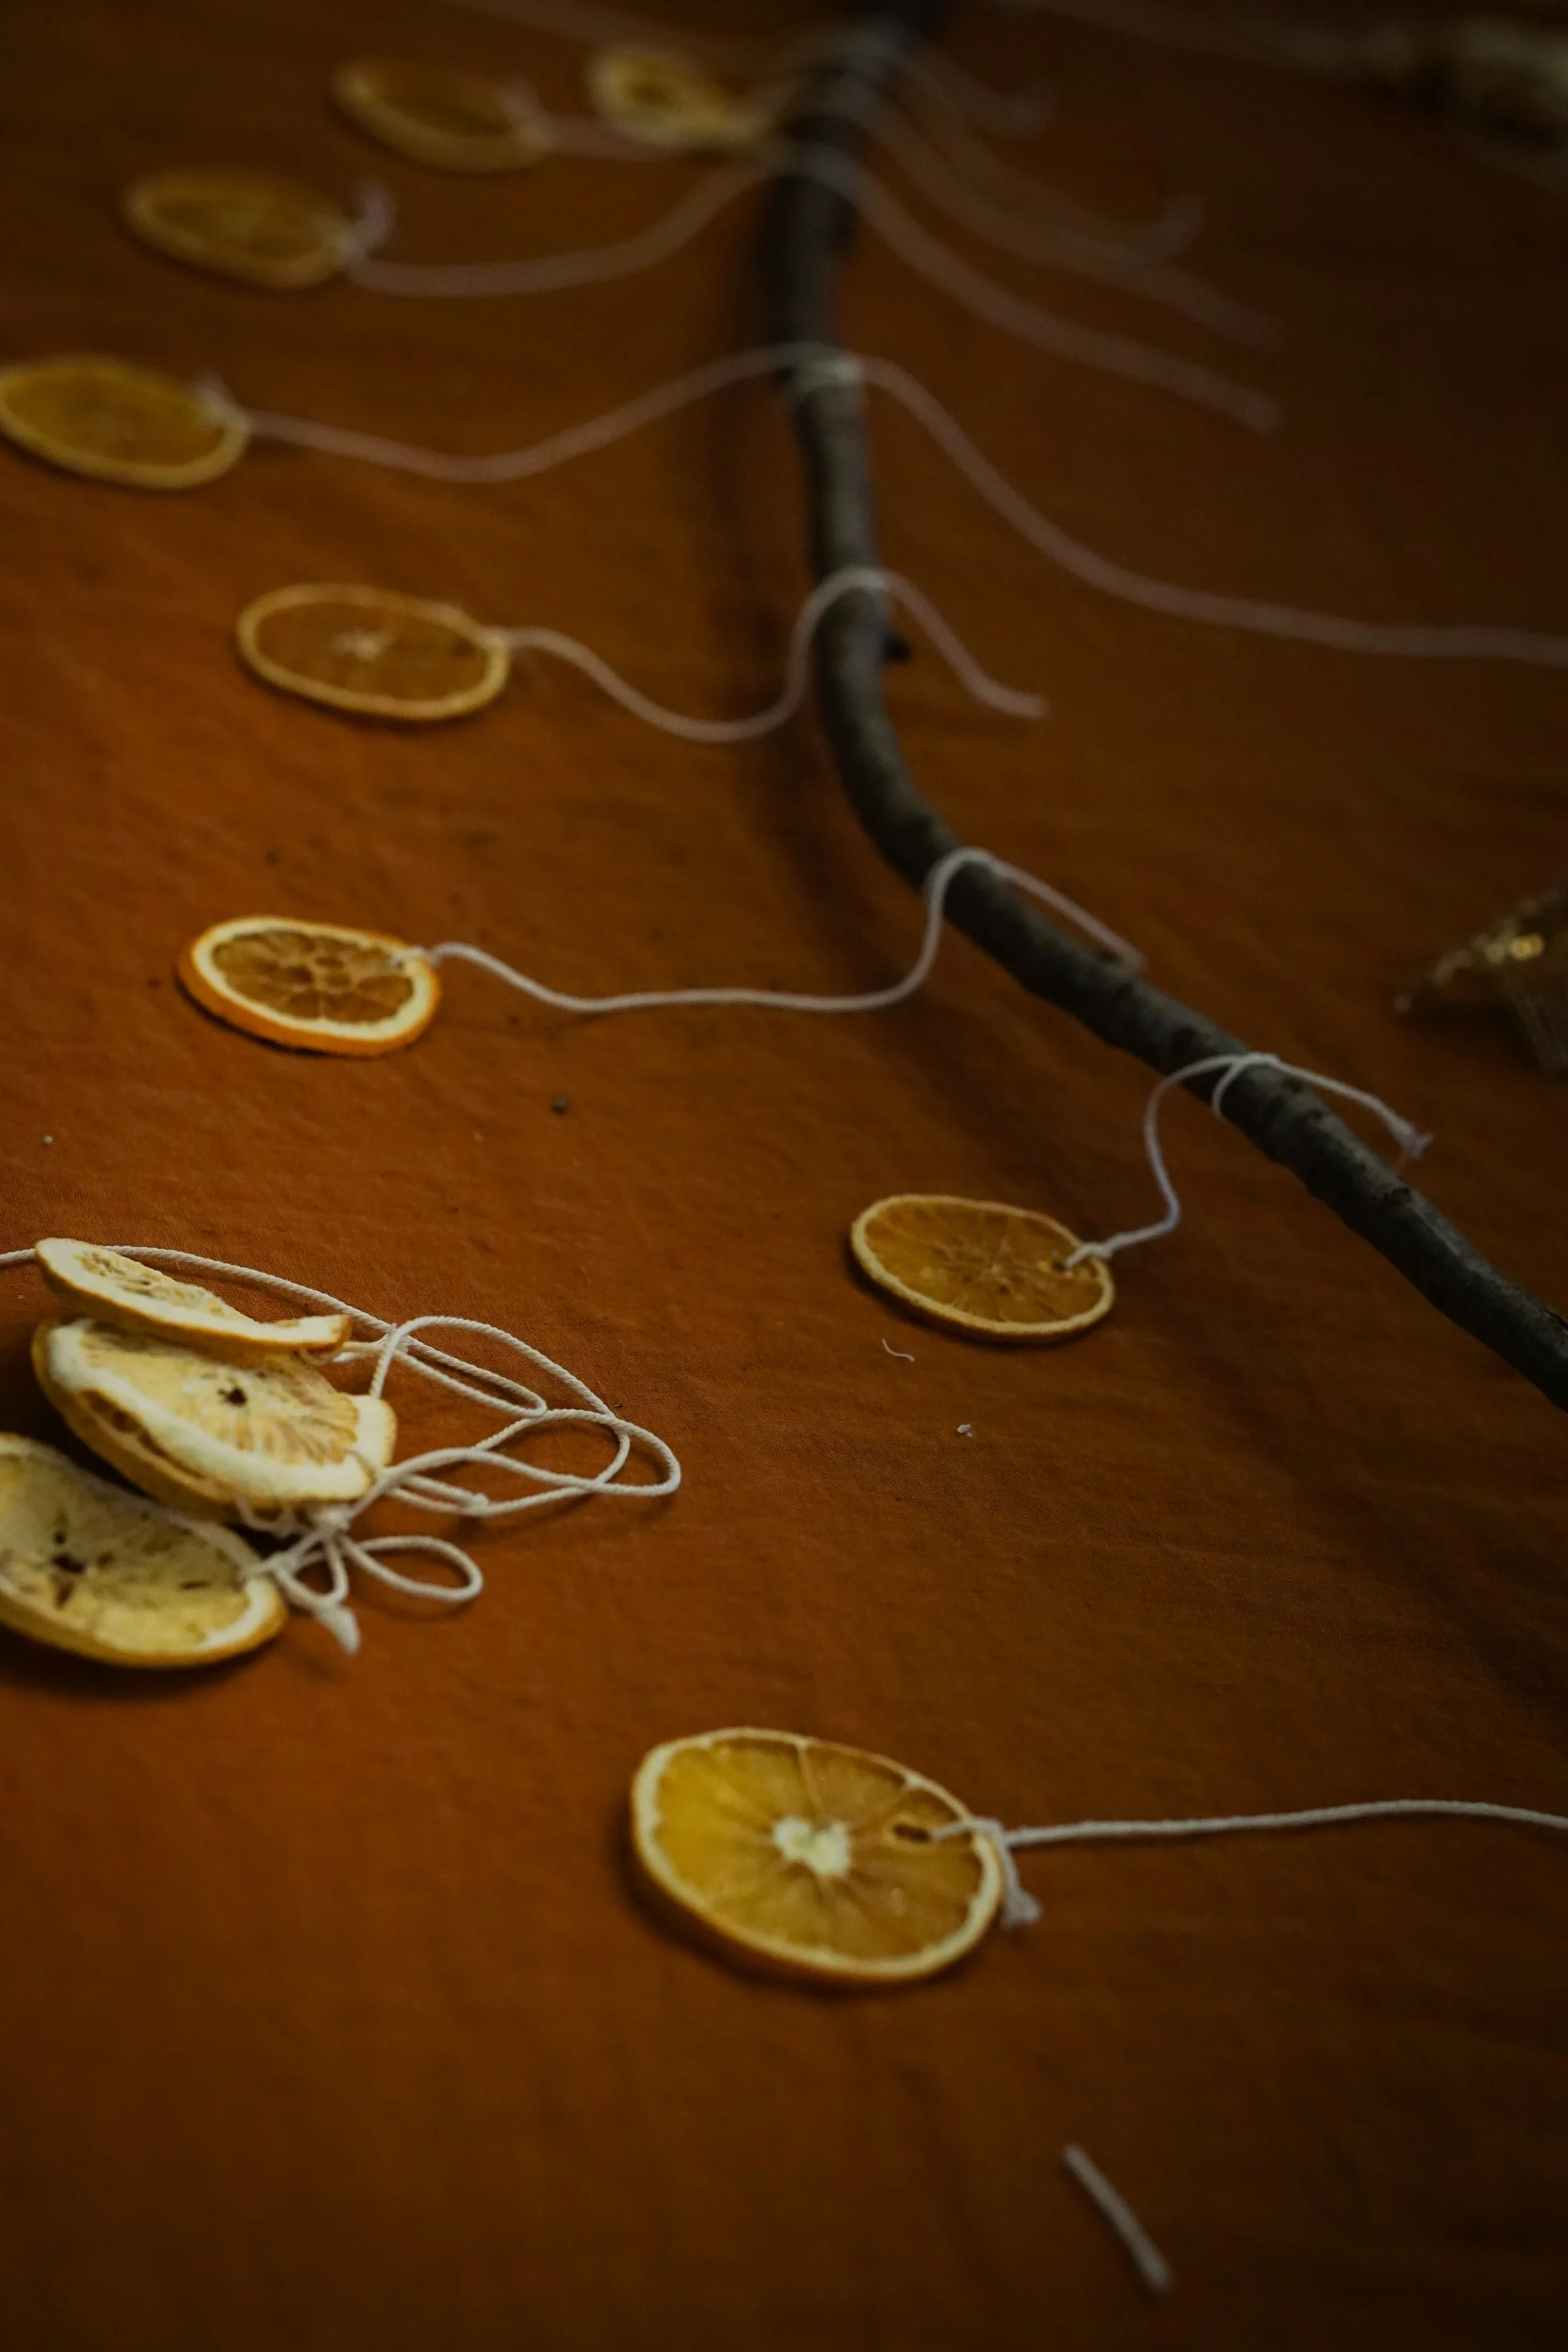
Note: make sure you string the oranges at least long enough to fall into the window! The light coming through the window and oranges is where the magic happens.
STEP 5: POSITION YOUR GREENERY
Next, figure out the direction you want your greenery to travel. Place the greenery across the stick, overlapping each other to create one long garland effect.
Once you have your garland placed, tie the branches together and to the stick using twine. I tried to do a little string every 6 inches or so, or wherever I had overlapping branches, so that the greenery would hold in place.
STEP 6: ADD ANY ACCESSORIES
I slid some of the berry branches into place at this point. If you have other decorative items — pinecones, ornaments, etc. - this is a great time to place them.
I added battery pack string lights to our garland later on, and have some glittering gold ornaments I might add, but adding some of these before the garland goes up (and trying to strategically cover the battery pack with greens) could be a good idea! I like the idea of it with and without lights - our lights have gone up and down a few times.
STEP 7: HANG YOUR GARLAND
Hang your garland using the string you looped onto your stick. Step back and admire! We put the garland together at night so it was fun to wake up the next morning and get the full effect of the sunlight streaming through.
My mother-in-law sent a document that recommends spraying your greens with water to keep them fresh. Writing this post is a great reminder for me to do that this evening!

Though we have a decorating strategy, we never decorate exactly the same—and I love finding new ways to decorate, especially using more natural materials. We loved doing the oranges this year and just today bought a huge bag of oranges to dry more to hang in more windows.
However you decorate your home and celebrate the holidays, I hope you find your own kind of magic.
xo,
Shannon
